German Motorbikes Zvezda and Italeri 1/72 Scale

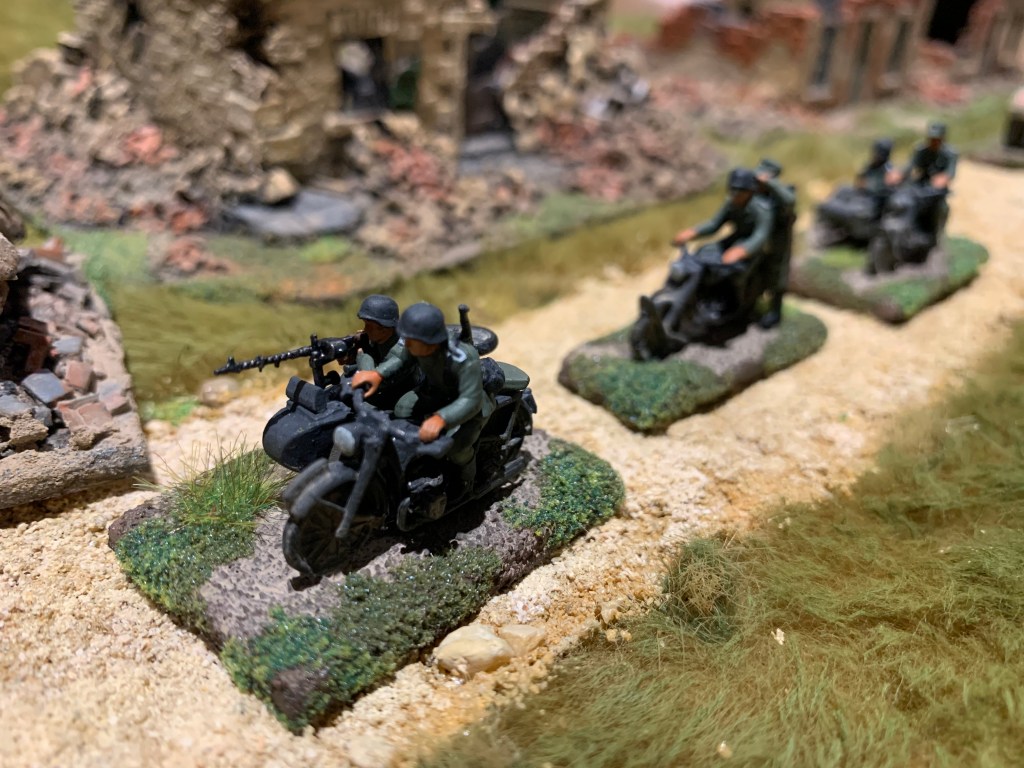
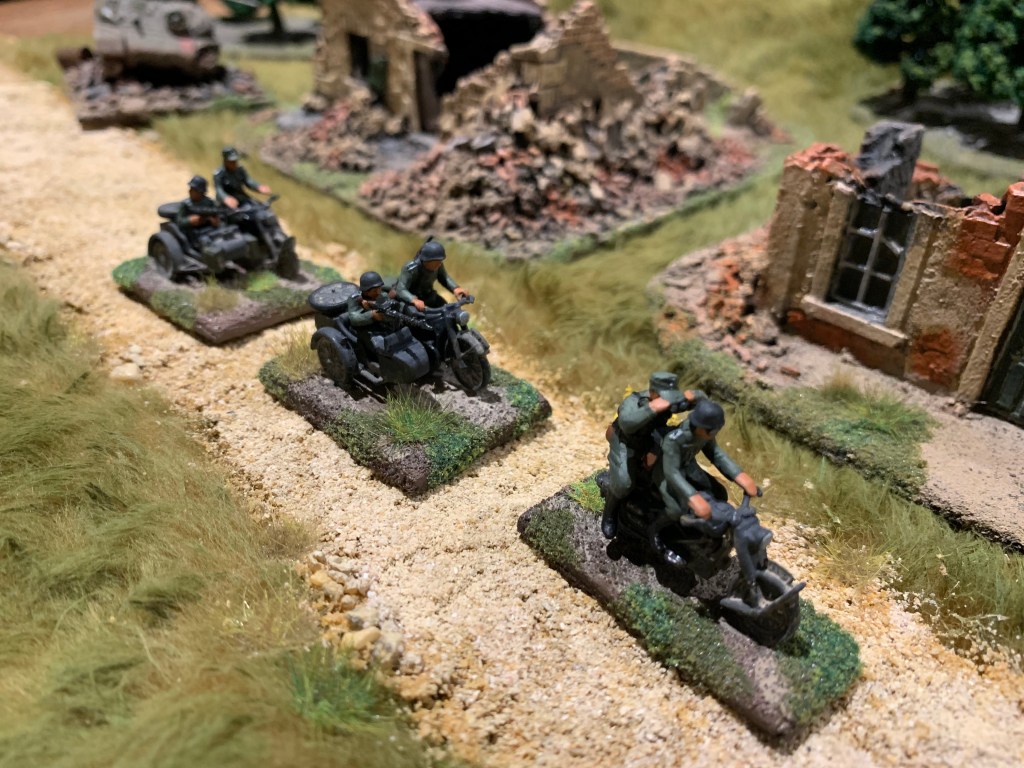
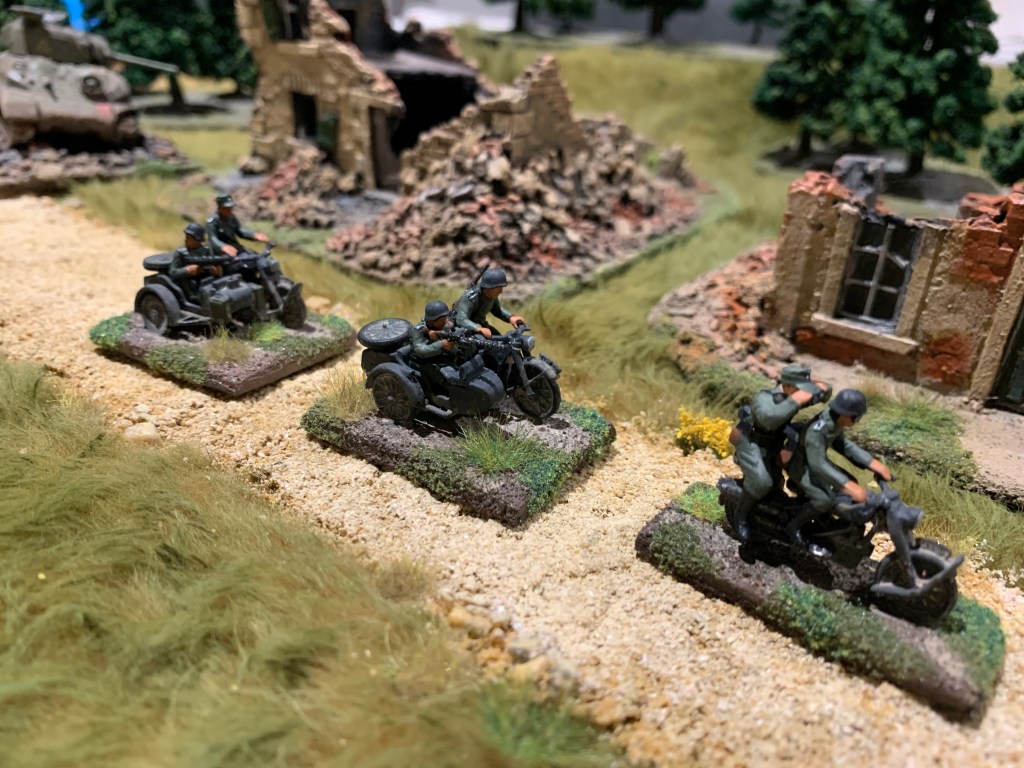
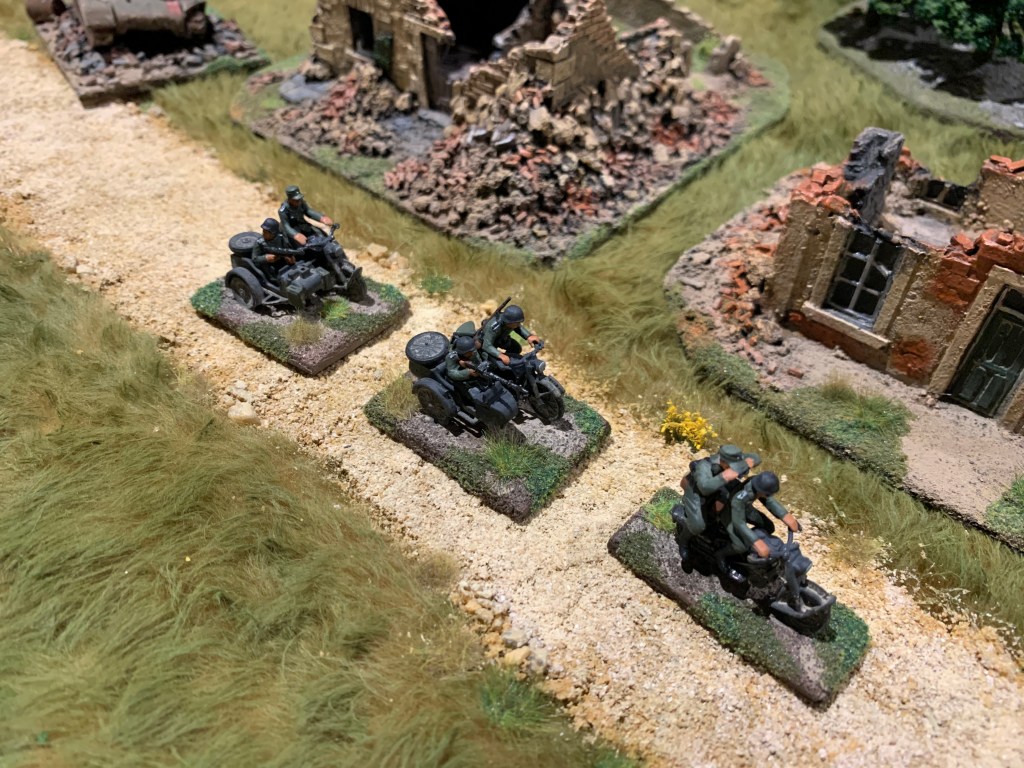
It is always good to have some super speedy reconnaissance vehicles with machine guns. Like having sharks with laser beams attached to their heads. Also good. Zvezda produce a great little motorbike and sidecar for a few dollars. The kit is very simple and only a few parts, will go together in minutes. Just remember to keep the riders separate for painting as it is too tricky to paint them once they are glued in position. This does mean that you have to leave the front part of the sidecar off so you can fit the passenger in once he is painted. This was the only piece that was tricky to do and i had to do some surgery to get the last piece to fit in. I also dumped the plastic base it came with and made my own from MDF as usual. Great kit and great value. I might buy some more!

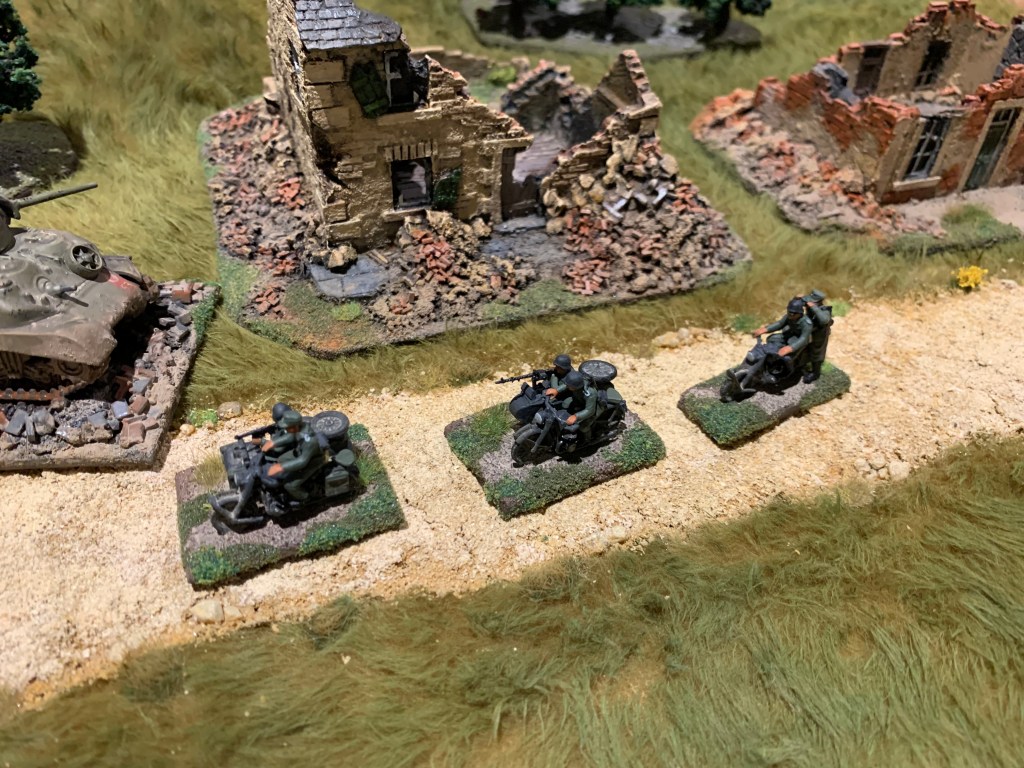
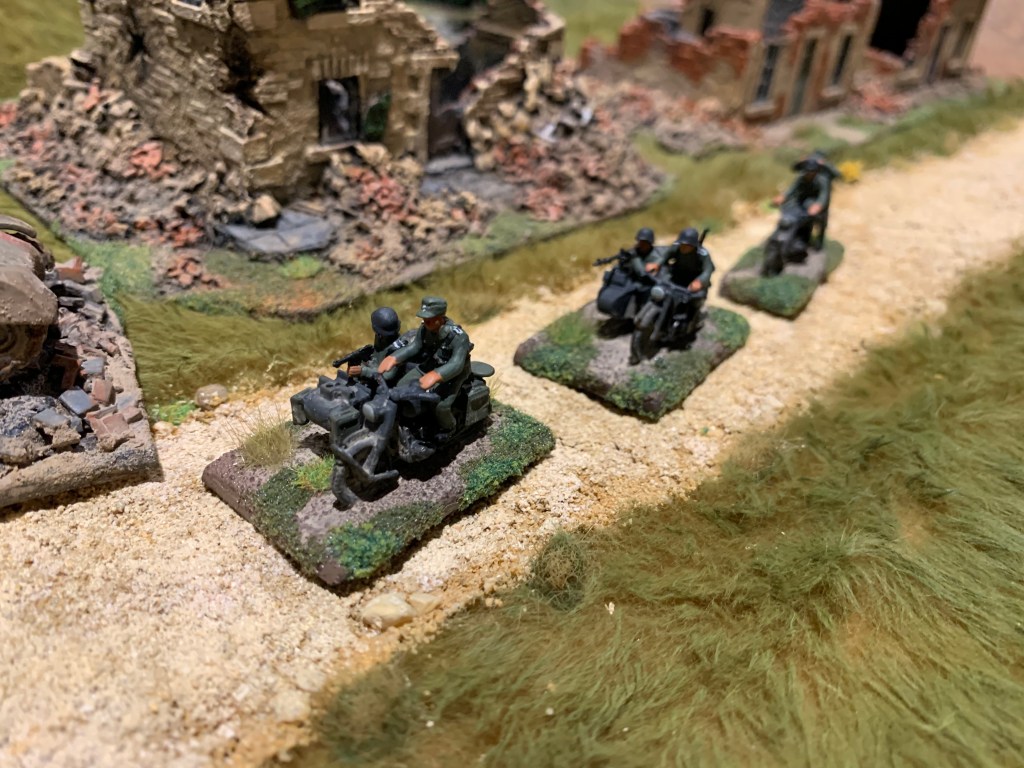
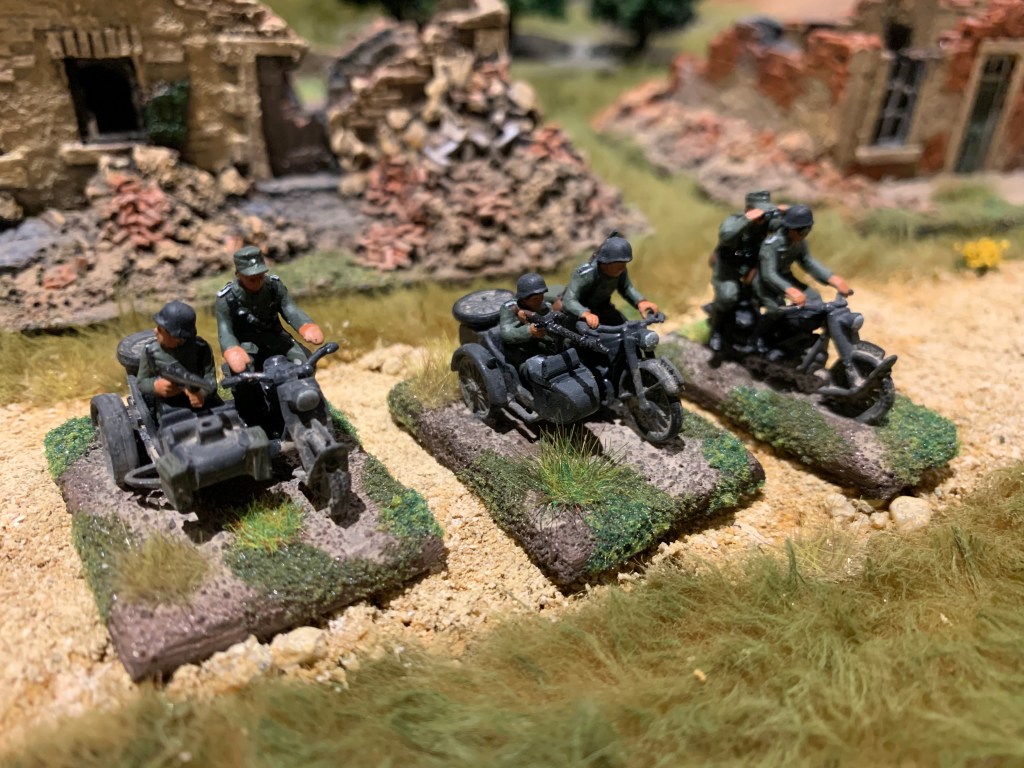
The Italeri kit comes in a larger pack with two single bikes and two motorbikes with sidecars. You get extra figures to make different options, with helmets or caps, and an LMG or SMG in the sidecar. So that’s nice you can vary how you build your bikes. Kits are again very simple and take minutes to put together. The only thing is i had to use super glue as the plastic rejected all my usual plastic cement. I also tossed the supplied bases away and made my own. Each passenger and rider has a bum toggle that i removed so positioning was easier. That way you are not trying to shove the toggle into the hole in the seat. Just glue the dudes on. Again another good kit and nice to have options. Great value as you get four bikes in each box.

I painted them all German grey and the figures field grey. Added some dust, but kept the process simple. I actually have the other two bikes from the Italeri kit I finished a few years back, and I may have to redo them in the same way.

Fujimi Opel Blitz Ambulance Truck 1/72 Scale

Another German softskin vehicle to add to my growing armada. I was going to make this just as a regular truck but then seeing the cool red cross decals that come with it I decided to make the ambulance version.

This is the first kit from Fujimi I have ever made and it was a good experience. Easy to build and plenty of detail. The only issues I had were with the back body of the truck sitting at a very wonky angle on the chassis. It needed some surgery and fiddling around to get it close to horizontal. So OK not so easy to build. Maybe i stuffed up which is highly likely but the tilty angle was way off.

Like I mentioned the red cross decals were excellent but I did need to use plenty of decal softener to get the back ones to sink into the truck panelling. The only other thing I did change was the windshield which is a really thick piece of plastic. So I changed it to a thin piece of plastic.

Lots of dusty dirt on this guy and here is next to the Opel Blitz with Flak Gun both ready for some grassy bits and tufts.

Sherman Firefly 1/72 Scale

As soon as i had seen that this new Airfix version of the Firefly had been released i was all over it. Well i did check its relative size to my other armour and it works out to be matching size to Armourfast PSC and Unimodel Fireflies that i have. You never know with Airfix 1/72 or 1/76 and exactly what you are getting.

its a great little kit. The tracks are a nice one piece moulding that you place onto the running gear just like their Cromwell. Its a great design and much easier than all that link and length mullarkey. They also provide complete running gear and tracks in one piece which you can alternatively use. They have gone in my spares box to be used no doubt to replace some dodgy vinyl bollocks i am bound to find.

Other great touches are the lift rings that you glue up into the hull on larger fittings through a hole. Great design again rather than chasing tiny lift rings around in the carpet.

My additions were just some stowage and an aerial. Nice decals provided too. Building Airfix kits is always nostalgic but it was a nice surprise to find a new one on the market. Instant nostalgia!!! Here is my new Firefly hunting through some ruins you have seen before.

Esci Opel Blitz with AA Flak Gun

Another great vintage kit I found on eBay for a few pennies. Nicely worn cardboard smelt twenty years old, and the decals had long since passed into browny, crispy bits. As i have found with some of these older kits they really stand up even being twenty years old or more. This one was good fun to build and quite straight forward.

i made some adjustments mainly adding my own clear plastic windshield and also a driver who you cannot see anyway. I did manage to make a pigs ear of attaching the bonnet and had to cover my error with an extra shovel. Looks OK for a cover up. I decided the crew were setting up ready for action so i only dropped one side of the back. The decals came from my pile of spares. The crew are the excellent AB figures who i gave field grey jackets and pea dot camo pants. I did have to remove the back seat of the flak gun as the seated AB dude had his seat welded to his backside. I added a box or two, a panzerfaust and an SMG for some extra protection.

It’s my first bit of anti aircraft equipment for the Germans, but not the last as i have a heap of MACO kits i am saving up for a rainy day!

Wrecked Tanks Terrain

I wanted to create some wrecked vehicle markers, both as nice looking scenery and bits of cover, as well as potentially actual wrecked tanks to replace vehicles destroyed during proceedings. I thought that having a few actual wrecked models would add to the variety rather than the usual plumes of cotton wool smoke.

These two are a Plastic Soldier Soldier Company Sherman and an Armourfast Jagdpanther. Neither model I was particularly impressed with. The Sherman was very big and chunky and I found many better offerings from Trumpeter, Esci, Dragon etc. Same for the Jagdpanther who was since replaced with much finer model kits from Zvezda and Trumpeter again. SO i got to it ripping off bits, hatches, tracks and punching holes in the hulls with pins and drills. I placed them on bases at funny angles which helps with the drunken wrecked look. I added lots of homemade rubble and stuff and other bits and pieces of debris. Always good to have an old oil drum kicking around. I used a heavy brown wash followed by lots of dust and dirt powders and some charcoal to show the burnt out bits. They look good just as extra scenery cover near some blown out buildings. I am looking forward to Christmas and hope to get some more work finished so I can post more pictures!

AB Figures British Infantry and new grass mat

I am so close to finishing up my British Infantry battalion it is not funny. The trouble is i keep finding more awesome figures to buy and paint. This platoon from my favourite AB figures was no exception. I think they are meant for the Far East by the equipment and the presence of a Thompson sub machine gun, but I have painted them up to join my Northumbrian Light Infantry in Normandy. Nothing much to add, they took me ages to paint as usual.

I was asked about the new grassy mat I have photographed them on. This was made using a faux fur blanket I found at Spotlight (an Australian craft store). The material is available at this link – i have no idea if the same stuff is available in other countries:

https://www.spotlightstores.com/sold-by-the-metre/plush-fashion-fur-150-cm-fabric/BP80506687

The trick is that this particular fabric has a fur length exactly the height of grass at 1/72 scale so you do not have to cut it or shave it or mess with it at all. You could easily shave roads and paths into it if you like, but i tend to place all my terrain on top, or hills can be anything placed underneath. Other fur fabrics are a pain as they are generally quite long and need a lot of cutting to get them to look like anything else except fake fur…..

Painting is simple. I just laid my 3m x 150cm fabric out on the lawn and sprayed it lightly with a lime green and bright yellow cheap spray like the below. $3.50 per can, and i probably used 2 green and one yellow. You could throw in some brown or beige or cream depending on the effect you want.

https://www.megasavers.com.au/australian-export-lime-green-250g-spray-paint

The trick is to take it slowly and spray lightly and repeatedly so you retain the texture of the fabric and do not get it swamped or claggy. When you are happy with the colour mix leave it to dry. If you get spray paint on the lawn dont worry it will go away next time you mow.

Zvezda Panther Ausf. D in 1/72 Scale

Boxart Pz.Kpfw. V Panther - Ausf.D 5010 Zvezda

I still needed a couple more panthers to get up to three troops of three tanks, so I picked up a Zvezda Panther on eBay. I have made one of these before and also a few of the Panzer IVs and also a Tiger so I know what I am in for. These kits are advertised as snap together which really only means some of it is snap together, but if you are like me you are going to be gluing it all together anyway. Zvezda kits are generally really good. The detail is excellent and parts go together very nicely. Also they are great value for money, especially if you buy them from Eastern Europe where they are made. I don’t think this cost me much more than $10–12AUD.

My only criticisms would be as follows. The hatches are all moulded shut, so if you like placing extra figures in the tank, like I do, you cannot, unless you are brave and feel like doing some surgery.

Due to the snap fit design some bits are tricky to get together, like the rear of the top hull fitting into the bottom. I had to cut off a couple of small lugs that were just bending rather than fitting. Also there was a gap at the front where the hulls meet and i had to do some filling and sanding with my magic putty.

The track design is great, you wrap around the flexible tracks and then fit them onto pegs in between the wheels. This can also get tricky as its a tight fit, and you need to be very careful not to apply too much force and break any of the sprocket wheels. I made this mistake before on the Tiger so I was extra cautious this time.

My paint job was a patchy camouflage scheme and some dark washes, plus plenty of dirt and dust to finish him off. I added an aerial and half destroyed the side skirts for some interest. I used some excellent decals from the Revell panther i finished next which gave more options than this kit.

Dragon Models Sd.Kfz.70 6 x 4 Personnel Carrier in 1/72 scale

Another great kit from Dragon Models. It is a Krupp six wheeled heavy car towing a Pak 36 anti tank gun. I really like Dragon Models, they make the best kits. Great detail, clear instructions, and everything fits together nicely. I particularly like building trucks and vehicles right now, and luckily my time period of World War Two is full of interesting transports.

I always base my wheeled vehicles, and this one also has some fiddly bits that definitely need a base you can pick the model up with, rather than risking big hand damage. I painted this one an early war German grey and then lightened it with a second coat with some white added. My only gripe was that the anti tank gun is really fiddly and I nearly threw my toys with the teeny tiny bits. Driving the truck is a man from AB Figures and in the back are some greatcoat wearing seated dudes from Caesar Miniatures. I bought a box of these guys who are really cheap and handy for the back of any your trucks. It made a nice change to do a grey vehicle rather than my usual dunkelb and camo.

Italeri Sd.Kfz. 234/2 Puma in 1/72 Scale

Another personal favourite of mine the Puma armoured car. This one is from Italeri and a great little kit. I have previously built the Hasagewa version of the Puma, which is also a very nice kit. The Italeri one is not quite as detailed and slightly bigger in all dimensions, but matches up pretty well. Unfortunately the hatches on the Italeri kit are moulded shut so you would need to do some surgery in order to open them up. I did not change much just added the usual aerial. I particularly liked how easy it was to align the eight wheels on this model, its a good design. Overall it was a fun kit to build, but I still prefer the Hasagewa version.

I did a dunkelb base and a dark green camo. Some chips with a sponge in dark brown and black. Oh and a dirty brown wash. Here is the finished model next to my other Puma for comparison.

Special Armour Sd.Kfz 11 LEICHTER ZUGKRAFTWAGEN HALFTRACK 1/72 Scale

See the source image

So another German half track rolls off my painting (dining) table. This time from Special Armour, which is a company I have never built before. It’s a nice little half track mainly used for towing guns I think. Another eBay purchase that I found quite cheaply. The kit was quite a challenge with various small PE parts that raised my frustration levels a fair bit. I lost at least one door handle in the process. The worst thing though was the front engine and drivers compartment did not fit properly on to the chassis. So the front section was too high and there was a gap between the chassis and the engine, and the front suspension looks a bit high. I am not sure if it was my building that went wrong but I could not see how it was meant to be any different as the whole back section was correct and in line. Anyway I wont be buying one of these again. Luckily you cannot really see the problem.

I used the usual dunkelb dark yellow and did a fair amount of chipping with my sponge and added plenty of dirt and dust. The squad in the back and the driver and officer are all from AB figures. I tried out a new M44 camo scheme using an awesome set of paints I bought. Also threw in an old fuel barrel that I rusted up.