Superquick Railway Hotel in 1/72 scale

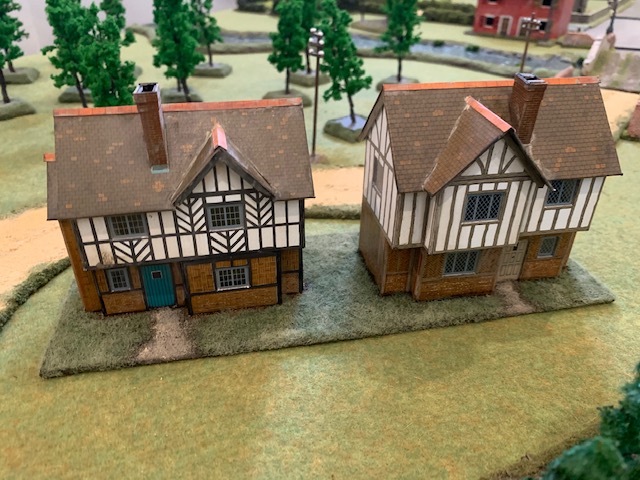
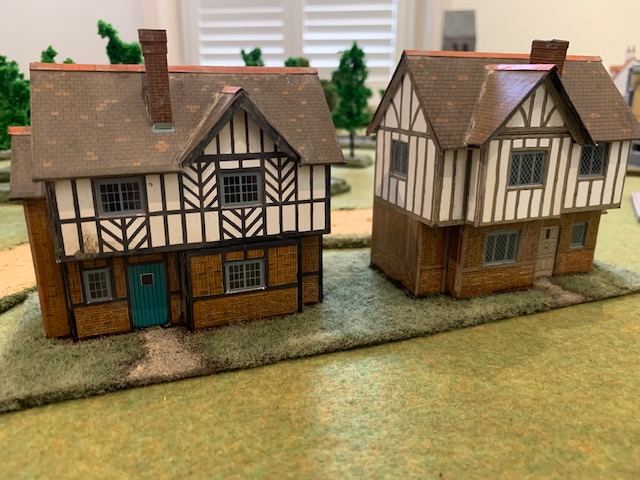
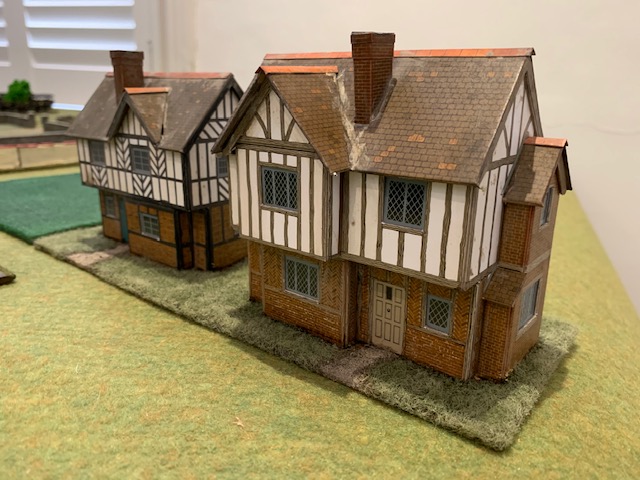
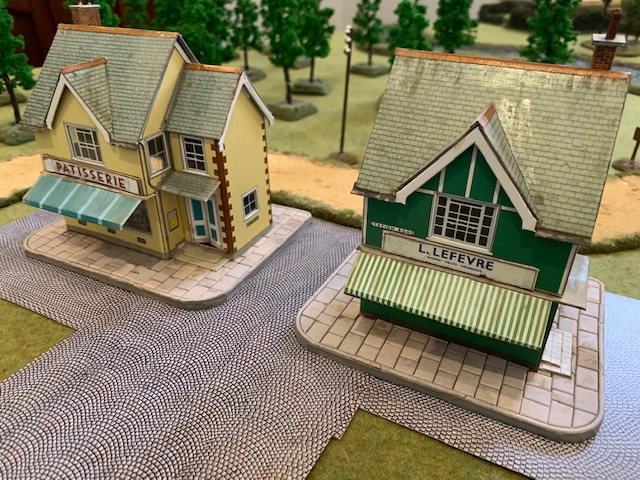
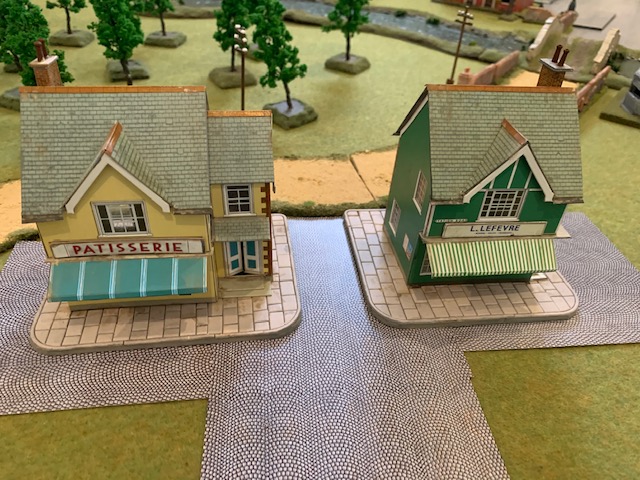
I had a change of direction this week and built one of the Superquick card models i had lounging around. It makes a nice change to build something not out of plastic and also a switch to some scenery. These kits maybe old but their design really stands the test of time. I guess they are older than me and pre 1970 even!

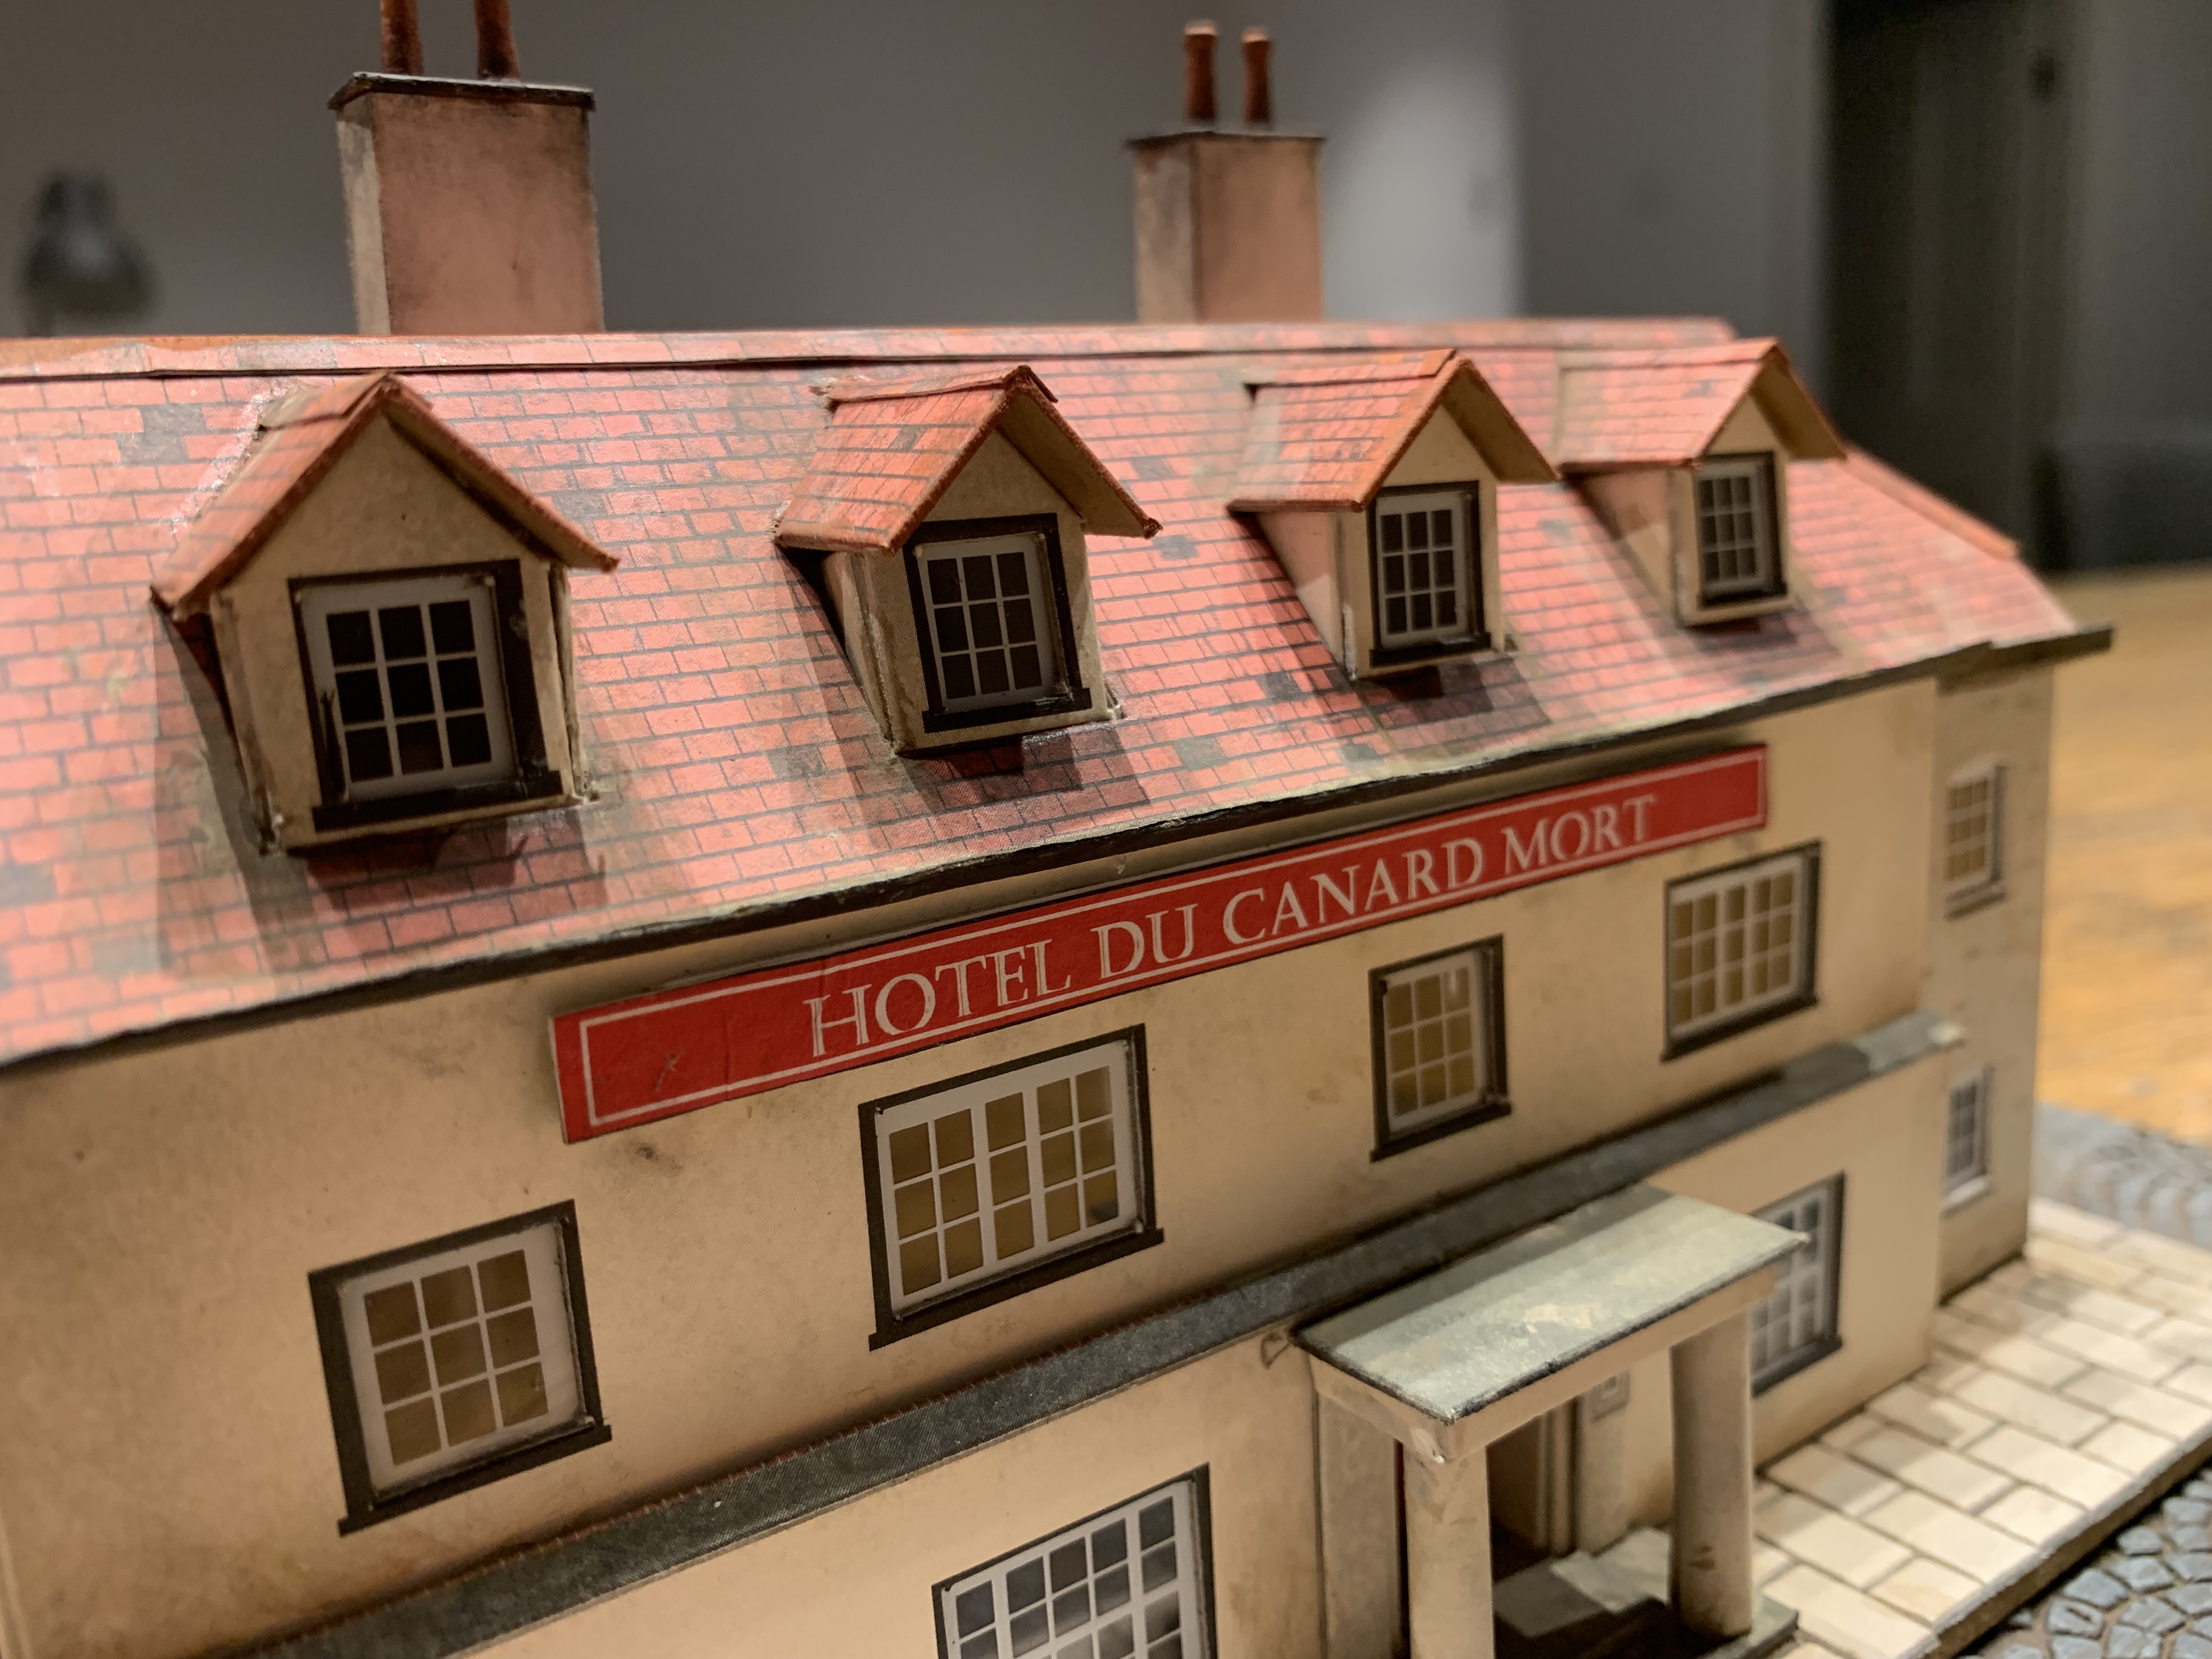
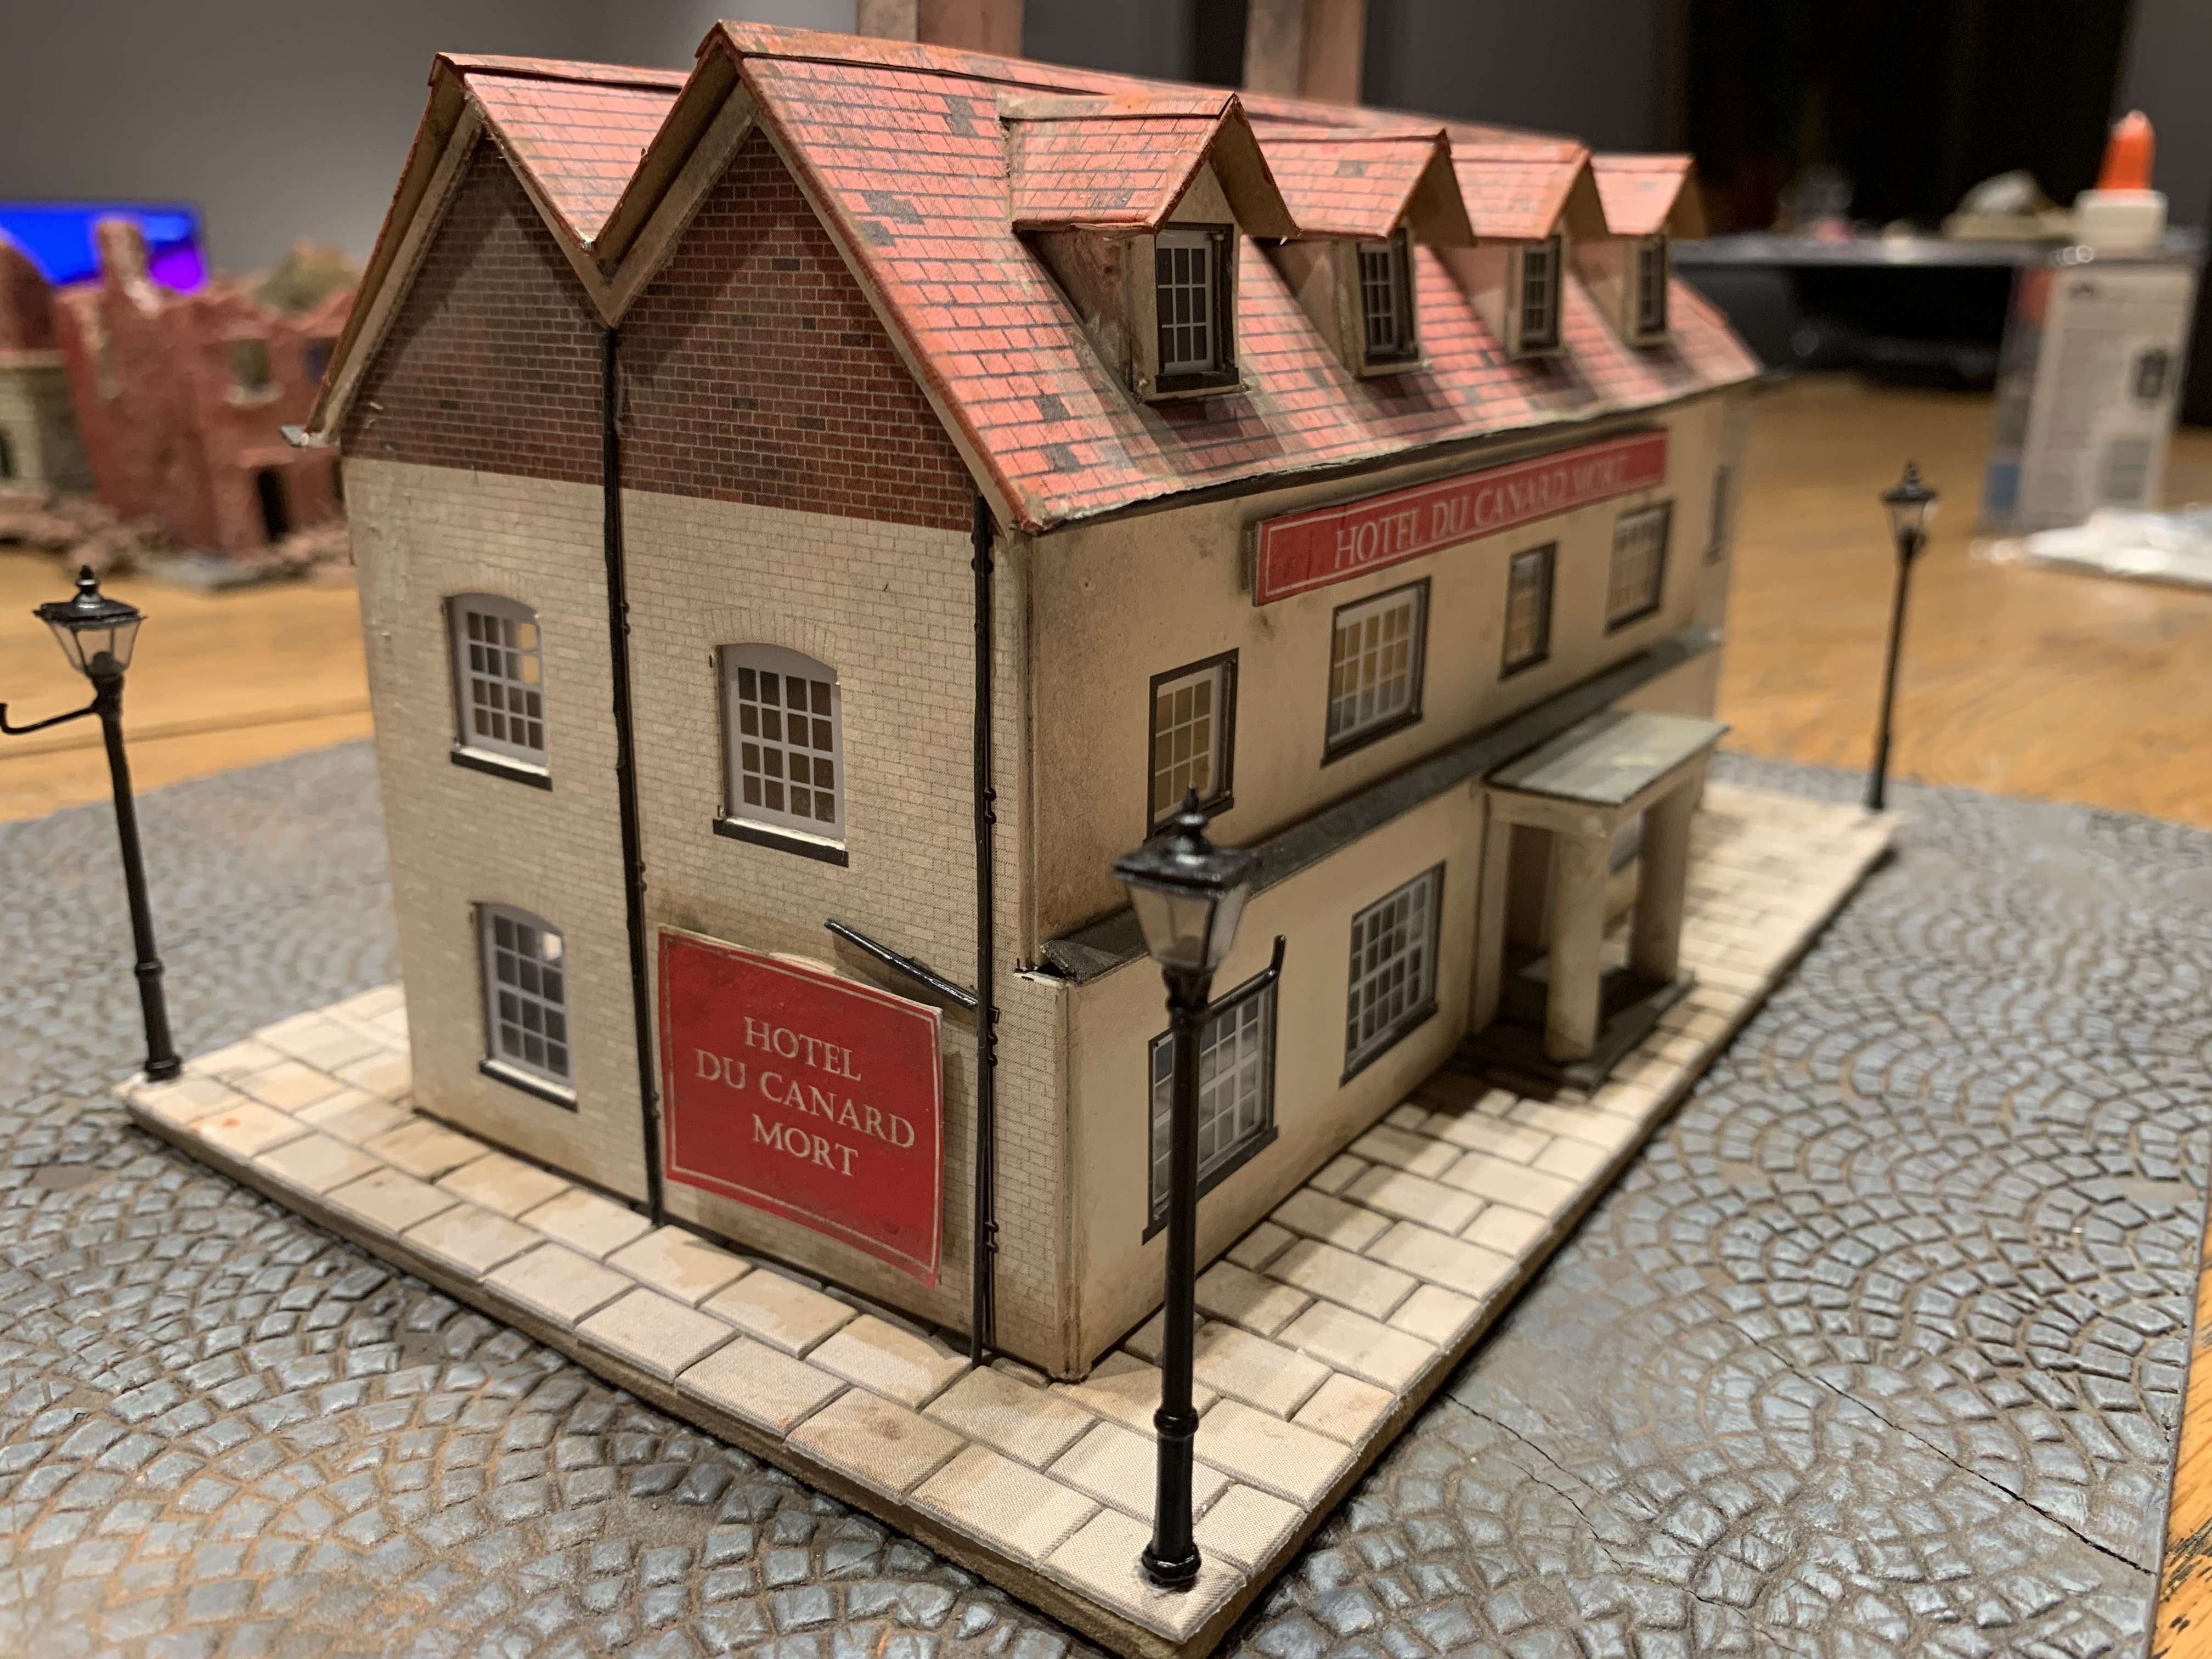
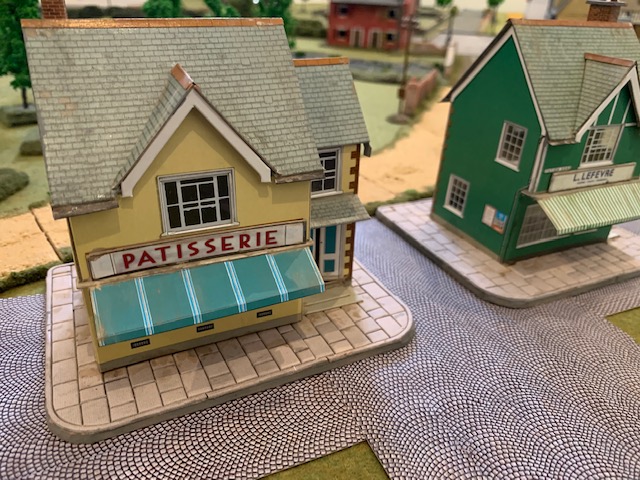
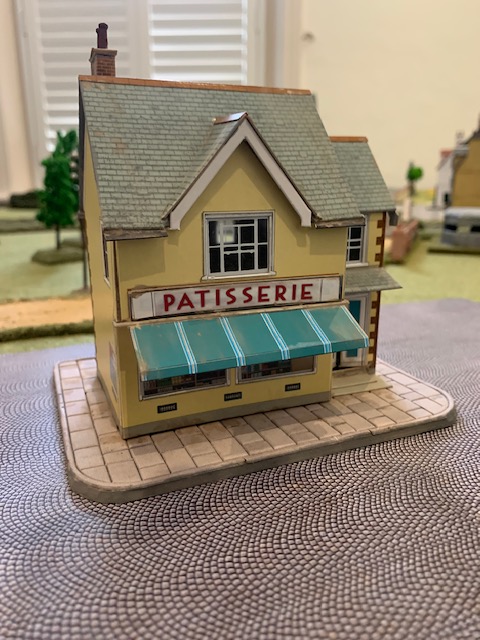
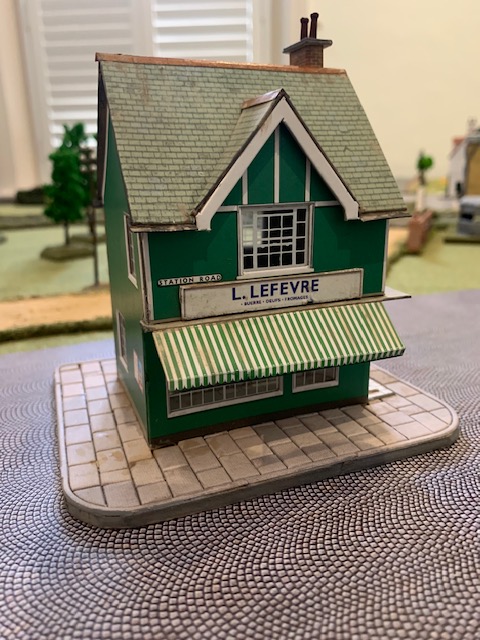
This one is the Railway Hotel and seemed to me like it would fit into any European town. So now it is called the Hotel Du Canard Mort and will be sitting pretty in my Normandy towns and villages. When building these card kits I make sure I use some foam board bits to reinforce the whole thing rather than just rely on the card supports supplied. Makes the whole thing much straighter and stronger. Rather than use the flimsy base supplied I used 3mm MDF covered with paving slabs glued on individually. I also added some foil flashing superglued on as box gutters in suitable places. Its a good finishing touch to paint all the exposed cardboard edges with matching paint colour. This definitely makes a big difference. I added some weathering powders to rough it up a bit too as cardboard tends to look to clean. The street lights are little kits from Langley Models in the UK and added a nice detail I thought! Oh I also added black drain pipes using painted wire glued straight onto the card and also metal chimney pots from Langley Models again. These little additions take the card kits up a notch. Bit like MDF kits when you make that extra effort!

Esci Churchill Tanks in 1/72 Scale

This weekend I finished painting three more Churchill tanks for my British forces. These three were all Esci kits bought on eBay (one of them was boxed as Humbrol, but it is the same Esci kit in the box). The kits are identical except for the Humbrol branded one comes with one piece plastic tracks rather than the link and length tracks in the Esci kit. Luckily the one piece tracks are usable and not the super annoying vinyl ones that mess with my sanity. It also helps that the design of the Churchill means a lot of track is not even visible so you have plenty of scope to make a mess and then cover it all up.

These kits may be old, but they are still great. No fiddly wheels as the running gear comes in just two sections that you have to line up. The detail is good and the parts fit together well. I only had to fill a few gaps here and there with putty, mostly near the front fenders. I think the old plastic had warped a bit. You can leave the commanders hatch open, which I did, and added my usual AB Commanders. Turrets fit nicely and turn easily even after a couple of layers of paint. I added some aerials but left off any stowage, just for a change felt like some clean looking vehicles.

They were all undercoated in matt black then a coat of olive drab. A layer of gloss varnish before I added a whole heap of decals, some from the kits plus a bunch of other spares. I like seeing names down the side of the Churchills so these three got that treatment. A brown wash and a coat of matt varnish finished these guys off. Plus some dark earth and European earth pigments just to dust them up a bit.

I also finished my furry field and sandy track for the Churchill troop to be driving down. Perfect photo opportunity for everyone. These kits may be old but they are just as good as modern offerings from Dragon, and better than more simple kits like Plastic Soldier Company. If you can find them for $10 on eBay well worth the money. I built an Airfix Churchill Crocodile at the same for comparison. You can see him next,


Teddy Bear Fur Fields again…..

0EA0CB35-0108-4961-931A-B8C68254FC22
I have been getting tired of my terrain mat being like a billiard table. I found a cheap source of faux fur on line from Spotlight (Australian craft/fabric/stuff shop). So this week while in front of Masterchef I have been busy painting fur many shades of green. The dog brush we never use on the dog has come in handy to brush the paint in. I also replaced my beard trimmers with a new $25 dollar pair from Target. The old ones were handy for trimming my faux fur before painting and also carving a path. I intend to do a whole heap of fields and roads to cover up the unrealistic smooth finish of my green mat. I think the fur was $10 per metre x 75cm. It will take some time to paint the whole lot but will be worth it.

More Superquick Card Buildings HO/OO Scale

I finally finished the rest of the Superquick card models. Two Tudor houses and two little shops. The shops were given new French names so they fit in better with the Normandy theme. Basing was done with 3mm MDF as usual, plus some Metcalfe card pavements for the shops. The Tudor houses had a more grassy base. These card models need a bit of extra painting on all the white edges that appear after building. I also added some weathering powders and stuff just to dirty things up a bit. It’s a shame you cannot take the roofs off but they will help bulk up my buildings for fighting through a bigger town.

Superquick HO/OO Buildings

A quick update, or even a super quick update – ha ha ha, on some card model kits I cranked out recently. I love these Superquick kits. Unchanged designs since way back when and they are still so much fun to build. If you want some fast options to build a little town these will do the job. Hard to make the roofs removable so i did not even try. I placed them onto MDF bases for extra strength. I also added a lot of foamboard supports inside the houses and church to maintain its shape. Much better than the suggested bits of card that the instructions suggest. To try and make the shops look a bit more like 1940s France I added some new French signs. That should fool everyone. Also painting all the exposed card edges a dark shade and adding some dirt and dust makes all the difference. Oh and I nearly forgot I replaced all the chimney pots with some nice new metal ones. Chimney pots on buildings are a bit like eyebrows on faces. They are much more important than you think, and its only when you remove them you realise their importance!

The shops will look great in my town square and the small church also handy for when I do not want to use my massive home made church.

To finish off the base I used Metcalfe Models card pavers. These come in sheets and you just have to glue them onto your base. They look much better than the supplied bases. You can see in the last photo my use of the pavers with some other buildings too. I think this is a better option than carving pavements and definitely much quicker.


Dapol Girder Bridge HO/OO Scale

I needed another bridge. I have two home made country bridges but really wanted an old rusty looking girder bridge. Down the road I want to add a railway line onto my table top so a girder bridge would be perfect for that. Dapol make a very cheap range of plastic terrain aimed more at railway modellers. Their buildings are too small for 1/72 scale wargaming, in my opinion, but this bridge is perfect. It is 32cm long and wide enough to take a medium tank (Sherman etc). It makes it easy on creating a rule for what weight it can withstand. If the tank is too wide for the bridge then it is too heavy for the bridge.

I think I bought this direct from Dapol at their web site Dapol Girder Bridge

It is a simple model, with three main bits, two sides and a bottom. Plus some struts to link the tops. There is some decent detail showing lots of rivets. I had a lot of fun painting this up. A solid undercoat of matt black, then a spray of red brown. Then i attacked it with buckets of track rust and light rust weathering powders. Using a really wrecked brush i stippled more black back on top, plus a wash of brown on top of that. I think I even went again with more rusty powder. I wanted a really old rusty effect so spent some time adding more and more. The colour and texture came out quite nicely and even looks like peeling paint in some places.

I also made some quite steep roads for each end so I can place my bridge over a river. I used polystyrene on MDF bases coated with plaster for good strong and light results.

Here you can see a cautious advance from a Dingo Scout Car backed up by a half track and a Humber armoured car.


OTP Terrain Houses in 20mm

I think I am totally addicted to making buildings and creating a tiny world, rather than actually playing a game in that tiny world! I found OTP Terrain while looking for the great designs by Jens Najewitz. So they make a whole heap of Printed 3D terrain in a hard plastic. I bought three houses, the Normandy Hotel, Small Building and Town House. They each have removable roofs and floors perfect for your wargames. The detail is excellent and easy to paint. The only additions I made were chopping off the chimney stacks and adding my own metal ones. It has become a thing, I need to replace every chimney pot on any bought building model. I get mine from S&D Models in the UK. They do not cost much and are way better than any of the attempts at chimney pots you get with kits or ones you can make yourself.

These houses are not cheap compared to their MDF counterparts, but they paint up really nicely, have good detail, and they have a huge range. Check them out at OTP Terrain

Photos below. Check out the French Boulangere called Brien. Weird.

I have my eyes on a farm house and barn and bridge. But so much else to get painted first.…….. Good thing we are locked up at home………

Superquick Card Model Houses HO Scale

I figured I would need some more houses to build while the world goes into lockdown. These card kits from Superquick are just pure nostalgia. My big brother had built some for his railways in the 1980s and they were swiftly borrowed to be used on my ping pong table for battles. After 35 years they have not changed. I will get to build them this time. I am sure I can make them look a little more French and a bit less cardboardy this time around. My aim is to have enough buildings to have a full town on a 6 x 4 sized table.

IMG_1041

Charlie Foxtrot Models Houses in 20mm

So I have painted up the first three of my new houses, starting with three kits from Charlie Foxtrot Models in England. The Brasserie, Dormer House and Shed. These kits are pretty reasonably priced and come in pieces in plastic bags with a stapled cardboard header and a single sheet of instructions. The main structures are MDF with other bits and pieces being plastic, like chimneys, and balsa wood shutters.

My first impressions were excellent with nice clean bits of MDF which all fits together well. But the instructions are terrible. They could easily write and print much clearer and precise instructions. It must be the smallest outlay of the whole kit, one sheet of paper, but they have not given the modeller much help. So you kind of have to wing it. Luckily most buildings are just a box so you cannot go too wrong.

Armed with PVA glue everything fits together and the kits can be built quickly in an evening. Now as always with MDF kits i have to add and amend plenty of things to get them up to scratch. First up is a layer of plaster over all the outside walls. I did this on the Brasserie and the Dormer House. For the shed i coated in textured plastic sheet to look like stonewalls. You will need to sand the plaster to get it smoother. It covers up all those annoying MDF corners. I also added some tiled roofing, some pantile, some slate, as I really cannot deal with the MDF roof that comes 100% flat. You could also use cut up cardboard for the roof tiles. My last pet hate for MDF kits is the chimney pots. So i added all my own metal chimney pots I had purchased from an excellent model store in the UK.

Once I had made all these additions the buildings came up a treat I think. One last tip for doing gold letters for the Brasserie was to buy a gold paint pen from the newsagent. This made it much easier than trying to paint with gold paint which does not cover very well.

Even with all the additional work I think these Charlie Foxtrot kits are very good and measure up with other MDF producers like Sarissa. If you need buildings quickly and not too pricey check out Charlie Foxtrot