
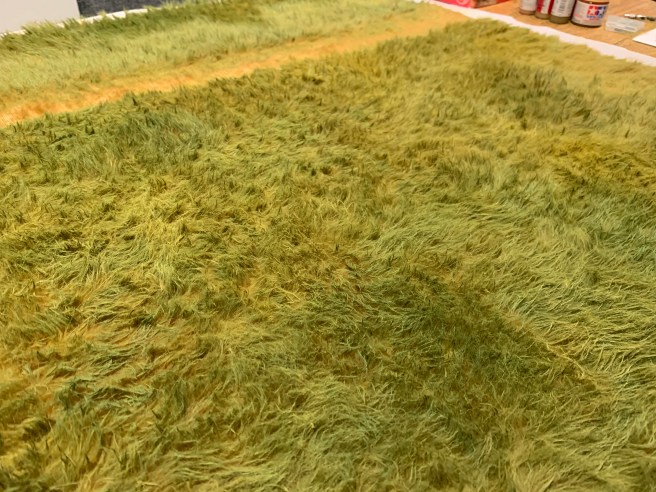
I have been getting tired of my terrain mat being like a billiard table. I found a cheap source of faux fur on line from Spotlight (Australian craft/fabric/stuff shop). So this week while in front of Masterchef I have been busy painting fur many shades of green. The dog brush we never use on the dog has come in handy to brush the paint in. I also replaced my beard trimmers with a new $25 dollar pair from Target. The old ones were handy for trimming my faux fur before painting and also carving a path. I intend to do a whole heap of fields and roads to cover up the unrealistic smooth finish of my green mat. I think the fur was $10 per metre x 75cm. It will take some time to paint the whole lot but will be worth it.
Wargaming
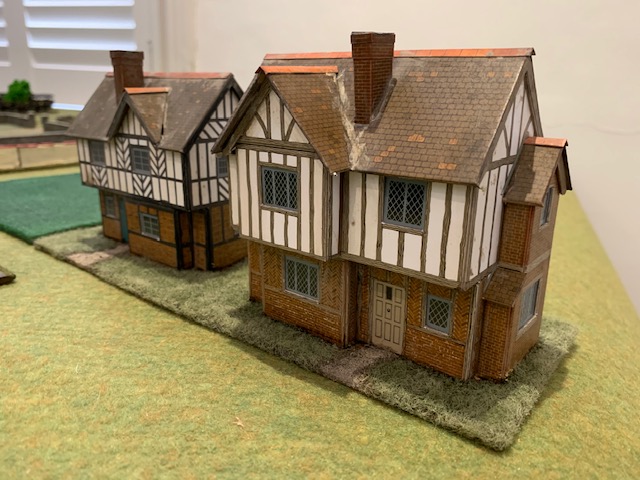
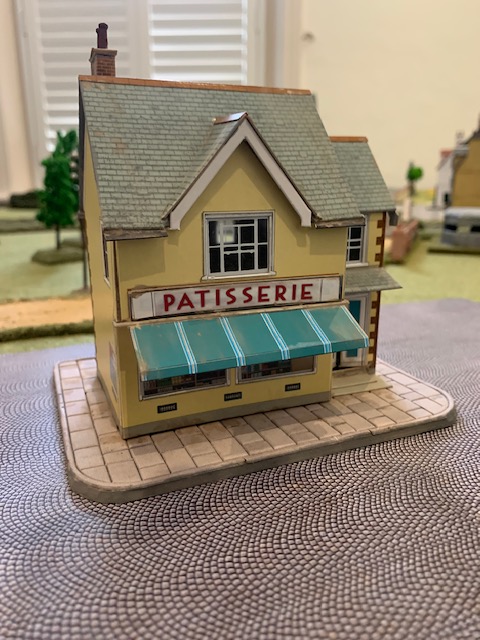
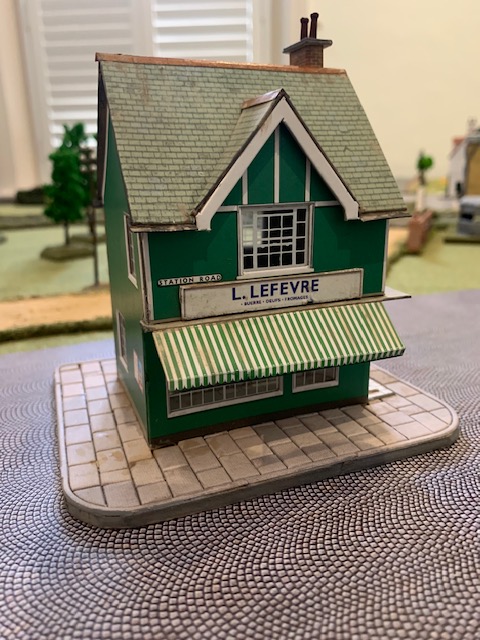
More Superquick Card Buildings HO/OO Scale
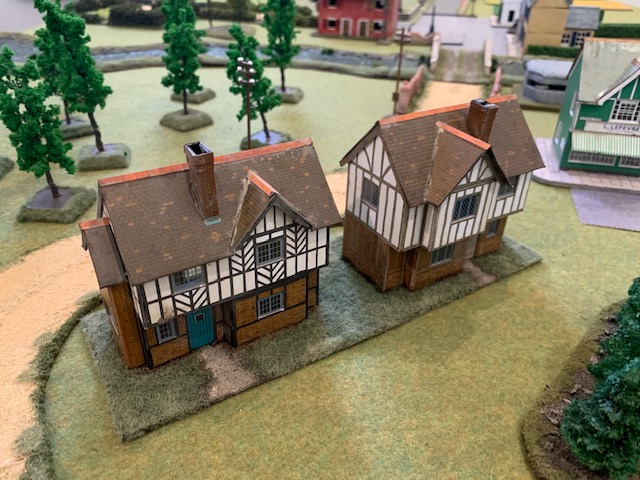
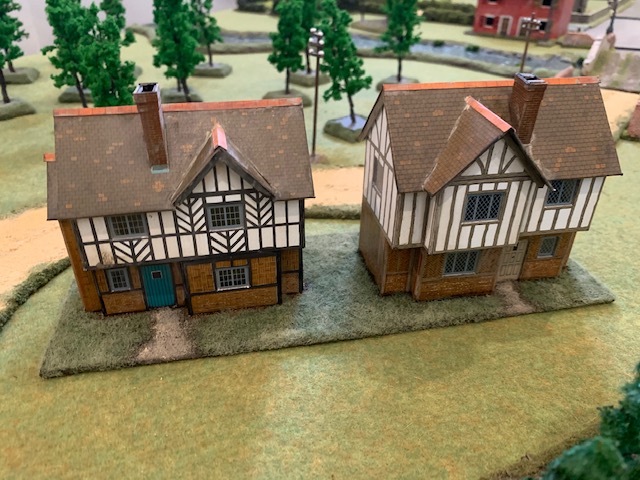
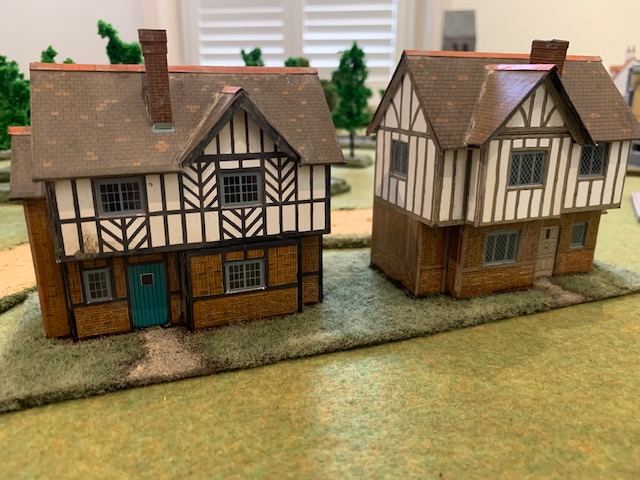
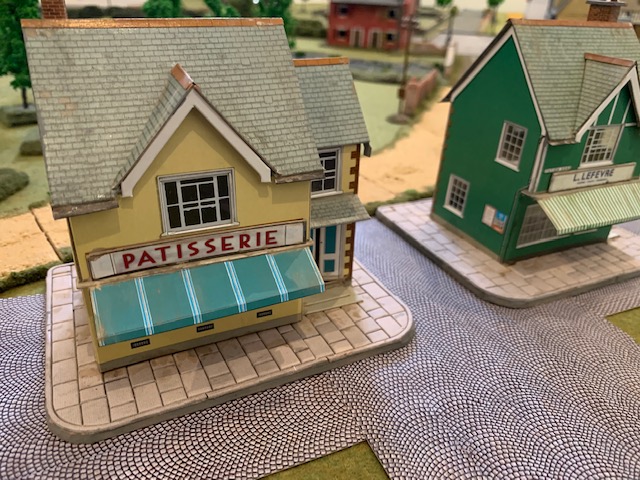
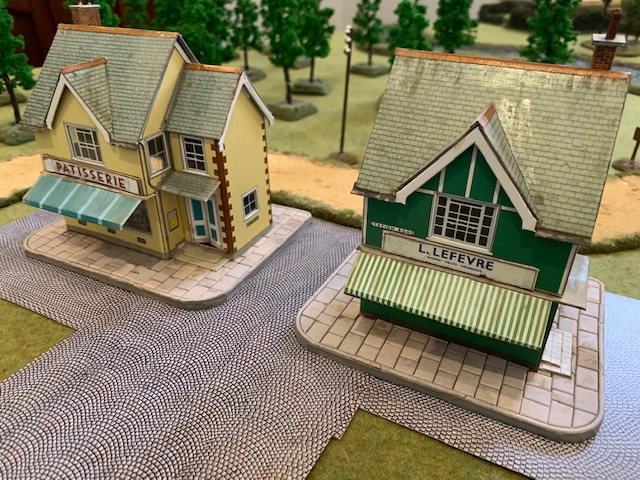
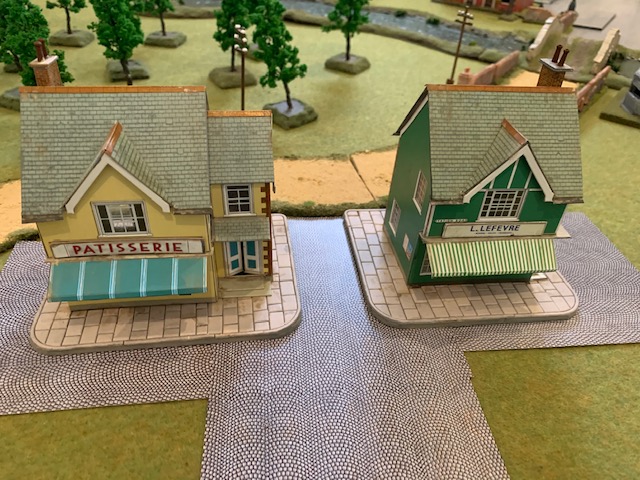
I finally finished the rest of the Superquick card models. Two Tudor houses and two little shops. The shops were given new French names so they fit in better with the Normandy theme. Basing was done with 3mm MDF as usual, plus some Metcalfe card pavements for the shops. The Tudor houses had a more grassy base. These card models need a bit of extra painting on all the white edges that appear after building. I also added some weathering powders and stuff just to dirty things up a bit. It’s a shame you cannot take the roofs off but they will help bulk up my buildings for fighting through a bigger town.
AB British Flamethrowers and Observers
I have been trying to finish up my remaining piles of British Infantry and all the support weapons and other bits and pieces. Unfortunately I keep getting tempted by more AB figures and bought another squad of British just because I like them. So I think as many other figure painters find, it is one step forward with reducing stocks, and two steps backwards as more figures and kits are added to the collection…..
Anyway here is a fancy looking AB figures commander smoking a pipe, with some observation teams. Also a commander from Stonewall figures and two radio men. I added an aerial to the one with a radio backpack. The flamethrower team and support man with an SMG are from AB figures again. I am going to make a flame attachment to show them firing. Probably out of wire and some kind of painted sponge and flock I think. Will have to think about that. One day I will complete my British Battalion and actually get a game going. My friend Jim at Combat HQ has released his version 2 rules of Combat HQ so I want to try and get a game in and write up a battle report/review.


Unimodel Sherman IC Tank in 1/72 Scale
More lockdown production, this time a Sherman Hybrid with a 17pdr gun that I thought was a Firefly, but isn’t. Well it’s gun is a Firefly 17 pdr gun but the actual tank is a regular Sherman. Another forum had to point it out to me. I was a bit surprised as I bought the kit to fit into my Firefly additions but I soon realized the hull is shorter than the PSC Fireflies I was building at the same time!
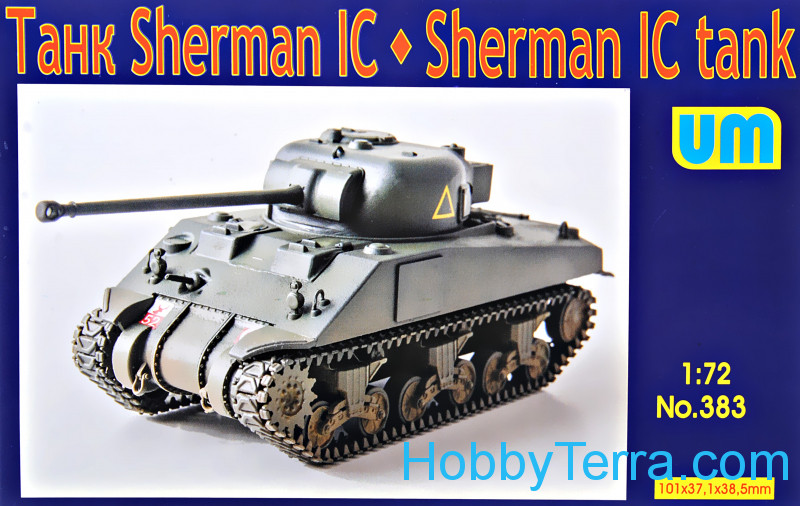
The kit is great. I really like Unimodel kits. More detail, some cool photo etch to mess around with and drop on the floor, and plenty of decals. The spares from this one I used on my PSC Fireflies (see previous post). All turrets can be modelled open so I included an AB commander in the turret hatch and decapitated two other plastic dudes for the hull hatches. Just their little scones sticking out catching a glimpse of what big cats were up ahead. The link and length tracks and bogey wheels are excellent. Even a bit of photo etch on the bogies. They are definitely more challenging than other kits and well worth it if you are looking for something more involved. I find buying direct from the Ukraine is far better value than any other hobby store.
Painted in olive drab with a dark wash is all you need to do. I do not bother with chips and scratches on dark green vehicles. Maybe i should try it. Next up I have three Esci Churchills ready to go, perhaps they will be more beaten up than this Sherman.


The Plastic Soldier Company Sherman Fireflies in 1/72 Scale
Finally finished the other two Fireflies in from a box of three I bought a while ago. The Plastic Soldier Company models are very simple kits, easy to build, but have a nice level of detail, and are good and solid. I do like them for knocking out a few quick tanks, like Armourfast but better on the detail side. They also respond well to some tarting up with a few bells and whistles. These two have aerials added, AB figures crew men, a bit of value gear stowage, and plenty of random decals stolen from other kits.
Olive drab spray can, gloss varnish and decals, dark wash, matt varnish and plenty of European earth and sand powders on top. Easy formula for my British Army vehicles.
Lockdown has definitely increased my hobby output. I would highly recommend PSC kits if you want to build a good looking force nice and quickly. Much easier than fiddling with link and length tracks or dreaded Esci vinyl ones. You can smash out a few troops of tanks in quick time. I have not tried the figures from PSC as I am firmly entrenched with my favourite metal ranges, and will never go back to plastic.


Superquick HO/OO Buildings
A quick update, or even a super quick update – ha ha ha, on some card model kits I cranked out recently. I love these Superquick kits. Unchanged designs since way back when and they are still so much fun to build. If you want some fast options to build a little town these will do the job. Hard to make the roofs removable so i did not even try. I placed them onto MDF bases for extra strength. I also added a lot of foamboard supports inside the houses and church to maintain its shape. Much better than the suggested bits of card that the instructions suggest. To try and make the shops look a bit more like 1940s France I added some new French signs. That should fool everyone. Also painting all the exposed card edges a dark shade and adding some dirt and dust makes all the difference. Oh and I nearly forgot I replaced all the chimney pots with some nice new metal ones. Chimney pots on buildings are a bit like eyebrows on faces. They are much more important than you think, and its only when you remove them you realise their importance!
The shops will look great in my town square and the small church also handy for when I do not want to use my massive home made church.
To finish off the base I used Metcalfe Models card pavers. These come in sheets and you just have to glue them onto your base. They look much better than the supplied bases. You can see in the last photo my use of the pavers with some other buildings too. I think this is a better option than carving pavements and definitely much quicker.


IBG Otter Light Reconnaissance Car in 1/72 Scale
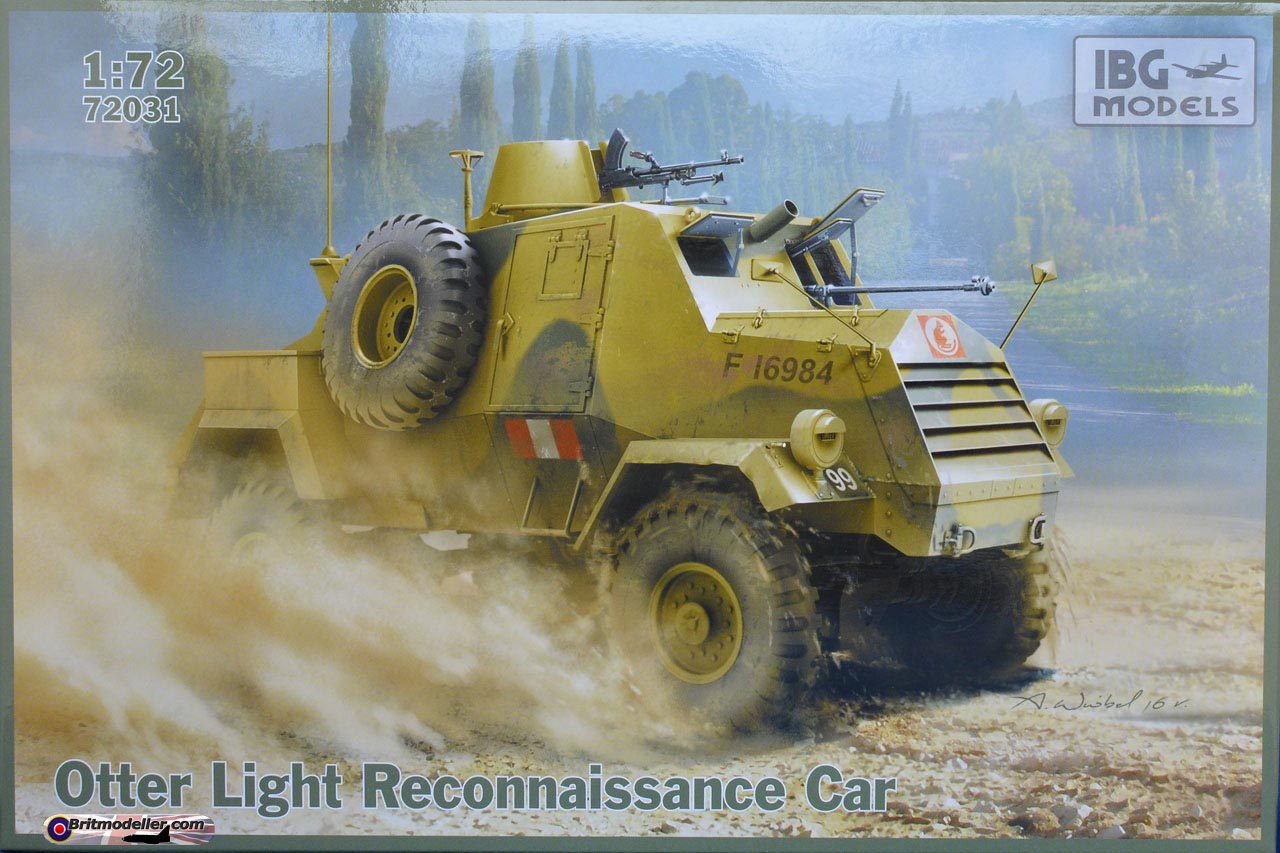
IBG Models make great little kits of all sorts of vehicles, especially some lesser known ones. This Otter Light Reconnaissance vehicle is one of those. Everyone knows about Humbers and Daimler armoured cars, but this little guy is a treat. IBG kits are always a real pleasure to make and this one is no exception. I loved it. To begin with its a fine looking little armoured car. The casting is super clear and everything fits together perfectly. The kit comes with some excellent PE parts for mudguards and a cool plank for getting out of a bogging situation (not sure what that is called!).
So building this car was a lot of fun. The interior is also fully detailed so you can leave a side door open and have a look in. If i build another one I will do that with maybe a crew man stepping out. You get a choice of decals to use, so I went with a Canadian unit which would be relevant for Normandy. I liked the white star mainly.
Olive drab paint work plus a bit of a dark wash, followed by some earth and sand pigments. I added my own aerial as usual just to finish it off. I can never recommend IBG model kits highly enough. I have a Bedford QLT ready in the queue for my next build.


More AB Figures CP Models SHQ British Infantry
I think like everyone out there this isolation thing is providing us all with extra hours to dedicate to painting and building. Always a silver lining. Although I am happy to continue in isolation paintbrush and glue in hand. My wife and dog provide me with all the human interaction and companionship I need to live a content life.
Anyway more British infantry finished. A mixture of three figures from AB, two rifles and a bren gunner defending in great poses. Then five advancing troopers from SHQ, and another kneeling bren gunner from CP models. Finally at the back is a another rifleman from Capitan (i think sold by Stonewall figures), who i left at the back as they are poorer quality figures. Better to leave him in the blurry background. If you are looking at Stonewall Figures their Combat 20mm ranges are cool, but I didn’t like the Capitan range. Sculpting was not so flash.
All i have left to do on my British company is some support weapons (HMGs and light mortars), flamethrowers and a bunch of officers and observers. Oh and a sniper. Oh and one more squad, the only plastics I will have being an excellent piece of work from Zvezda.


AB Figures British Infantry in Camouflage Smocks
This isolation business is really doing wonders for my output. I have almost got through painting all my British infantry who will make up a full company of men. This is another squad from the fantastic AB Figures range. British infantry walking, running, carrying a fuel can, patrolling, and armed with rifles, a couple of SMGs and a bren. The difference with this squad is that they are wearing camouflage smocks. This made a great change from the usual uniforms I have been painting. Looking on the AB Figures web site I used their painted example as a guide. So the camo smocks were a dark yellow base with patches of red brown and bright green, a bit like a German tank. Pants were painted the usual British army khaki. It all still took me ages to do but luckily I have plenty of time these days. After looking at some amazing painting of AB Figures faces in this tiny scale I am trying to do a bit more with the faces. Trying to do a base coat, a wash, then two lots of highlights. It seems to work better. It just takes longer………..
These guys are still waiting for their bases to be finished with flock and tufts. I have another squad also completed so I will get all the bases done together and post the two finished squads.


Esci Sdkfz 250/3 and 250/9 in 1/72 scale
Another two old Esci kits I bought on eBay for not very much. They were both pretty old kits and I managed to buy two of the 250/9’s and one 250/3. As usual with Esci kits of this age the little tracks were wonderful vinyl that would not bend, but rather snap into little pieces at the slightest hint of movement. So the first step was to find replacement tracks as none of my lessons for Esci vinyl tracks I have previously learned could be applied here. Luckily on eBay again I found a ready supply of rubber track for this little armoured car, so I picked up four sets for only $10 or so. Its amazing what you can find these days. If you need it, you can almost always find it, and have it delivered to your door. Very lucky in the current climate.
So onto the kits themselves! I cannot say that I enjoyed making either of these little vehicles. The plastic is old and brittle and did not take plastic cement at all well. They are not complicated but so bits didn’t fit well and didn’t glue well. The wheels especially were very tricky to get square. Even super glue did not really cope with the plastic. So I would recommend avoiding these particular old Esci kits if I were you. There must be plenty more versions these days that are a million times better!
Once I had managed to build them I added some aerials and a bit of stowage here and there and painted them in a two tone camo scheme. The original decals were long gone so I used replacements. They came up OK after all the painting and basing, but there was a sigh of relief when I finished them. You get what you pay for sometimes…….


