Ploughed Fields Corrugated Card

I was destroying some card board boxes to put into the recycling the other day but then was suddenly struck with a terrain vision in my backyard. As i tore up the reinforced card board i remembered something i read somewhere about making ploughed fields out of corrugated card and thought i would give it a try. You can never have enough rural scenery, and my painted carper tiles get a bit stale.

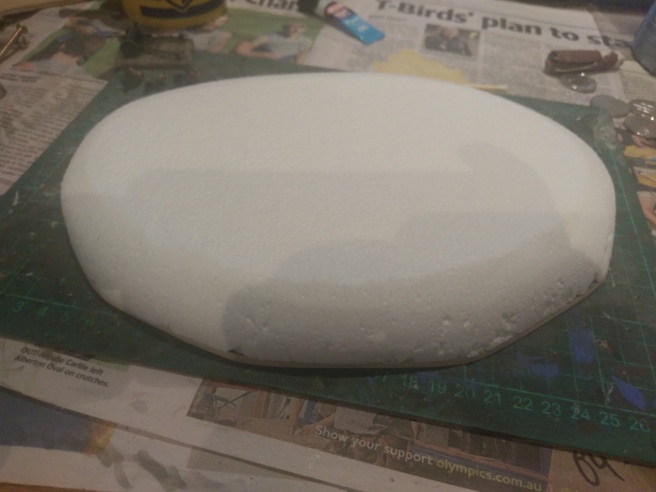
This is about the easiest terrain build you can hope for. Clean up your corrugated card by removing the top layer of card leaving the furrowed bit. Then glue to an appropriately sized piece of MDF. You can make any size you like. The card is blended to the MDF using some no more gaps/caulk/arylic filler around the edge. I gave the edging a good cover of PVA and sprinkled with sand for texture. I also did some PVA glue and sand sprinkles on the furrows too for effect. A good dark brown spray from the can followed by a couple of lighter brown dry brushes adds some texture to the surface. The usual green flock around the edges plus some in the field for variety. I did have some warping issues with the MDF which i sorted using some heavy weights and also painting the bottom of the terrain.

Together with some hedges below the results are pretty convincing. For almost zero cost this is a great addition for my table. I just need a tractor and some hay bales now.

Assault on Camembert June 9th 1944

As the British moved forward from the Normandy beaches they managed to grab some small towns ahead of the main invasion force. One of these small towns is a little known hamlet called Camembert, on the road to Rochefort. A worn down British Company from the 17th Durham Light Infantry had taken the German forces by surprise and were just holding on by the skin of their teeth. Colonel Frank Mustard was occupying the town with two platoons of infantry, a couple of Cromwells and a Firefly as armour, plus a 17 pdr and a battery of 80mm mortars. In reserve he had the lumbering Churchill AVRE which was fresh from blowing up some Normandy beach defences. So not an insignificant force. Colonel Mustard had orders to hold Camembert against a possible German counterattack.

Just down the road through the bocage the counterattack was inevitably coming. A much bigger German force was on the way including one troop of Panthers, a troop of Panzer IVs, a company of Panzer Grenadiers, an 88mm and some Pak40 AT guns, plus a dangerous Tiger in support. So outnumbered and outgunned the British had their work cut out to hold on. The British plan was to try and destroy some German armour on the main roads leading to the village and block them up, then bring in mortar fire to further mess up the forces and pin them down.

It all started so well as the Firefly took out the lead Panther on the West road and blocked it up, while the 17pdr stalled the Tiger rolling down the East road. That was as good as it got for the Brits. The mortars never found their range and basically did nothing allowing the Germans to continue to advance. The remaining three Panthers got through the bocage and made very light work of the Firefly and his Cromwell friends. Then once the Tiger survived three direct hits from the 17pdr it took one big shot from close range to destroy the doomed anti tank gun. By this time the reserve Churchill AVRE has spent 5 moves moving about three inches and was already too late

Suddenly the Panthers and the Tiger were in the village. The Brits had no answers to the big cats and Colonel Mustard threw in the towel. So a decisive German victory i think. Next time the British need to be more alert and get those mortars firing early to have any chance. Plus be a bit smarter with some ambush tactics rather than just exposing themselves to the enemy so easily.

Farmhouse Rural Building

I finally finished my farmhouse for my Normandy terrain. I based this roughly on some of the amazing scenery built by David Wright in his book “Making Rural Buildings For Model Railways”. This book is a must read for anyone looking to build their own scenery. I followed all of the suggestions in it and it improved my little farmhouse no end! I have tried a couple of manufactured buildings from different companies and nothing measures up if you have the time and the energy to scratch build your own structures. Your creations will also be what you want, to your designs, and fit perfectly with your other scenery and models. I think making your own stuff is the most rewarding thing about this hobby!

Using a foam board base for the structure, the key is to give it a coating of glue and modelling clay or ready made filler or plaster. Stonework is then carved into the buildings skin in whatever texture you like. Regular bricks or rural stonework or anything that looks the part. I picked up a $15 electric engraving tool from eBay (China) which speeded up this process a great deal. Hand scribing individual stones is a time consuming effort, but well worth it. Roof tiles were made out of Christmas cards, flashing from aluminium foil. I did buy the chimney pots (another suggestion from David Wright) but everything else is easily found and inexpensive to pick up at the art shop or stationery cupboard.

I was very pleased how this turned out, now i need to finish the rest of my farm, including  a little stable with a corrugated iron roof, an old shed with a hay loft and a big barn. Also need to pick up a vintage tractor from somewhere and make some hay bales. Will probably make a farmyard with walls and find some animals to scale to finish the scene. If you want to make your own buildings for wargames i suggest you check out David’s book as it is all you will ever need! I put the new farmhouse on the edge of my table just so you can get an idea.

Painting Light and Magnifying Glass

I had a whine about my poor old eyes being old and grey and my arms being knackered and broken and a fellow blogger chimed in with a recommendation to purchase one of these. It’s an awesome magnifying glass with a bendy arm and clamp, plus a built in bright LED light. The days of going cross eyed trying to paint tiny dots on tiny men in semi darkness are now a thing of the past. Well they are a thing of 2016. Now in 2017 i can paint even smaller dots of camouflage and even put dots inside the dots. I can even paint tiny maps and tiny ordnance survey symbols on the tiny map. Well maybe not but still it’s a huge improvement. Anyone out there who is struggling with this stuff please go and get one. My lovely wife purchased one for me for Christmas. Woo hoo. Also thanks to my blogger modeller friend for a great suggestion. It even has a small section that is double the magnification. It takes a while to get used to the distance your hand is from the model under the lens. Bit of practice is all you need. I don’t know how i managed before i had this.

Normandy Bocage in 1/72 scale

I was on the verge of getting a game set up to play over Christmas while i had a few days away from work. But then i was hit with a wave of dissatisfaction like a seven year old opening a really shitty present on Christmas day. My Normandy bocage sections were just not up to scratch. I had to do something about it. I keep looking at Pat’s blog Wargaming With A Silver Whistle and having feelings of inadequacy! Anyway, armed with sections of MDF, rubber matting, poly fiber stuffing, acrylic sealant, coconut fibre, and lots of flock i set about redoing my bocage.

I have a rubber mat that’s about 2cm thick and meant to be used for camping or something, but works well cut up and glued to MDF strips roughly 3cm wide by 10-15cm long, as the base for my bocage banks. I make sure the rubber is a good 0.5cm thinner on each side than its MDF base. I then blend the bank into the base using acrylic sealant or crack filler, but you could use modelling clay or anything else really. When the sealant is dry i give it a good covering in PVA glue and then chuck a heap of sandy dirty gravel on it from out the front of our house. When that’s dry its a heavy spray of dark brown paint from cans i pick up from Bunnings for a few bucks.

The actual bushes are made from a mix of coconut fibre (also from Bunnings for next to nothing) and that poly fibre people use to stuff toys and cushions and probably dead animals. Again very cheap, my wife bought me a bag from Spotlight for about $5 and i will be dead long before i finish the bag. Maybe i can be stuffed with poly fibre. I jam bits of cocktail sticks into the rubber matting top of my bank and that supports the bushes. Lots of PVA again and then get lots of bush material onto the bank. I tried to vary the height as much as possible, but by all reports bocage was anywhere from 5 – 7m tall so i reckon 5 – 7cm is good for 1/72 scale. When the bushes are dry they get another good brown spray.

The last bit is the fun bit when i am throwing lots of glue onto the bushes and then dunking them into a two colour mix of flock (a mid green and a dark green). I use coarse flock from a Vietnamese company called MP Scenery. Its probably the only part of this terrain that costs any significant dollars. I flocked the base too with some finer stuff, and did a bit of lighter brown dry brushing too just to finish things off.

It all came out a lot better than my last attempt, you can see below with the doormat wheat fields and the carpet tile crops. Inexpensive and i think just as effective as anything you can buy. Maybe i can get to play a game now…… Happy New Year!

Sandbags and Obstacles Terrain Part 2

I finished off my sandbag defences, rubble obstacles and embankment this week. Spray paint of matt black undercoat and then a dark brown base, highlighted with a sand yellow for the sandbags, grey and brick red for the rubble, plus some silver highlights for the barrels. I added some flock and bushes to finish things off. Not much else to add, i was very pleased with how the sandbags turned out considering how easy they were to make. I think for some bits of modelling clay they will do the job quite nicely.

I took some photos of a heavily defended ruined crossroads. German AT gun, panzerfausts and a panzershreck can be seen safely dug in, with a lone Panther in the background.

Pork Chop Hill

Nothing to do with the actual battle of Pork Chop Hill, i just liked the idea of calling a post that. But it does have everything to do with hills, and the construction of one. In the good old days (for me that’s the early 1980’s when Adam and the Ants and Duran Duran were wearing frilly shirts) my hills were books placed under random green blankets. These days my green mat is a massive improvement on the old blanket or the green painted ping pong table. But its too rigid to place items under it to create any hills or undulations on my wargaming table. After plenty of research and investigation i decided to have a go at constructing my own hills. This method is nothing new and all sorts of tutorials can be found on the net, but for a balance between value, visual effect and simplicity of construction i don’t think you can beat it!

I bought some polystyrene sheets 25mm thick from my art shop for a couple of bucks, plus some 3mm MDF from Bunnings, again a very cheap material. I cut out my required shape from the MDF, in this case just a simple oval shape. I then glued the polystyrene sheet to the MDF shape with PVA glue and left it weighted down overnight to dry. I reckon you can use any kind of polystyrene or insulation foam or similar. Once it was dry i cut the hill edge level with the MDF base, and then gave it a good sand with sandpaper until the contours were where i wanted them. Make sure you sand this stuff outside so you don’t inhale any nasties. That’s pretty much it. I gave the hill a thick coat of a cheap dark brown acrylic paint and then gave it a liberal coating of green flock. The flock i had is a close enough match to my green mat, well good enough for me anyway. I was pretty happy how the whole thing came out. Now i can make a bunch more of different shapes and heights to cover all situations. I am also going to make a big hill in two halves so it can be one big hill or two smaller ones that sit flush with the edge of the table. I also think grabbing some cork from the pet store and making a hill with a cliff will be a cool idea.

Check out the naked hill below and then the finished result!

IMAG0133

Zvezda Pak 36 Anti Tank Gun in 1/72 scale

Zvezda make some cool kits aimed at wargamers under the “Art Of Tactic” banner. Their Pak 36 Anti Tank Gun is great value and easily the cheapest option in plastic. It is such a tiny little gun there is not much point in spending big on any metal versions when you can pick one up with a couple of crew for less than $5. This kit from Zvezda comes in their usual grey plastic and takes literally seconds to put together. Detail is good, and at this scale i am not sure you could get any more detail onto the model anyway. The two man crew does the job, but i added a third crew man with binoculars. I think he came from another Zvezda kit so he fitted in nicely to make up the trio. It would be good to have a limbered version of this gun so when moving around behind his transport so i don’t have the crew all sitting there on the same base. It looks a bit weird. I might have to buy another kit for this purpose. So here is my “door knocker”, as the Pak 36 was called, covering a wheat field from among the bocage, with his Horch car ready to get him out of there in a rush if things get too hot…….

“Making Rural Buildings for Model Railways” by David Wright

Sometimes i think that i enjoy making stuff far more than i actually enjoy playing games. A big attraction of this hobby for me is the never ending list of things to build and building techniques to learn. The list is endless and the challenge to improve my creations will never be satisfied, as there is always someone, somewhere who shows you something inspirational to aspire to! In the quest to improve my scenery and terrain, i found this book on an excellent web site called Book Depository and swiftly bought a copy. Published by Crowood Press i picked it up for under $30 delivered to my Australian doorstep.

What a great book. If you are interested in scratch building your own rural buildings then you should run out and get yourself a copy of this. David goes through every step of researching, planning, drawing and constructing various different types of rural building. Even though this is aimed at Railway People its application to wargamers is one hundred per cent relevant. Packed full of tips, tricks, reference material and step by step guides, it gives you all the tools to build your own very realistic scale models.

I had picked up various ideas and techniques from the internet, but this book puts it all together in one place and adds plenty of new ideas. Using foam board, modelling clay, cardboard and PVA glue is all you need to make some awesome looking terrain for your table. This is going to inspire me to rebuild my Normandy village from scratch, starting with a farm complex. I guess i am lucky to have the time to build my own, but ultimately its far more rewarding to see your own creations on the table in front of you.

IMAG0112

In The Greenwood Laser Buildings Part 2

I finished the second building i had bought from In The Greenwood and was very happy how it turned out. This was was the Victorian Terrace with some nice looking bay windows. Flat packed brilliantly into a small cardboard box these kits are really cool. They scale out quite nicely to my 1/72 scale stuff, i think being around 110 – 115mm high. Only costing around $20 on line, probably less now since Brexit, they are really good value compared to other MDF and resin model buildings.

Quite easy to build, i only struggled a bit with the bay windows, and didn’t get them totally square or straight….. next time i will do better. Although the designs are not necessarily for Normandy they fit in really well with all my other buildings, most of which are home made. The addition of some French looking adverts and signs will help the houses blend into the Normandy countryside. I have a corner shop left to build which i will get to next.

The backyards are particularly nice, with some sheds and outbuildings. I added a path and some grass out back to the rear gates. Just ready for some troops to hide out there ready for action…… Its turning into a smart looking MDF street.