CP Models, SHQ Miniatures and AB Figures British Infantry in 20mm

I finished one more platoon of British Infantry for my Battalion of Northumbrian Light Infantry. These guys made up of 5 figures from CP Models, 4 from SHQ and 1 from AB Figures. All great ranges of figures. My aim is to have a full 3 companies x 3 platoons and support without duplicating a single figure. I have about forty figures to go before completion, so getting there slowly.

The group of five men, including the waving officer with the SMG, are from CP Models. I love their range of figures. Great detail and interesting poses. They are especially easy to paint as everything is so clear. I keep faces simple with a basecoat, a red oxide wash, and then some lighter fleshy highlights. The officer has a nice blue bandana round his neck. My only criticism maybe is their legs get a bit chunky, but you do not really notice. CP do provide bases with slots but I usually cut off most of the slots and glue them into clay on 20 cent pieces. CP have a fab range, I have a bunch of Germans from them getting ready for camo smocks.

The group of four men are from SHQ miniatures, also a company I like. Their figures are cheaper than other brands and slightly smaller. The detail is not as clear as CP or AB but I still really like their poses and they fit in nicely with the other brands. Subtle differences but these differences just add to the look of the unit.

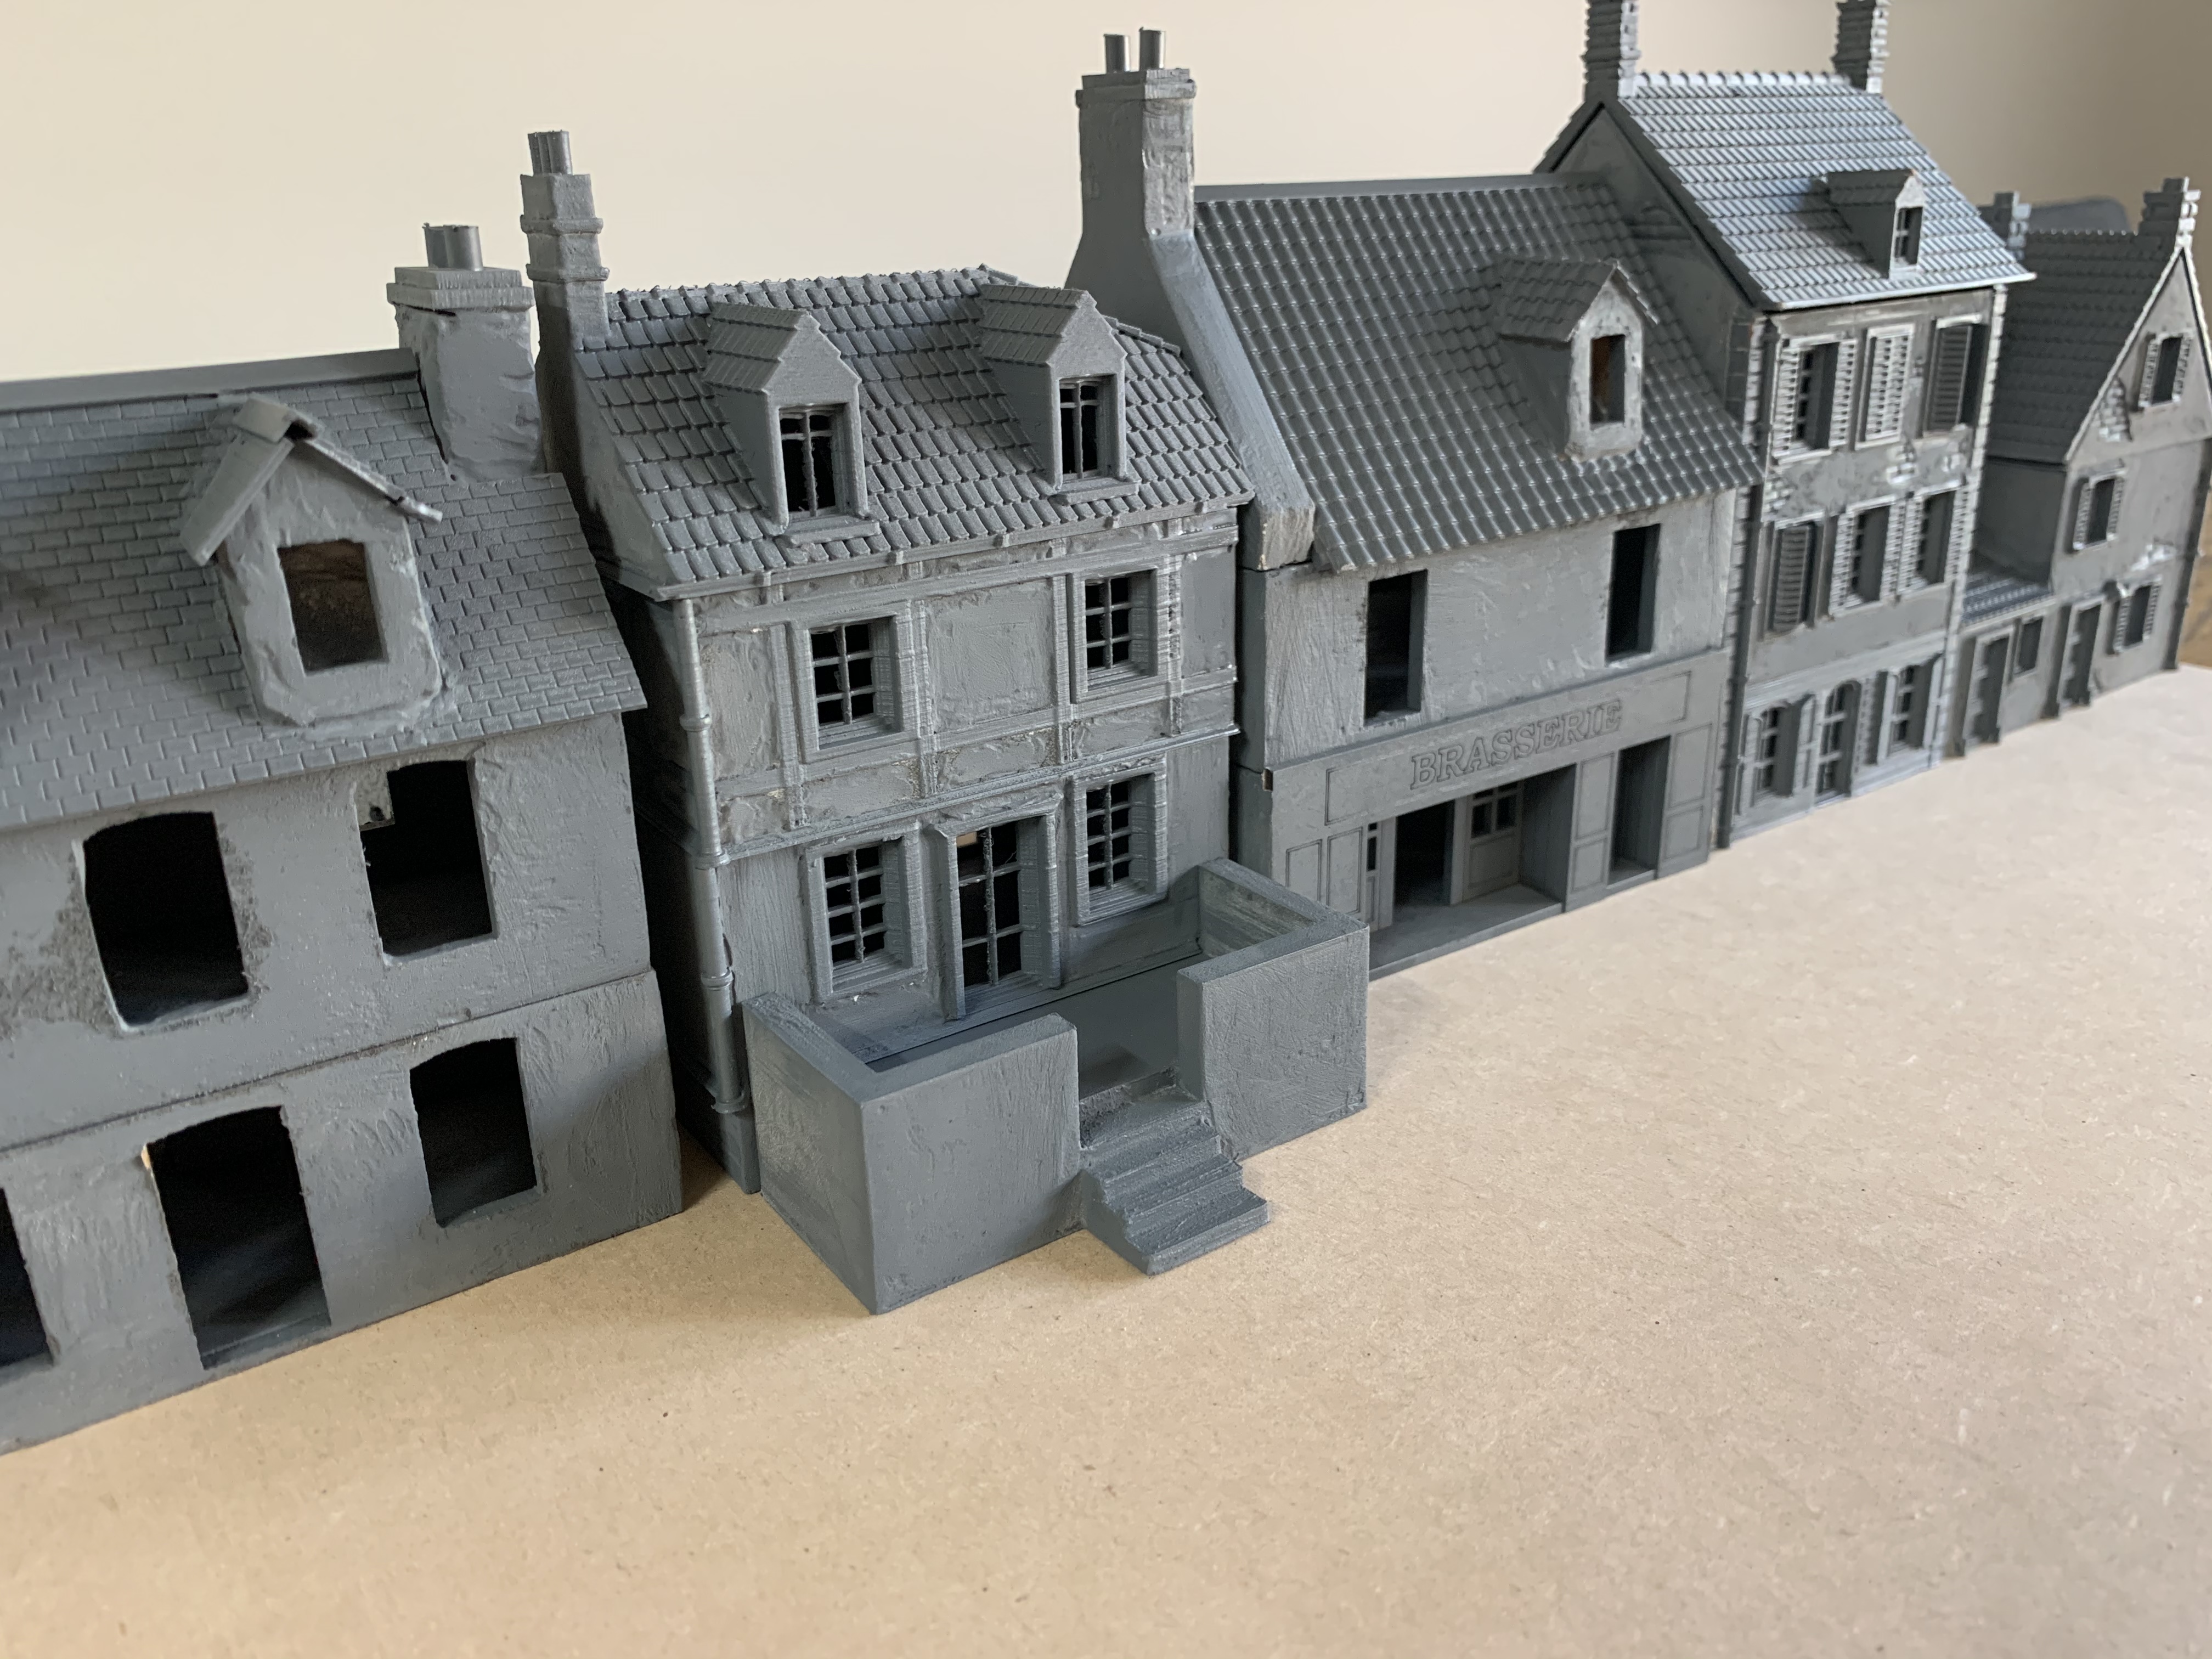
The last lonely man in front of the Brasserie is an officer with an SMG from AB Figures. I have written enough about AB Figures! Great figures and a fantastic range. My battalion is 50% AB figures, but the other manufacturers are very worthy accompaniments for them. All my plastic will now be consigned to storage or eBay as it has all been replaced by these excellent metal miniatures.


Charlie Foxtrot Models Houses in 20mm

So I have painted up the first three of my new houses, starting with three kits from Charlie Foxtrot Models in England. The Brasserie, Dormer House and Shed. These kits are pretty reasonably priced and come in pieces in plastic bags with a stapled cardboard header and a single sheet of instructions. The main structures are MDF with other bits and pieces being plastic, like chimneys, and balsa wood shutters.

My first impressions were excellent with nice clean bits of MDF which all fits together well. But the instructions are terrible. They could easily write and print much clearer and precise instructions. It must be the smallest outlay of the whole kit, one sheet of paper, but they have not given the modeller much help. So you kind of have to wing it. Luckily most buildings are just a box so you cannot go too wrong.

Armed with PVA glue everything fits together and the kits can be built quickly in an evening. Now as always with MDF kits i have to add and amend plenty of things to get them up to scratch. First up is a layer of plaster over all the outside walls. I did this on the Brasserie and the Dormer House. For the shed i coated in textured plastic sheet to look like stonewalls. You will need to sand the plaster to get it smoother. It covers up all those annoying MDF corners. I also added some tiled roofing, some pantile, some slate, as I really cannot deal with the MDF roof that comes 100% flat. You could also use cut up cardboard for the roof tiles. My last pet hate for MDF kits is the chimney pots. So i added all my own metal chimney pots I had purchased from an excellent model store in the UK.

Once I had made all these additions the buildings came up a treat I think. One last tip for doing gold letters for the Brasserie was to buy a gold paint pen from the newsagent. This made it much easier than trying to paint with gold paint which does not cover very well.

Even with all the additional work I think these Charlie Foxtrot kits are very good and measure up with other MDF producers like Sarissa. If you need buildings quickly and not too pricey check out Charlie Foxtrot


Armourfast Stug IV in 1/72 scale

You always know what you are going to get with a Armourfast kit. Two tanks in a box for something like seven pounds. Great value at about seven Australian dollars a tank for me down here in the Southern hemisphere. There are only a few parts to each tank, so they are super quick to build. Nothing wrong with a fast build tank. The detail is good enough for a wargame, and if you want a large number of tanks in quick smart time, then these kits are for you. You cannot beat value for money to bulk up an army.

I had a lot of fun doing a lot of weathering to my two Stugs. I really wanted to try the hairspray chipping effect on these two to add a bit more interest to them. So after building, and leaving the side skirts off, i sprayed everything with a red oxide and a dark brown spray can. Then i gave it three thin coats of hairspray, letting it dry in between each layer. Oh and do this outside….. It can get smelly. Once this was all dry i did the usual dark yellow dunkelb  spray over the top. Once that’s all dry you can grab a stiff brush and a toothpick, wet a small surface of the tank and give it a rub and a scratch. The trick here is to do this in areas that would get worn out, like hatches etc, and also not to over do it. I was impatient as usual and went overboard. It’s a fun process and can look really good but you need to remember less is more. Next time i will take it easy.

I gave it all a gloss varnish and a dark wash. Plus some decals. You don’t get decals with the tanks so you need to source elsewhere. I added my favourite AB figure crewmen plus a home made aerial and also some camouflage foliage. These Armourfast tanks really do improve greatly if you take a bit of extra effort and make some modifications!

“Setting The Scene Volume 2” by Pat Smith

I was lucky enough to discover Pat Smith’s amazing wargaming blog a few years ago and also grab a copy of “Setting The Scene Volume 1” a while back. Pat’s work is just outstanding and inspirational for anyone with an interest in small scale modelling.

Volume 2 is jam packed with techniques and invaluable skills for the terrain making modeller. Accompanied by buckets of excellent photos Pat runs you through all sorts of building projects from large rocky hills, orchards, terrain mats, to roads, buildings and bridges. Even though the style of terrain is based around the Mediterranean region, it is totally applicable to anyone making terrain for wargames or railways or any small scale project in any geographical region or historical era. It is so much more rewarding to make your own terrain rather than buying it. A whole lot less expensive too!

The photographs are great and accompanied by easy to read text that make the jobs look simple to do, but give you amazing looking results. This is the kind of book that makes me want to run to the hardware store and craft store and then spend a week making new terrain! If you can still find a copy I would recommend getting one!

Sentry Models Ruined Terrace

My last building from Raventhorpe all done. Another awesome sculpt from Tony Raven. This one is a big piece, half intact and half demolished. The remaining roof and first floor is all removable for easy access of troops. I glued it onto a large MDF base and gave it the same treatment as the other ruins with plenty of smashed up bricks and MDF mini bricks. Painted with acrylics and then liberally weathered with all sorts of powders and charcoal dust. I added some flock and tiny leaves for the foliage and grass round the back.

Next time I am in the UK i will be filling my suitcase with a few more of these awesome models. Need a spare bag for 10kg of resin from Sentry Models!!! The last picture has all three of the buildings I bought together. I am excited to get them on a table and have some excellent house to house combat.

Sentry Models Ruined Building

I painted another fabulous resin building from Sentry Models I bought from Raventhorpe. Its a two storey and a one storey wrecked building. I made my own base from MDF and added heaps of extra rubble to the base to blend them in. The second storey is removable to allow a squad into the ground floor.

I used my normal cheap acrylics to paint over a spray paint undercoat of dark brown. Plenty of dirt and dust added to finish them off plus some flock and tufts.

If you do not want to build your own buildings these really are the best things since sliced bread. I am happy to mix them in with my home made stuff as they really add an extra bit of detail and realism to your table. The last photo has my first ruin and a Jagdpanther creeping around looking dangerous. I have a finished farmhouse from Sentry next up. Check out Raventhorpe on Facebook, there is a massive range. On their Facebook page there are heaps of inspirational photos of amazing looking table setups using these buildings. It’s a closed group but you can sign up.

Esci Pz.Kpfw.IV in 1/72 scale

Esci German Tank pz.kpfw.IV ausf.g 1/72 Scale Model Kit Tank NEW

I picked two more Panzer IVs on eBay just like this one. Costing less than $10 each, such good value, even if they are the kits with the nasty vinyl tracks. I am now confident I can defeat the horrible things with a good dose of super glue and patience. I needed a couple more Panzer IVs to go with my Zvezda troop that I built previously. These Esci kits still hold up nicely, you just need to give them a bit more love than more modern kits. These two I made quite a few alterations to get them up to scratch.

First up is to sort out the tricky tracks. I managed to totally snap one of the tracks trying to wrap and glue them around the running gear, leaving a missing section. My solution for both vehicles was to scratch build side skirts to cover up the top section of the tracks. This gave me free reign to use wire to connect the tracks to the top return rollers, knowing it would all be covered up by the schurtzen. I used thin plastic card and the Zvezda skirts as a template. I also needed to build turret armour using the same plastic card superglued to thicker wire so it would retain its curved shape around the turret. This worked out quite well as I basically just tried to copy the Zvezda tanks.

One of my old Esci kits had a malformed gun barrel, so i bought a nice new metal one for a few dollars and replaced it. This was a great improvement too. I also picked up a tow cable to add. I drilled some holes and glued in aerials as usual. These kits let you leave the turret open so I did that on one tank ready for my AB figures crew man.

Paint job was a black undercoat followed by a Tamiya dark yellow spray. I then hand painted the green camo which was followed by a light overspray of dark yellow again. Gloss varnish and decals is followed by a MIG dark brown wash to pick out details. I did some chipping and scratching to make it all look nice and work, using a sponge and even just sand paper to leave some marks on the paintwork. After a matt varnish i used plenty of dusty pigments for the weathered look. My AB commander was painted and added and you can see him relaxing in his hatch below.

I was happy with the end result with all my additions and they fit in nicely with the two Zvezda kits i had made previously. Overall these Esci kits are great if you can be bothered to give them a little more love and attention.


Zvezda Panzer IV Ausf H in 1/72 Scale

See the source image

Zvezda really do make some great kits in 1/72 scale. I have already made their Panther and also their Tiger. This Panzer IV is better than both of the big cats. I have built Panzer IVs from Esci, Dragon and Armourfast, but these Zvezda kits are better than any of them from all perspectives. The kits go together beautifully, have great detail, plenty of parts to keep you interested, and are decent value for money. This pair I picked up from the Ukraine via eBay at less than $15 AUD each. In my book that’s a bargain for something a lot better than a quick build kit.

After struggling for weeks with horrible tracks, these tracks are great and so easy to put together. The kit comes complete with side and turret skirts, which I chopped up a little, mainly inspired by the excellent box art. My one criticism is the commanders hatch is modelled closed with no option to open it. I added a couple of washing up brush bristle aerials just to finish the whole look off.

Painting was just a bright camo green on dark yellow plus some chipping and plenty of dirt and dust. I also built two Esci old Panzer IVs at the same time which I will post up next. They were a whole different ball game and gave me far more of a challenge to get up to scratch. If you need Panzer IVs for your German army run out and grab some of these!


Sentry Models Ruined House

So after quite a long time searching for Sentry Models fantastic buildings I stumbled upon them on a Facebook page. Very excited I ordered a few from Tony Raven who makes these great resin models. Not cheap to get them all the way to Australia, but to be honest they are so good, I really didn’t care about the postage. I picked up a ruined house, a big ruined terrace and another two storey ruin. Sculpting is just beautiful and the detail much better than anything I have managed to scratch build.

My first effort is the single ruin. I glued to an MDF base and then added a heap more of my own rubble to blend it in. This included some bought bricks and some home made rubble carefully crafted from smashing up house bricks with a ten pound hammer. A good coating of PVA glue and then a black and grey primer spray coat on top.

Painting was done using cheap acrylics and a couple of washes and highlights. I did also use some weathering pigments to blend things into the base. Oh and some charcoal for the charred bits here and there. Last touch was the flocking and a few tufty bits. I was very happy with how it turned out and cannot wait to get cracking on the others. I would recommend getting onto Facebook and finding Sentry/Ravensthorpe miniatures ASAP and picking up some of these for your table top.

I still haven’t managed to play a game in 2019, I guess I am just more of a modelling and painting nut than anything else……….