Airfix Willys Jeep and S-Model Willys Jeep in 1/72 scale

The Willys Jeep is an absolute essential to any Allied army group, and let’s face it they are one of the coolest vehicles of World War Two. I just want to keep on buying and building more and more jeeps! You can never have enough jeeps in my opinion, great for loading up mortars, MG Teams and officers who don’t want to get their boots dirty!

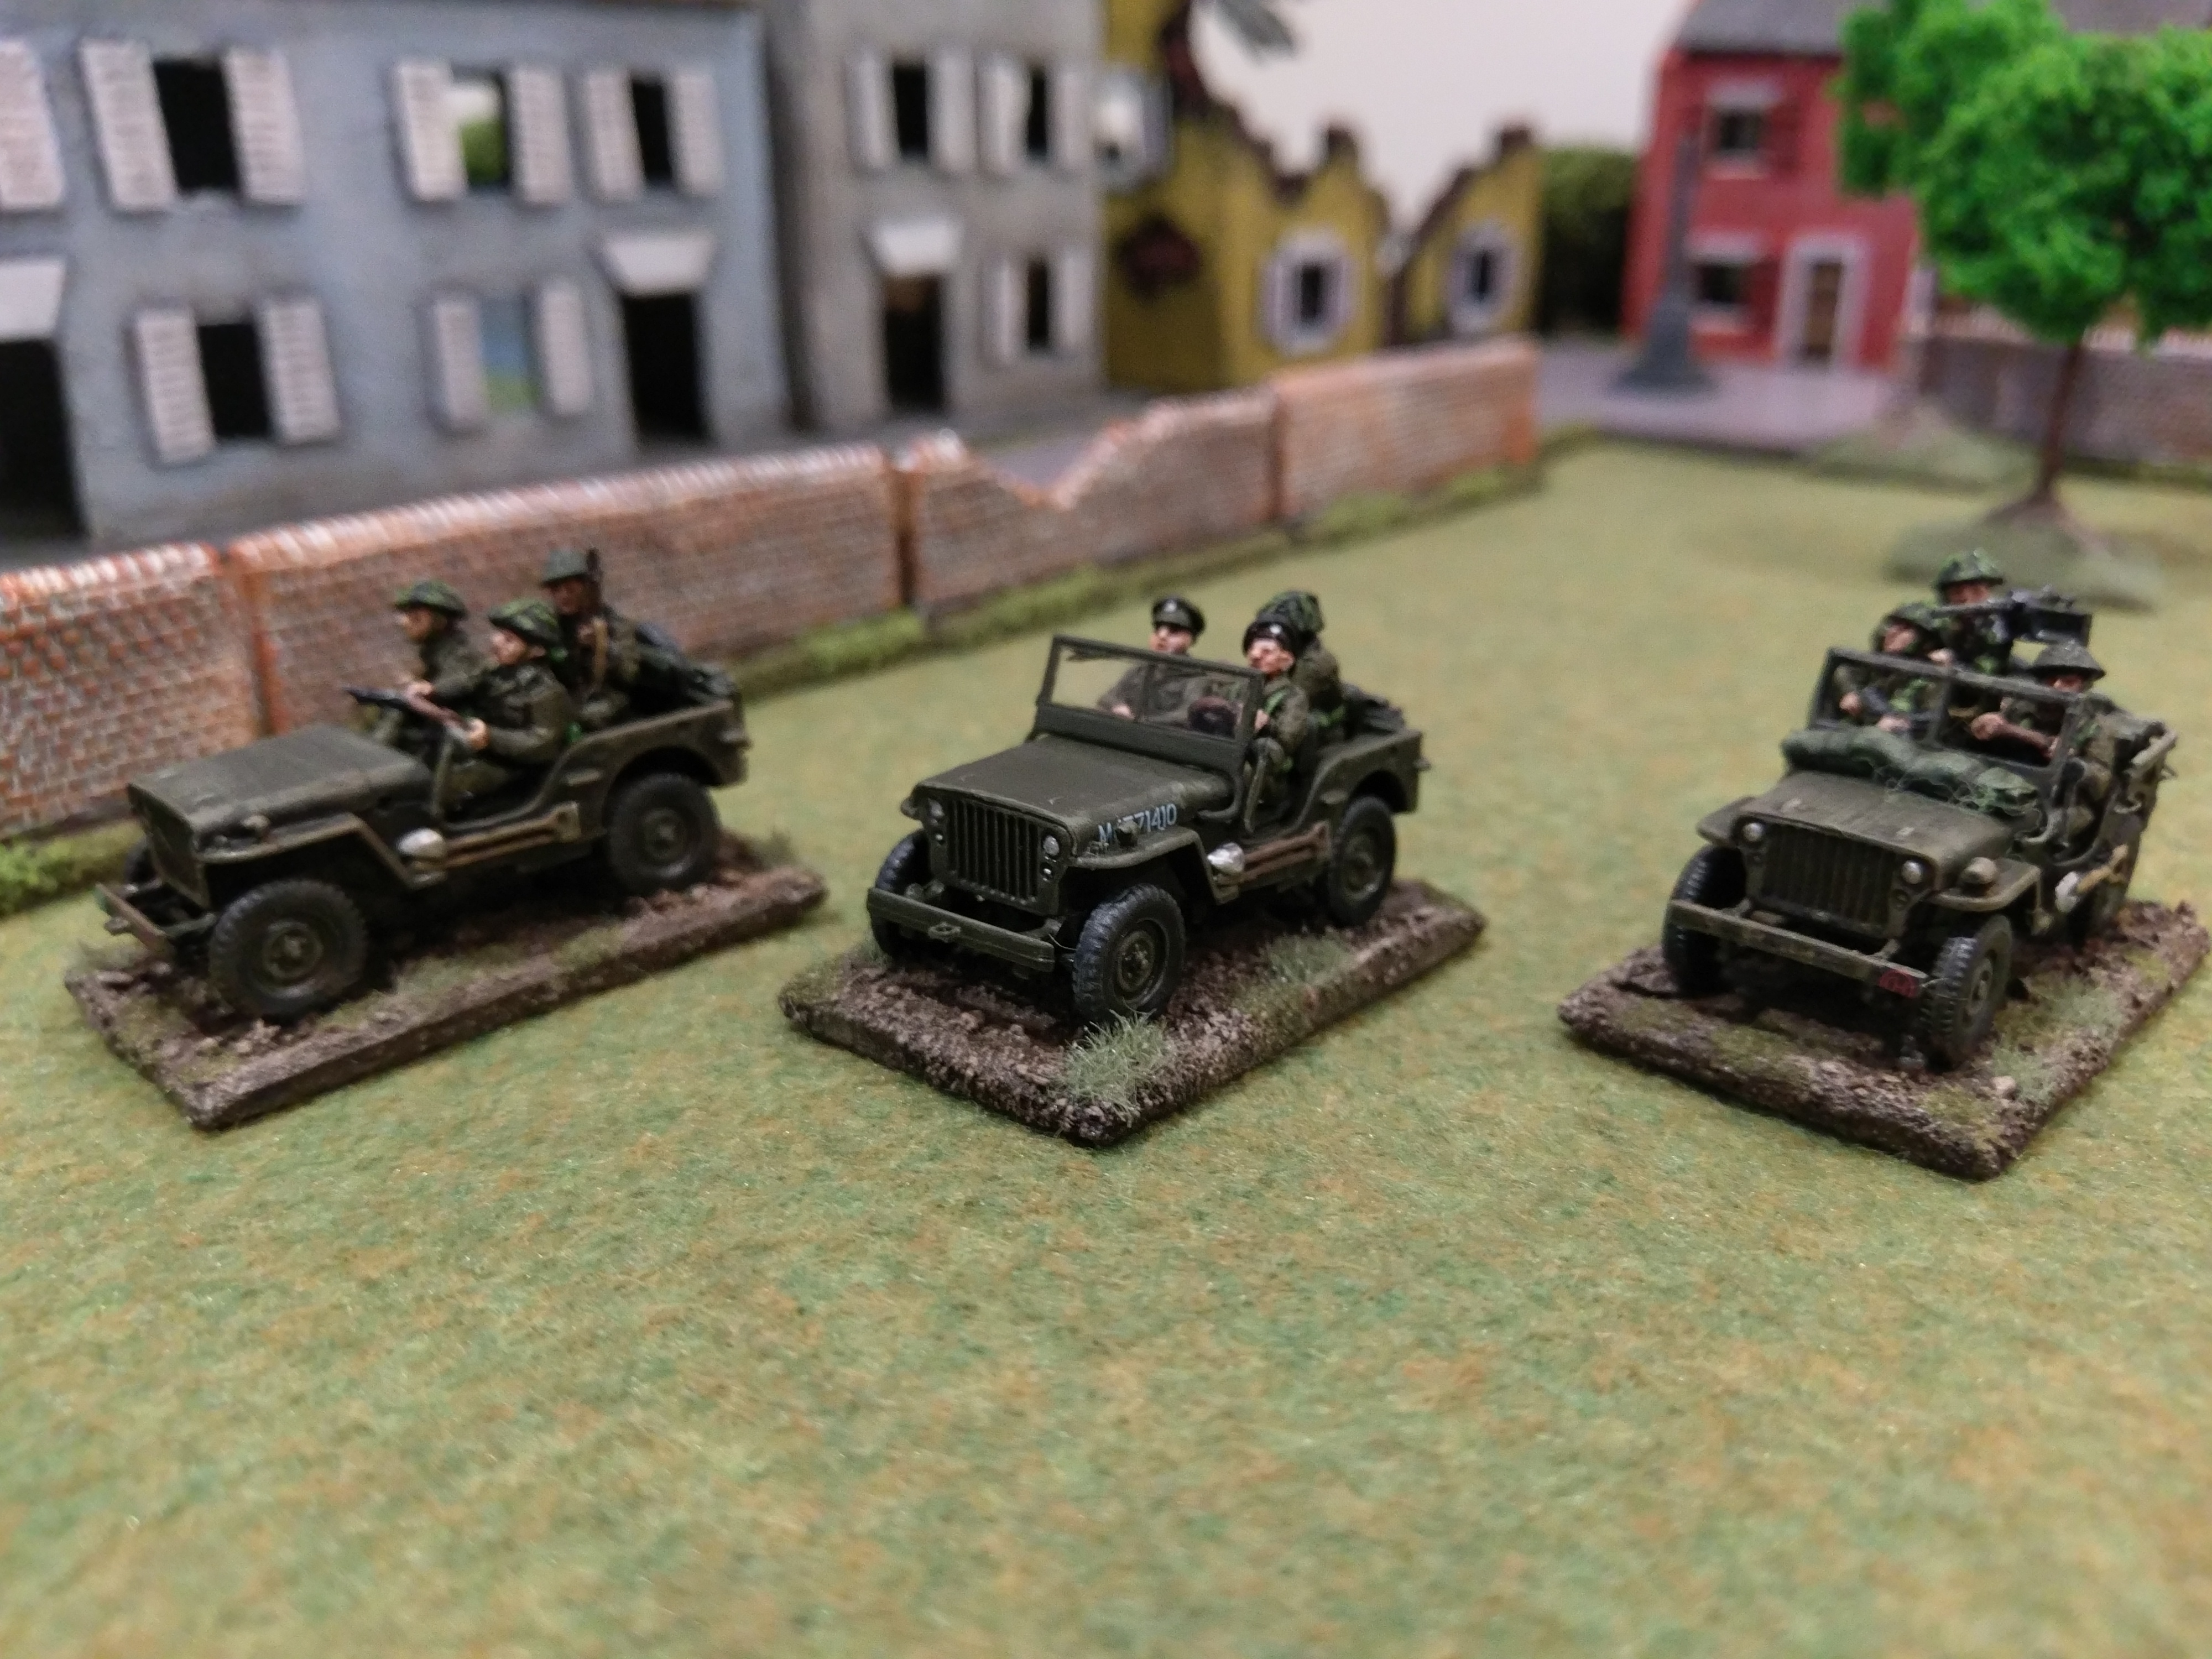
The two models i first got my grubby mitts on were from S-Models. Two kits in a box and good value for what you get. You can build your jeeps with a canvas roof or without and a 50 calibre MG instead. The detail is pretty amazing but that does mean the model is quite a fiddly prospect. On both kits i managed to destroy the shovel before even getting it off the sprue. I also managed to snap at least one axle just during removal. The kit also comes with some photo etched parts which get really tiny. It’s worth the effort but you need to bring your tweezers and patience to get it done. The S-Model jeep is excellent and i would highly recommend getting a few. In picture two the S-Model is on the far right.

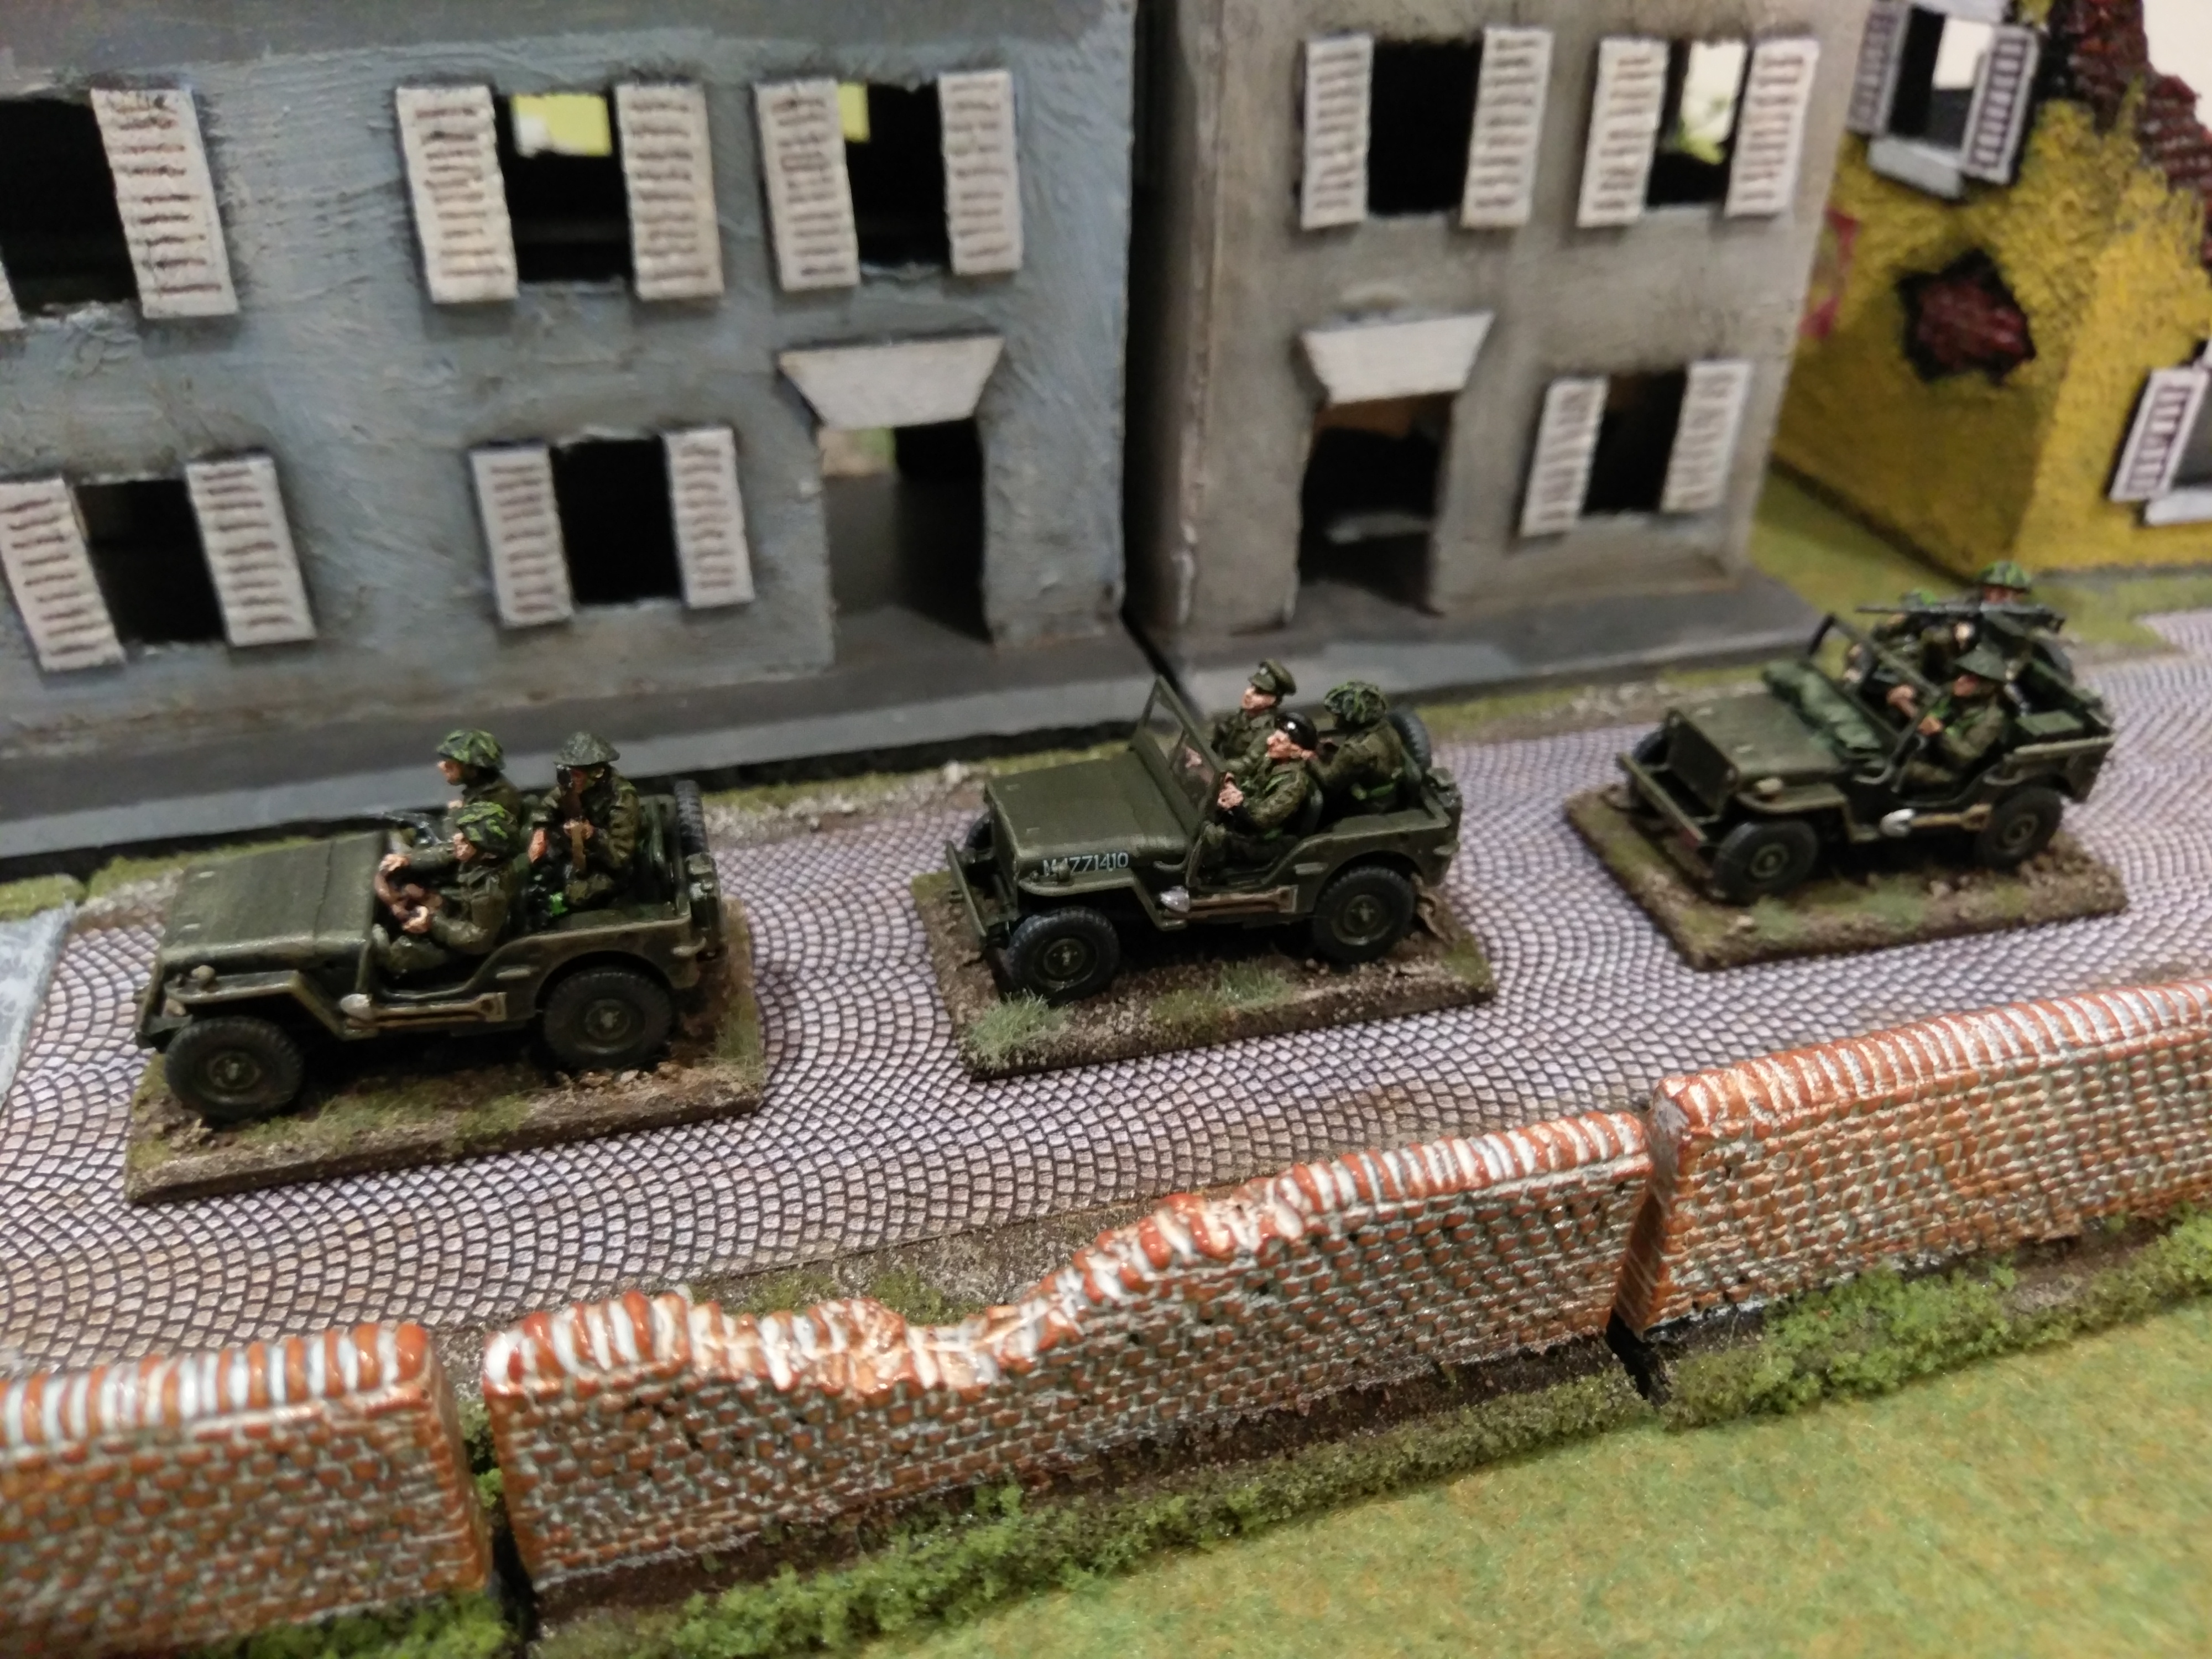
I also picked up two Willys Jeeps from Airfix and was just as impressed. Less detailed and simpler to put together, compared to the S-Model kits, the end result was just as good. If you prefer an easier kit with less fragile parts then the Airfix kit is for you. The box includes some extras with a pack howitzer and a trailer, which are an added bonus! The Airfix kit comes with a transparent front windscreen and frame, one of which i managed to destroy in an attempt to mask it off while spray painting. I just left it off the completed jeep and i think it just adds to the battle torn look.

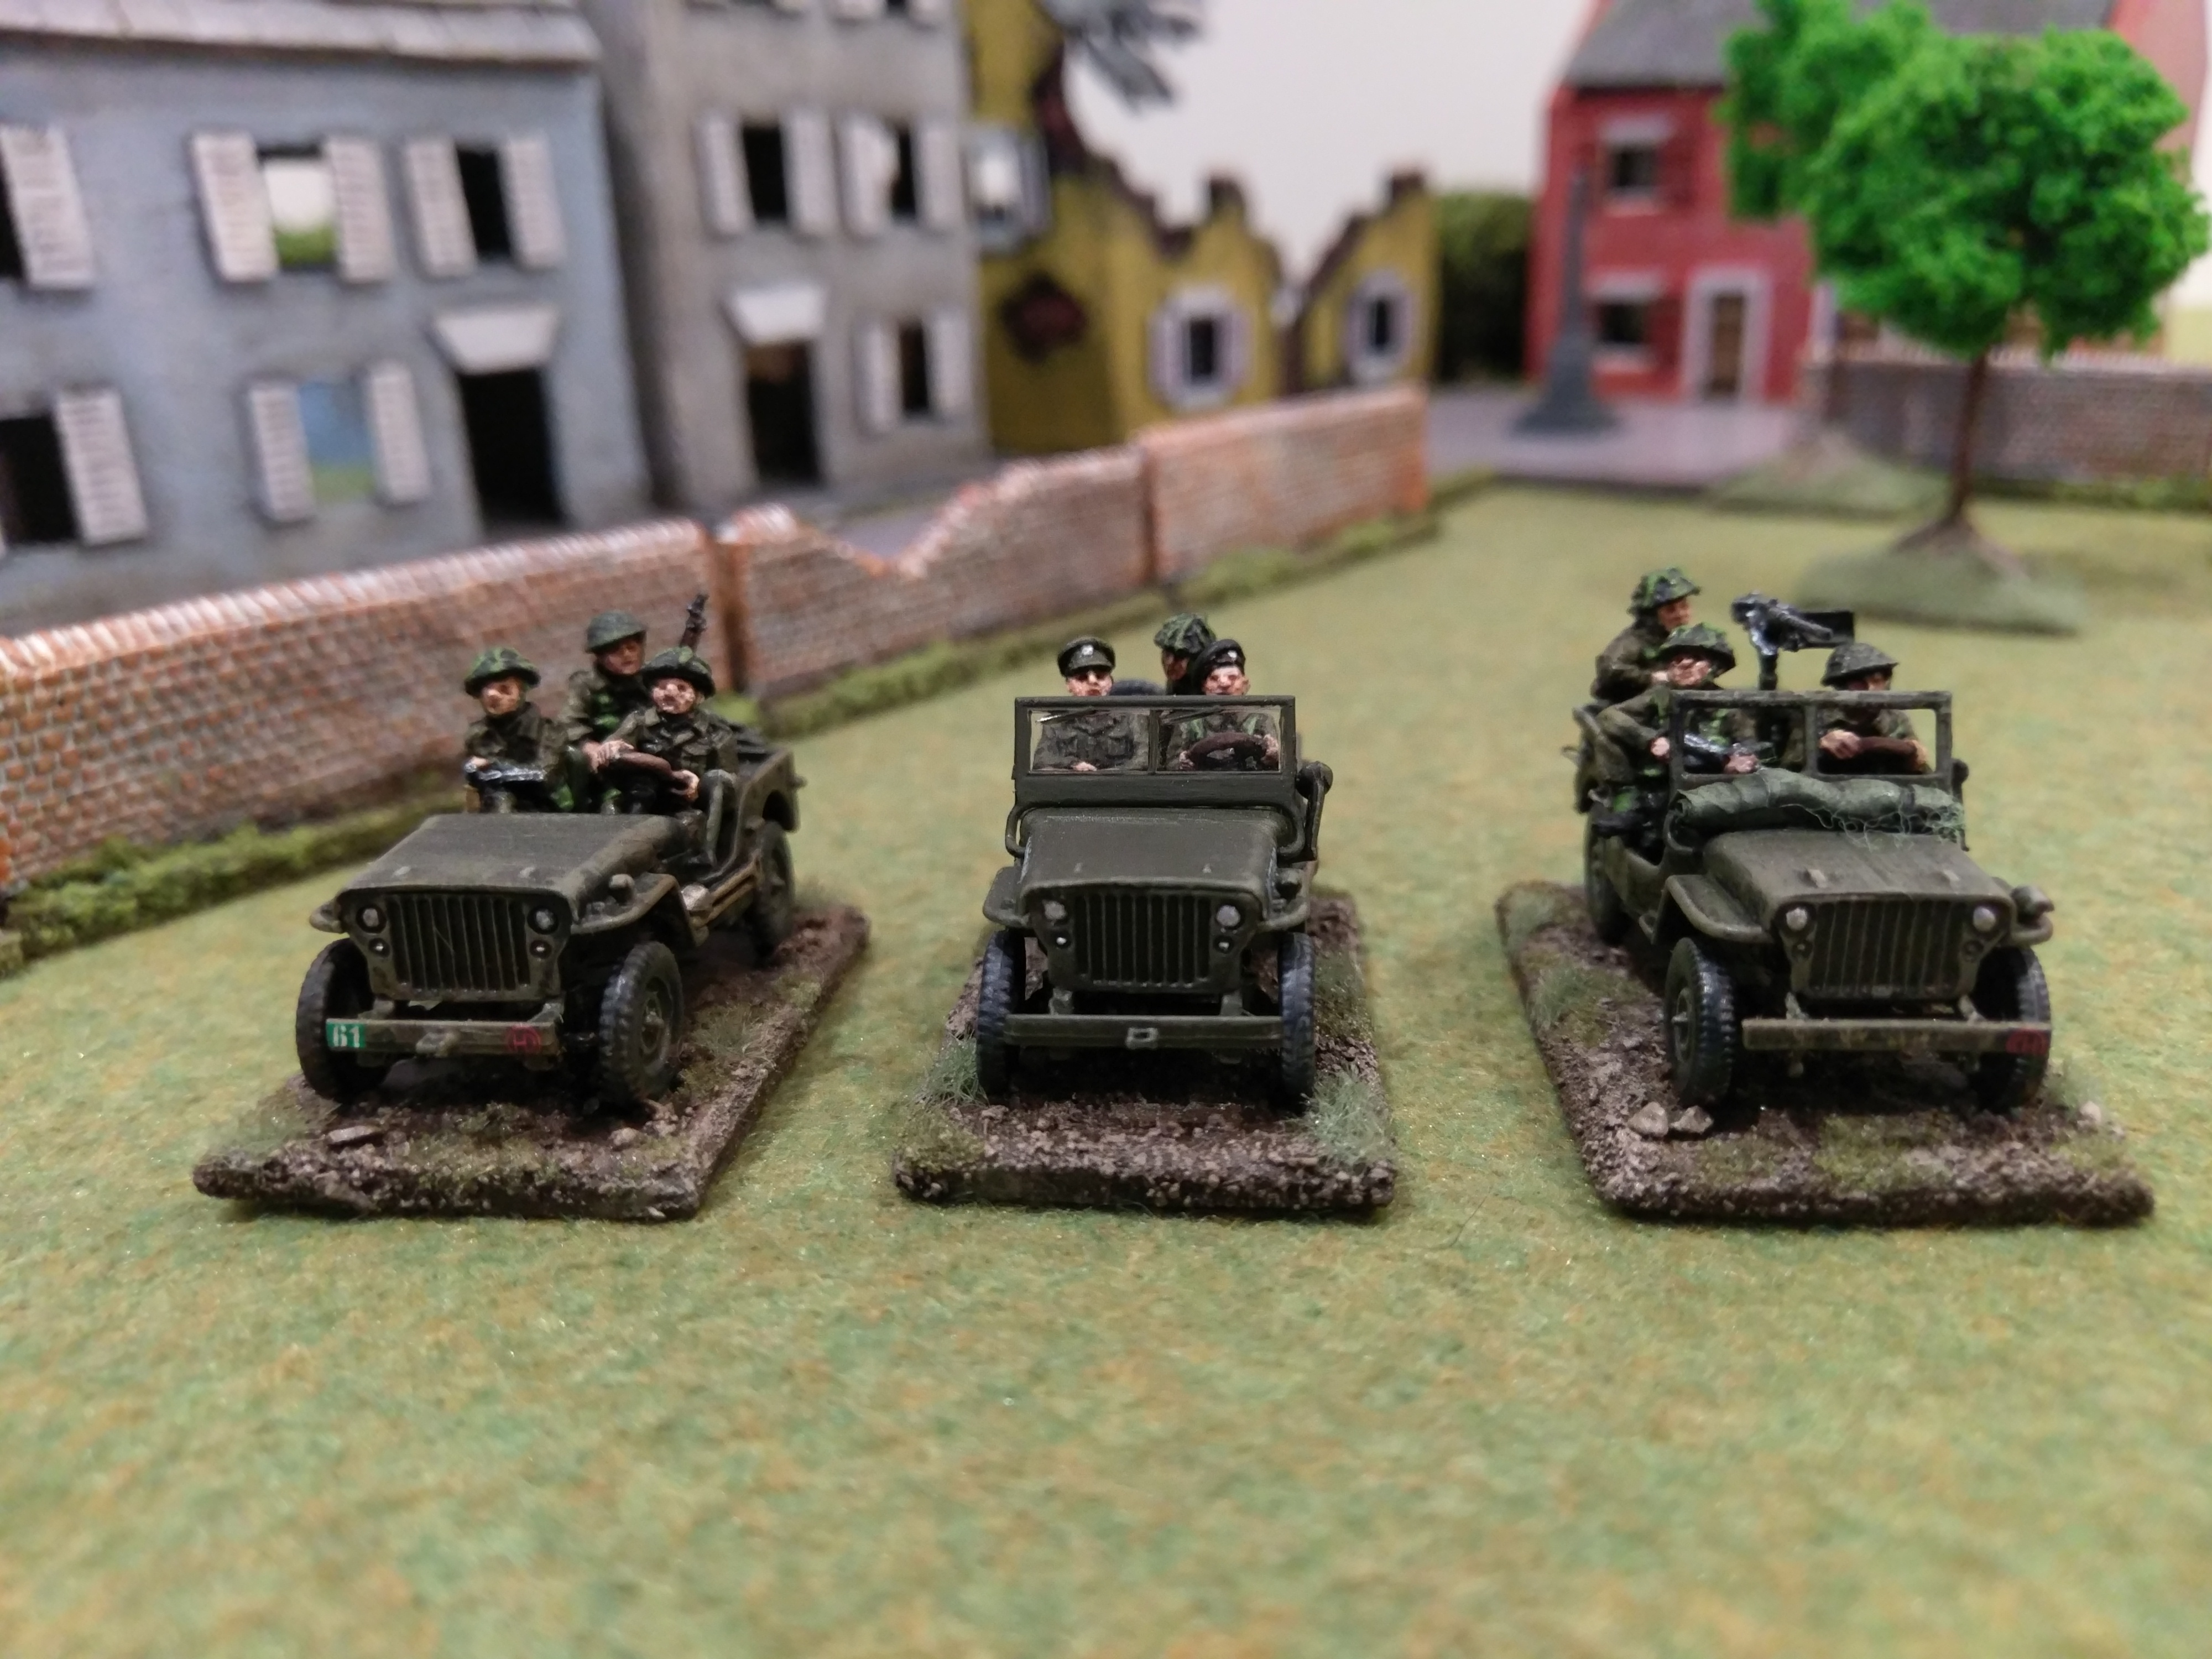
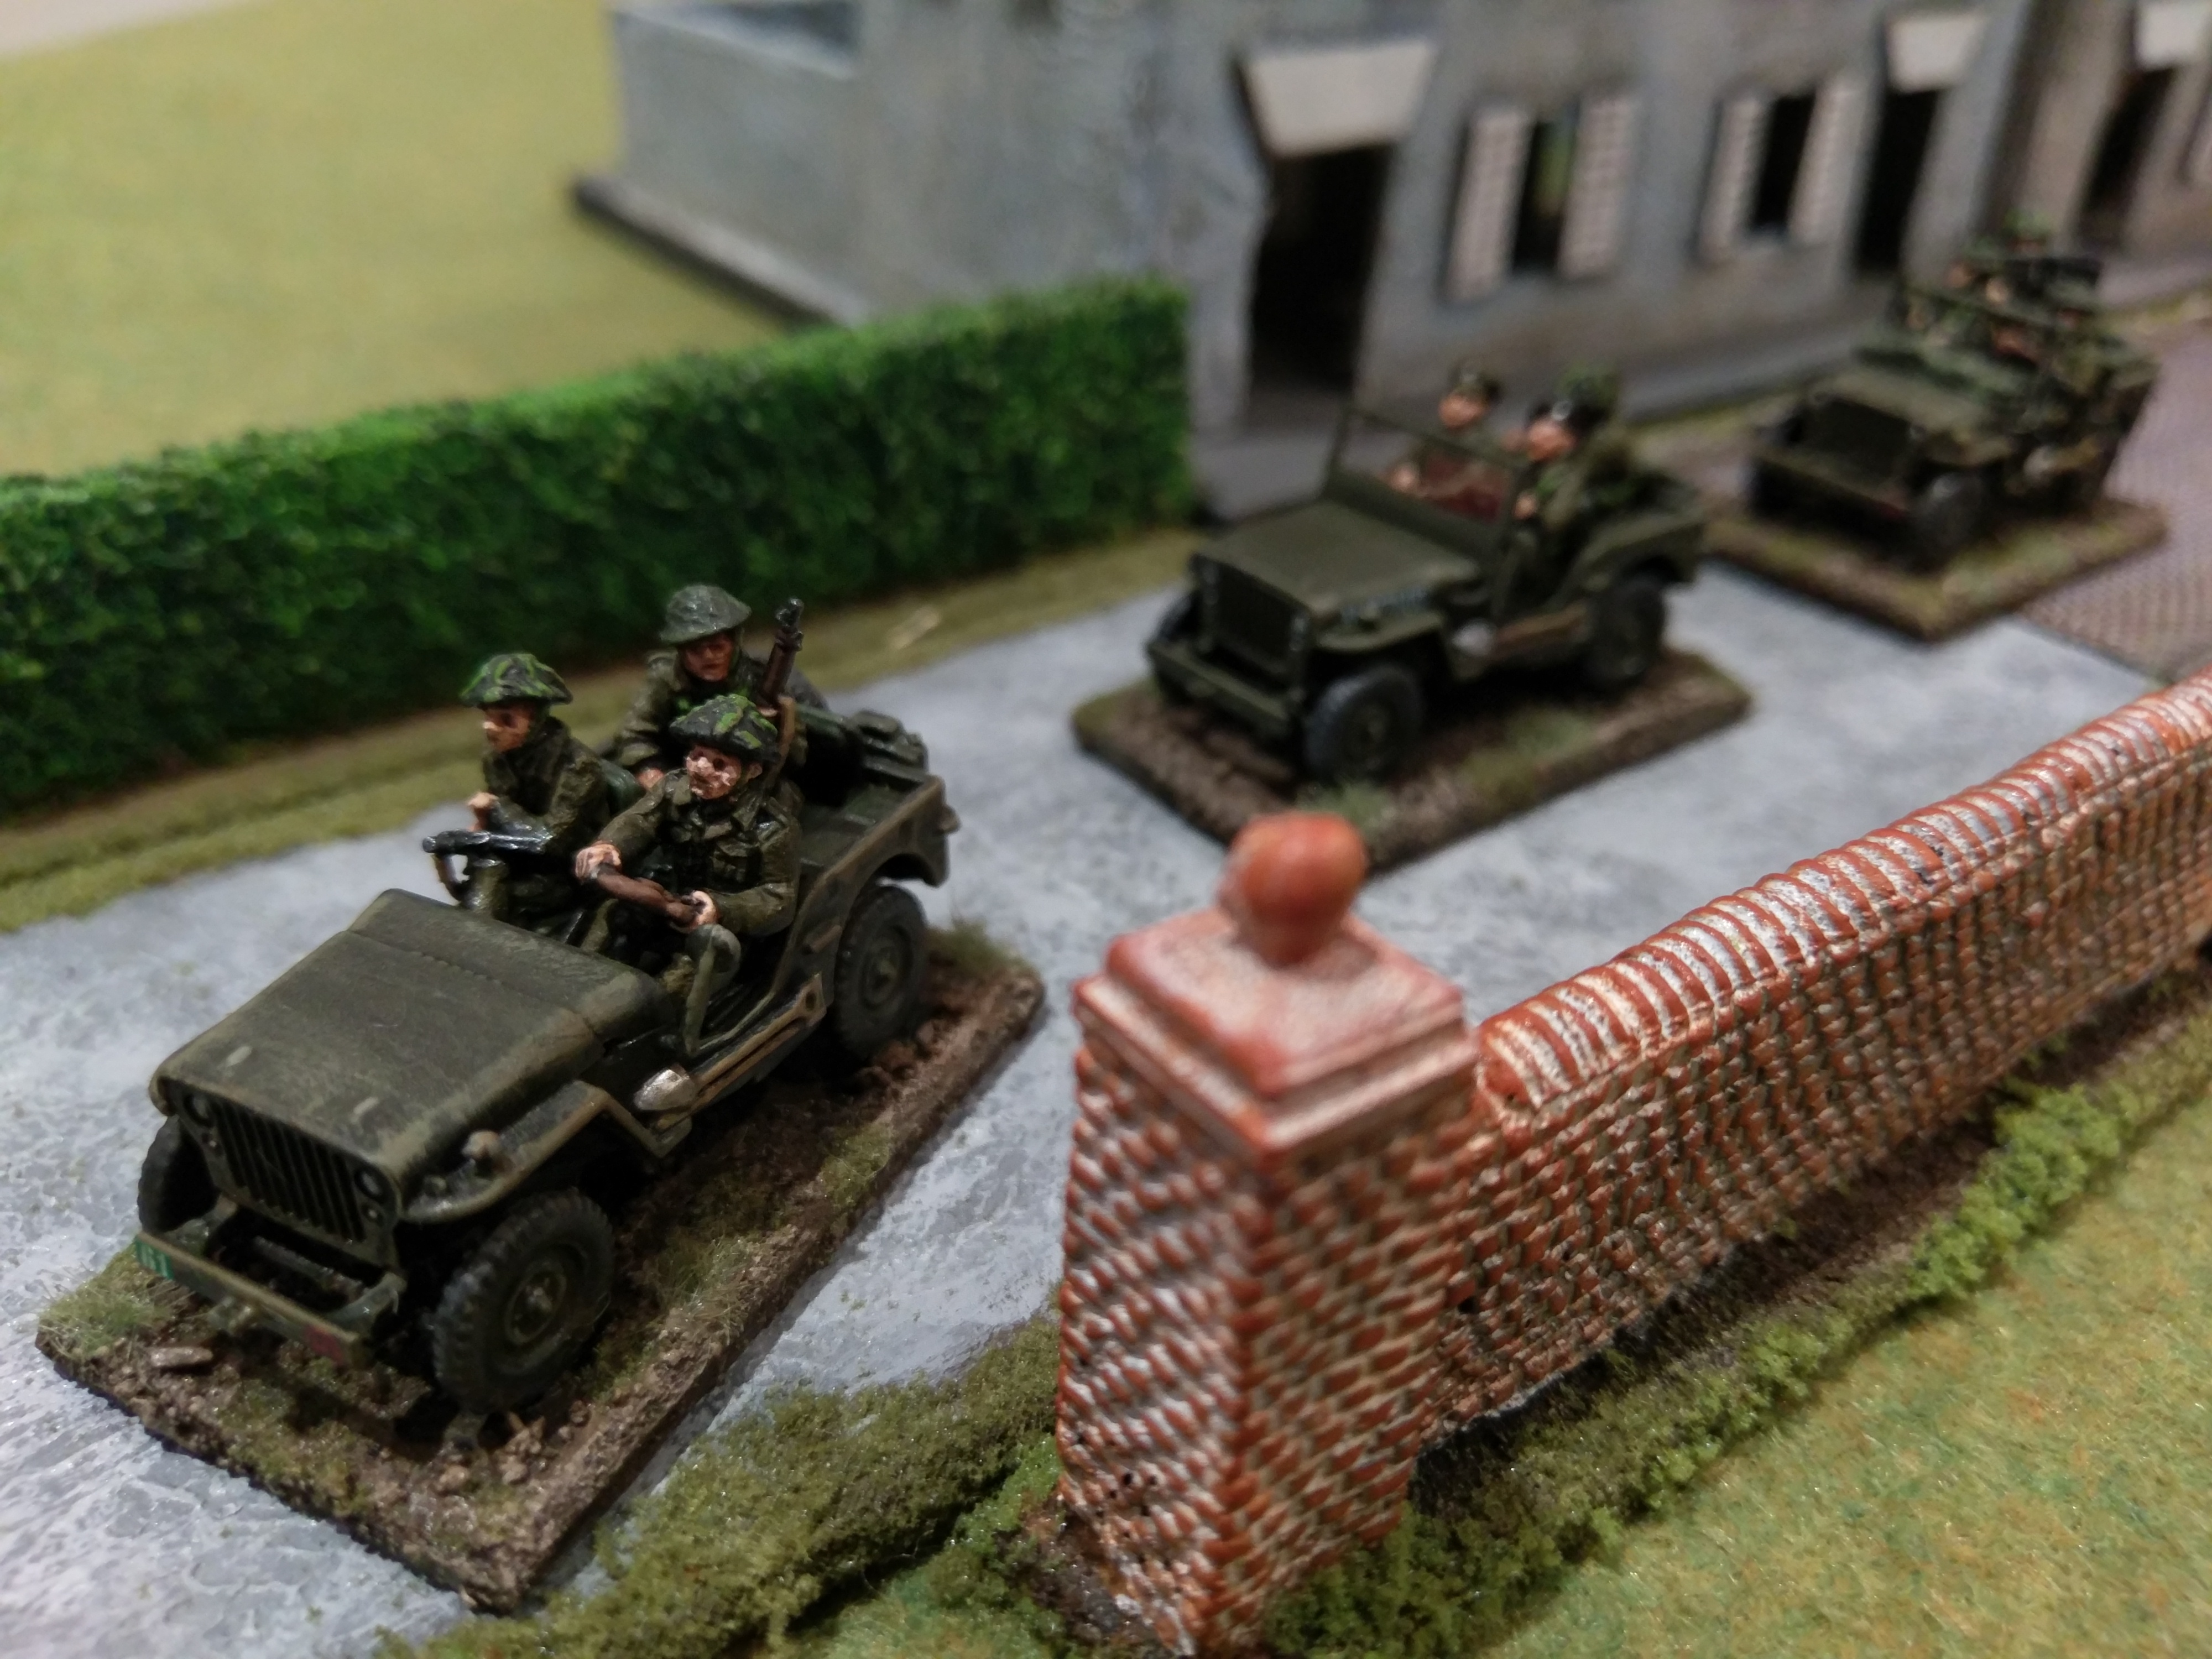
A few extras were added to my vehicles including some stowage from various sources like Value Gear and SHQ. I needed some British crew and drivers and as usual AB Figures have the best jeep riders you can get! A great set includes drivers, officers and various poses for passengers.

Photos below, convoy on the move and some parked poses shots!

IMAG0029 IMAG0028 IMAG0027 IMAG0030 IMAG0031-1 IMAG0034 IMAG0032

Trumpeter Stug IV in 1/72 scale

Time to look at another cracking little kit from Trumpeter, who are fast becoming one of my favourite manufacturers. This time it is their Stug IV. Previously i had made the Dragon Models version of this cool tank and have included some photos of both of them together below as a comparison. Cost wise Trumpeter kits are approximately half the price of Dragon kits, but definitely not half the quality. This Stug IV is no exception.

The simple nature of the tank design, with no turret, means the kit is also quite simple. The most complicated and time consuming part is putting the wheels and running gear together and attaching them to the lower hull. The upper hull and armament are pretty straight forward but still have plenty of detail. The tracks i gave a good stretch before painting them and attaching them after the tank was completed and painted. Everything fitted together very nicely and the kit was smooth and painless to make. Just how i like it. To add some interest i put on a heap of boxes and other kit on the back of the tank. I have seen various photos of Stugs carrying all sorts of stowage, so i used some extras i had from Value Gear. If you haven’t tried out some of their stowage packs i can highly recommend them!

I finished the whole thing off with a dark green camouflage scheme to match my other Stug IV. Pictures follow, some individual shots of the Trumpeter kit and also some with his Dragon counterpart. They make a good team!

Roden Opel Blitz

The backbone of the German army’s transport and logistics was the Opel Blitz. For 20mm plastic modellers and wargamers i don’t think we have a lot of choice out there for variations of this super popular truck. I tried the fast build kits from Pegasus, which are good, but lack much detail, and have yet to try the offerings from Italeri or Fujimi. So i turned to my first encounter with a plastic kit from Roden. The box art is great, so i had to include a photo of that to start with! Its also a big box with one big grey sprue and a couple of small ones.

IMAG0005

This kit was really fun to put together. It all starts with a tiny engine you have to build complete with fan and radiator. Unfortunately this part is all covered up by the cab when assembled, but cool to build nonetheless. The chassis, engine, axles and wheels all go together, followed by the cab and the rear. You can build versions with a covered back, as pictured on the front of the box, or a version with an open roof. I opted for the open version as i am planning to fill it up with some SS troops from AB figures hitching a ride. I did paint a couple of drivers, again from AB, who are happily sitting in the cab.

The level of detail on the outside of the truck is just excellent with wing mirrors, headlights, pioneer tools etc. Roden also give you clear plastic for windows if you want to use them. I managed  to balls up my cab placement too far back on the chassis and had to mess around a bit to fix it up. Based on MDF, textured and flocked as usual. This was a really nice kit to build and much better than other Opel Blitz models i have made so far in this scale. Check out my photos (with a new camera phone which is much better than my old one it seems).


More Panther Tanks from The Plastic Soldier Company

I built and painted the other two Panther tanks i had in my warehouse from The Plastic Soldier Company. Great little models, they go together in around 15 minutes. Nice detail and very solid kits. This time i used one of the commander figures they supply and he came up really well. I did some light pink braiding on his uniform which adds a bit of colour. I tried out some new camouflage schemes, one a straight olive green and the other a three colour scheme. Camouflage schemes for reference are abundant on the net, and i usually find a nice one as a starting point. Once you get painting its pretty easy to continue the pattern across the whole vehicle. I used some decals from my spares plus some Sergeants Mess spare track and spare wheel just to add some variety.

Photos of the two cats below! Only a quick blog as i have written about these guys before.

Ruined Buildings Part 3

So finally after all that construction it’s on to the paint job! Everything was painted a black acrylic as a base coat or primer. That gives the whole thing a good starting point and makes sure all the shadows are emphasized. I painted the undamaged rendered walls first, one a sand colour and one a pale blue. The insides were all painted a dark grey as more than likely they would have burnt in the fires/explosions that must have occurred. Previously i have used wrapping paper with a very small pattern on it as wallpaper. You could easily find a pattern on line and then print it out to a small scale to use as wallpaper for some of the internal walls.

The rubble and debris was also painted dark grey and then dry brushed with lighter shades to a very light grey. The exposed brick was painted a mix of bright red and a terracotta red. I also painted random bits of debris with the same red as many bricks would have fallen around the house. To illustrate the mortar i used a fine brush and a light grey to draw thin lines in between the detail on the exposed brick. The bits of wood on the floor, the roof beams and the internal floors were all painted a dark brown. I left plenty of black on the roof beams to suggest the charred nature of the remains. All the window lintels and shutters were painted white, and needed a couple of coats to get them right. I just used a black biro to draw on the shutters, much easier than a paint brush.

The roof tiles were painted grey and then randomly painted with lighter greys to mix them up a bit. I left plenty of black areas near to blast holes. Finally i lightly brushed black around all the damaged bits to show the extra effects of smoke. To add that extra bit of detail i found some cool French signs on the internet, printed them out and stuck them on the buildings with a lot of PVA glue so they look painted on. A bit of green flock on the base and hey presto the finished ruins.

See my photos below including some British units just nosing around in the smoky ruins! Over and out Colonel Mustard.


Ruined Buildings Part 2

I have continued working on my ruined buildings, and have decided to split the process into three blogs as otherwise it would be a bit heavy on the pictures. However, I did want to detail each part of the construction, so here goes!

To create the piles of debris inside and outside the ruins i first glued lumps of modelling clay at positions on the base next to the walls. I did this both on the interior and exterior in a random way, still leaving decent areas of the interior floor bare. I then covered these raised areas in PVA glue and sprinkled a decent amount of dirt/gravel from my front pathway on top. The stuff out the front of our house is perfect for producing random debris. You can see the construction taking shape below.

Next up i need to add a texture or render effect on the walls to get rid of the smooth finish of the foam board. I do this by mixing a fine sand (pinched from the play ground around the corner) with a paint thickening medium i found in my art box. You could do the same with sand and PVA glue mixed up. I then paint a liberal layer of the stuff onto all the exposed walls, making sure to stay away from the exposed brickwork and the window frames, and let it dry. This makes an excellent texture to paint on the outside of the houses.

To add a bit more character i needed to make more rubble and debris for around the place. The rubble i made with more modelling clay by rolling out a large flat piece to about 1-2mm thick and when it was half dry cut it into small cubes. I made a big pile of bricks and rubble this way. I also chopped up bits of balsa wood into broken beams and bits of roof. This extra debris was then glued on top of the original piles, and new small piles were also added just using the new rubble.

The whole building was then painted with black acrylic. Be careful not to use a cheap spray paint on foamboard as it can dissolve the inner foam part, and therefore would destroy all your hard work carving the brickwork. Last but not least i made a framework for the roof sections out of balsa wood and roof tiles out of more modelling clay. The damaged removable first floor sections were also made with balsa wood. I just drew floorboards onto the balsa wood using a biro which creates a decent paintable effect. So now all the bits are made all that is if left is to paint and construct. We will see the end result in Part 3!

20160430_074755


Ruined Buildings Part 1

I wanted to make some more ruined and battle damaged buildings for my table top, and thought i would document the process with the help of Colonel Mustard.

First up i drew up some rough plans and designs. There are plenty of places to get inspiration, the internet being the most obvious. I settled on making a house that has its centre completely blown out and a half flattened, heavily damaged cottage. I use 40mm per storey as my basic measurement (although in my drawings i did change to 35mm but then changed my mind back). Doors are 15mm x 30mm tall and windows 20mm square. I sketch out the basic plan and measurements as you can see below.

20160422_12370720160422_123841

For the base i use a 15mm border around the bottom of the building. In this case i only put a border around the front and back as i wanted to be able to place the ruins adjacent to each other with no gap to form a ruined terrace. My next step is to cut bases out of 3mm MDF, making sure you calculate the correct width and length of your building plus any border required. I then draw my building design onto 5mm foamboard. Most houses end up as four pieces as they are no more complicated than a box. I guess this is why i object to paying through the nose for purchased buildings as they are little more than an MDF or plastic or resin box that is decorated! I can do that for less than $30 per house.

Once you have accurately drawn your building cut it out carefully using a sharp knife. Try and keep the knife perpendicular so you cut straight through the foam and don’t leave any wonky angles. Cut out all the window and door frames too.

20160422_123751

I then cut away some of the card covering on the foamboard where the building render has been damaged. You can draw guidelines around some of the damaged walls and then cut through the card outer layer. Slide your knife under the card layer and peel if off carefully. Then with a ballpoint pen draw on exposed brickwork. When you press on the foam core it creates a texture which looks really good. Then its glue your box together on the base  with PVA glue and leave to dry.

Then its a question of cutting out 20mm x 5mm sections of balsa wood and gluing them into the windows as frames. i also add 20mm x 5mm balsa wood as window mantels and lintels. Above the doors i also put a 15mm x 5mm lintel. On the inside walls i add balsa wood beams halfway up the building, which indicate where the floor would have been, or if you do put some floor in they can act as supports.

At this stage our ruins look like this. In my next post we will do the building texture, rubble and debris, the roof and finally painting!


Normandy Bocage Part 2

Following on from my blog a few weeks ago i recently finished more bocage sections using the same techniques as before. MDF bases with coconut fibre foliage flocked heavily with a bright green. Some sections include trees sticking out, which is apparently how these hedges evolved. Some sources put bocage up to 5m in height so with a scale of 10mm to 1m I made these sections up to 50mm tall. They definitely look the part and will block line of sight nicely and make my Normandy battlefields look more and more realistic.

I laid them all out with a home made ruined building and a few German armoured vehicles cruising through. Check out my photos below!

Hasegawa Sd.Kfz 251/1 Ausf. D Halftrack

Panzergrenadiers always need more half tracks to get them around the battlefield. In 1/72 scale there are plenty of options to choose from. After trying the Plastic Soldier Company fast build half track kits i wanted something that gave me a bit more of a challenge in the modelling department. The result was the purchase of a couple of these Sd/Kfz 251’s from Hasegawa at around AUD $10 each from my favourite Japanese hobby shop. In my experience Hasegawa kits are nice models, and provide a good mix of decent detail and an interesting build. This one is no exception.

You build the running gear first with all the individual wheels and rubber tracks. I have read plenty of complaints about these tracks but i think they are fine once you paint them. The running gear is then attached to the lower hull. I kept the upper hull unattached until after painting so i could paint the interior easily. No driver is supplied so i cut down a Plastic Soldier Company passenger i had spare and fitted him in. He lost most of his legs to squeeze in, but you can barely see the back of his head anyway. I also had some spare stowage and jerry cans (one of which i realise i put on backwards oops) which went on the armoured sides of the vehicle.

Paint job was the usual Tamiya Dark Yellow Dunkelb and a hand painted dark green camouflage scheme. Good decals are provided with a whole selection of numbers. You can never have enough transport vehicles and this Hasegawa kit is great value and definitely worth building the next time your grenadiers hit the roads and fields of Normandy.

Normandy Bocage with Coir Coconut Fibre

After further internet research i made some new bits of terrain for my Normandy battlefields. Passing through my local Bunnings Warehouse i stumbled upon a big bag of coir coconut fibre for about $6.00. Having read a few blogs about making bocage out of this stuff i thought i would give it a go! Normally this fibre is used for lining hanging baskets and gardening things like that, but for me it was going to become a 5 metre wild hedge on top of a bank/ditch. I think i read an excellent blog called “Little Tin Men” where the idea was illustrated so well.

I cut strips of 3mm MDF 40mm x 150mm and then glued strips of old cut up expanded rubber camping mats (about 6mm thick mats) and glued them on top of the MDF. When they were dry i would carve the sides to be sloping to represent the banks of the bocage. You could use any kind of foam or polystyrene for this too. I then coated each one in acrylic gap filler to smooth out the whole thing. When that was dry a liberal coating of PVA glue followed, which was covered in fine dirt/sand/gravel from my front yard. Regular sand would do the same job. Small twigs and sticks were then jabbed into the foam to give the hedge some structure. I put about 4 twigs into each section. You can also use bigger twigs that turn into trees sticking out of the hedge.

It was then a question of dipping sections of coir fibre into PVA glue and adding them onto the bocage sections building it up to 30-40mm high. This gets messy! Do not worry about being neat and tidy just get the fibre onto the base! I am going to try a hot glue gun next time as i have read good things about this gluing weapon. Once the PVA and coir is dry i attacked the hedges with a pair of scissors to tidy them up. Next a full spray of cheap dark brown paint covered the whole construction.

For the foliage I used a nice coarse bright green flock, but you can use whatever you have kicking around. I think multiple greens work nicely. Paint or spray on diluted PVA glue (50/50) to the hedges and then sprinkle on your flock. Don’t be stingy just chuck it all over the place. Shake off the excess and leave to dry. I did this process twice with different types of flock. Finally i mixed up a 50/50 PVA/Water mix in a spray bottle and sprayed the whole construction again for extra durability.

Final touches were to paint the base an earthy brown and then dry brush lighter brown to pick out the texture and light grey to pick out any bigger rocks. The base was then also flocked with a grassy green to finish it off! The same process i used for some trees on a base, which you can also see below.  I reckon this is the cheapest and most effective way of making big sections of bocage for all your Normandy battle fields out there!