I wanted to create some extra foliage branches to cover up my German armour. It was a common practice where tank crews would cut branches and drape them and tie them onto their armoured vehicles. Using small bits of lichen I just dipped them into some PVA and then flocked using various different greens. A spray with some varnish kept the whole thing together. Rather than glue these onto my vehicle (in this case my latest Jagdpanzer) I just rested them on there so I can choose to camo up or not! I think they came out quite well and will definitely keep the assault gun under cover behind some tasty bocage. I made plenty of these extra foliage branches so I can use them on whole units. My troop of Panzer IVs were just completed and will be blogged next up with and without extra camo.
1/72 Scale
1/72 Scale Modelling
Hasegawa 1/72 Sd.kfz 162 Jagdpanzer IV L/48 Late Version
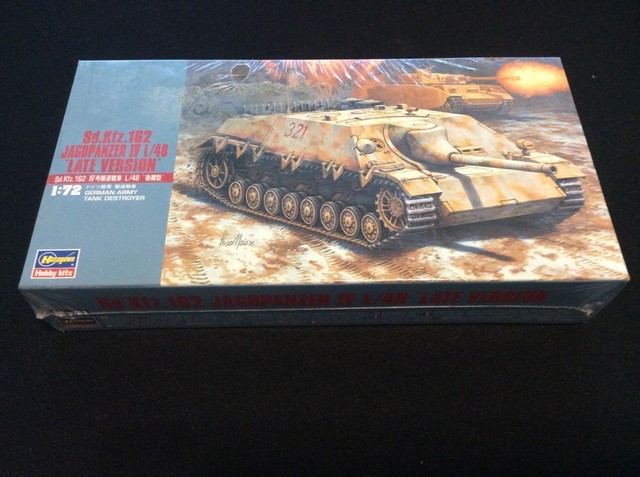
Continuing my German armour building plans i got my hands on this Jagdpanzer kit from Hasegawa. Again the best Japanese on line hobby shop have this at a great price compared to everywhere else, especially for those of us in Australia! Hasegawa kits just keep surprising me, each new one I build, the more I like them!

The Jagdpanzer is another German tank destroyer that i am not sure was used too much in Normandy. I am guessing it was used more on the Eastern front, but i could be wrong. Anyway i wanted to build one and i am sure it will be happy to fit in with my Stugs and Hetzers. The kit comes in the usual Hasegawa grey plastic which is really easy to cut and glue. Wheels are simple and go straight onto the bottom hull. Eight along the bottom and then four return rollers on the top. You need to make sure you keep the lower hull and upper hull separate before painting them and after painting the tracks. The tracks need to go onto the lower hull before gluing the two together otherwise it will be very tricky to get them on. The tracks are the one piece rubbery type so give them a good stretch to make sure they fit OK without straining on the drive and sprocket wheels. You do not want to snap anything off……
The upper hull is pretty straightforward but it does not miss any detail. You have to open a couple of holes and also fill a couple of others. On the front of the hull there is one bigger area to fill which i made a total pigs ear of. I made such a mess with my filler and sanding i had to cover it up with extra track. Great way to cover my mistakes! I also added some more track along the front and the usual washing up brush plastic bristle aerial. If you haven’t tried that yet i suggest getting a $2 washing up brush from Woolworths with plastic bristles. Hey presto, 200 plastic aerials! I was super impressed with the detail and the challenge of this kit. Hatches can be open or closed, and I have a commander in the painting queue soon to be added.
Painting started with an undercoat of matt black followed by dunkelb dark yellow. Then i did a red brown and bright green camo pattern. Gloss varnish, followed by decals and dark brown wash and finally some chipping using a sponge. Its the usual process but i was happy how it all came out. I had also based the tank on 3mm mdf as usual. After a coat or three of matt varnish i used mud, dirt and various weathering powders to create the final dirty finish. The base was completed with tufts and flock and a little static grass.
This kit is excellent and a great balance between a challenging build without being frustrating. For a wargamer i do not think you will find a better version of this tank. I also made some camouflage foliage for the crew to further hide their vehicle so I will detail them in my next post.
Hasegawa Tiger Tank 1/72 scale
My Tiger tank regiment is expanding. I love making German armour, especially the big cats. I have made the Revell and Zvezda Tigers, but this time i tried out the Hasegawa kit. You can buy this kit for 810 yen direct from a Tokyo hobby shop which works out at around $10 Australian, so its a pretty good deal. They have the whole Hasegawa range all at between 810 – 1100 yen, so i am sure i will end up buying all the kits at some point. The Hasegawa Puma Armoured car is a particularly nice kit.
The kit comes in Hasegawa’s usual grey plastic which is really easy to work with. I had no issues with any of the kit and it was quite simple to put together. There are few holes to fill so you need some kind of modellers putty or something to fill and then a fine sand paper to finish them off. The shovel on the front of the tank is also meant to be removed but i really didn’t see the point. I had a bit of trouble lining up the two halves of the turret so be careful with that step as mine came out a little wonky. Hatches can be modelled open or closed which is always good news as you can choose to crew or not to crew. My previous Tigers had no commanders so i left my hatches open and added a couple of AB figures tank commander and henchman types.
I left the tank tracks off until after painting the main tank so i could paint and rust up the tracks before attaching them. The tracks are the rubber type so make sure you give them a careful stretch before attempting to fit them. I had to use superglue to get the tracks to stick, and putting the vehicle on a base also helps keep it all together. Also superglue the top track down near the sprocket wheel to give it an appearance of weight. Otherwise they float unrealistically. That’s one bit of the model that does not quite match the Revell and Zvezda kits is the solid sprocket wheel. The other kits have better detail.
My paint scheme was a three colour camo using red brown, bright green and the usual sandy yellow dunkelb. I gave it a wash with a dark brown and used weathering powders to create some dirt. Hasegawa kits always give you a good range of decals with loads of options. Here are my photos, plus some photos with the Revell and Zvezda Tigers. This kit is slightly smaller than the other models but it still fits in OK when they are cruising around together.
Airfix Halftracks 1/72 Scale
I have been a busy bee trying to finish eight different things at once and ultimately failing to really finish anything. Also a ten day trip overseas for work also interrupted my building and painting production line. I have, however, managed to complete some Airfix halftracks. I found these kits for some bargain price on eBay, i think less than five pounds each and had them delivered to my mum’s address in the UK before a trip there. Any chance i get to avoid shipping to Australia i take it! I have a fondness for any Airfix kit I previously built in the early 1980’s and this was no exception.
I have always read many complaints about the accuracy of this kit. To be honest I don’t care. It’s a great little kit and I loved building it three times. It goes together very nicely with no problems. Only fitting the front bonnet was a bit tricky to make sure everything was square, but apart from that i had a great time making these. The interior is sparse, but again you can easily paint up some figures to put in the back. The driver is a horrible figure and this time I didn’t bother with one as you can’t really see him anyway. I may put a machine gunner in the turret to fire the 50 cal, but I may not.
It definitely helps to add some stowage. I used all sorts from Black Dog, SHQ and anything else i could find. The decals that come with the kit are excellent and are thin enough to mould to the surface detail. I added some more numbers and symbols from other decals i had. Nothing historically accurate but who cares. Plenty of weathering powders and muddy bits all finished it off. Here they are together and also with my White Scout and IBG Models Chevrolet Radio truck on some reconnaissance.
“Setting The Scene” by Pat Smith
I was lucky enough to order a copy of Pat Smith’s awesome book “Setting The Scene” before Christmas and it turned up on my doorstep recently. What a happy way to start the New Year!
Now I have always been a big fan of Pat’s amazing 28mm modelling on his Wargaming With A Silver Whistle blog and this new production just continues on Pat’s excellent work. I am not a 28mm modeller and was not planning to do any Winter games or scenes right now, but none of that matters. There are so many good ideas and tips and inspirational photos this book is not to be missed if you are a keen wargamer and modeller who likes to build stuff. This is relevant to whatever scale or period you are interested in, but I guess even more so if you are cemented in World War Two like me.
Pat covers many aspects of terrain building from creating a mat, making trees, rivers, bridges and also tips on painting vehicles and figures. So much eye candy and amazing photos of his stunning results I cannot help but keep flicking through the pages. If you are looking for some inspiration and a standard of terrain to aspire to then I suggest you sign up for the reprint which I am guessing will get a run. Drop Pat a note on his blog and get your copy!

Walls Walls Walls
After building my Loic Neveu terrain bits and pieces I found I still had some of his low country walls. So striking with my hot iron I quickly glued them all down to a piece of 3mm MDF to make a rough two field kind of configuration. Then a layer of PVA and fine sand, plus some rougher sand nearer the ends of the walls.
I wanted some random scrubland so used a few different types of grass, flock and tufts to cover the field areas. The walls were undercoated black and then highlighted. In retrospect I should have used more browns for the stonework as it came out a bit too black and white. I may change it. These are quite small walls and I realise I should have put a 20mm soldier in here to give you an idea of scale. But these will definitely get some usage in my next games.
More AB Figures British Infantry
I finished up another squad of AB Figures British Infantry this week. I am slowly replacing all my plastic figures with metal ones. The AB ranges are just the best. Not much else to say! There are enough different packs to make up plenty of squads without repeating the same guy twice. The detail is so clear on these figures it makes them a real pleasure to paint. I find that just blocking in the colours and then doing some highlighting is good enough. I did buy a proper set of British Army Uniform colours, shadow, base and highlight, which has helped a lot. Trying to mix a British khaki is really tricky so i stopped trying to do it!
These guys are all based on Australian 10 cent coins which are not only useless for anything else but perfect size for individual bases. If you don’t own any AB Figures in your collection you really need to change that. I pick up all mine from Eureka Miniatures in Melbourne, they have such a great range of World War Two figures, its tempting to keep loading up. Next up i need to paint three PIAT teams to try and finish my British company. Check out my pictures below, i am still struggling to take half decent photos with my phone. Lighting seems to be difficult with small figures.
More Wrecked Vehicle Terrain Bits
More terrain bits from Loic Neveu that i have finally painted up. I mounted them on MDF first as they are quite delicate around the edges. They are nicely detailed and paint up well with out too much trouble. I used plenty of weathering powder to create a dirty, rusty look. Not much else to add. They fit well into my 1/72 scale stuff and will provide extra cover in my war torn urban situations. You could also use them as objective markers too. Loic has a bucket of interesting stuff on his web site https://neveu.blog4ever.com/articles
Just a quick blog as the photos are self explanatory!
Fences and Rubble Piles
Happy Christmas and New Year everyone! I finished off a couple of terrain bits in between stuffing my face with Christmas goodies. No models in my stocking or models in stockings for that matter. But still expecting some more goodies to show up from various model shops across the globe independent of Father Christmas’s delivery schedule!
Anyway i had some rubble piles and cars from Loic Neveu in France that i had left aside for ages and decided to paint them up. They came out very nicely and fit next to my ruined buildings for extra effect. I have a couple more to finish. I had bought a manor house from Loic too but it is more like 15mm scale and it didn’t fit in with my buildings. If anyone wants the building i bought for 15mm games drop me a note and i will send it to you or at least show you a picture first.
Also there is some fencing i bought from Hovels in the UK. Super cheap at 75p a section and they came out really nicely. At that price i really cant be bothered to make my own which will be no better. Based on MDF and flocked etc. It does make me feel lazy but sometimes buying terrain is just a nice, speedy alternative!
Esci White M3 Scout Car in 1/72 Scale
One of my favourite, if not top of the charts, World War Two vehicles is the White Scout Car. So my quest to find one in plastic kit form in 1/72 scale was an important one. In the whole world there is not one company now that makes this vehicle in plastic kit form. Esci, now Italeri, no longer make this kit, even though i think they do still have pictures of it on their web site. So my quest turned to the internet as usual. Thank you eBay for the seller of this old kit for only about five pounds. I would have paid more for sure as it really seemed to be the only available kit in the known world. So i was a happy chappy when this turned up on my doorstep. I think this kit must have been years old judging by the box, but inside everything was still sealed in its plastic bag. Only the decals were unusable, but that didn’t matter as they were French and Russian anyway.
My Scout Car was going to be Allied/British. The kit build was great, a pleasure to make, all parts fitted nicely and i had no issues. The only thing wrong with this model was the rear axle sits too far forward resulting in the wheels not being central within the wheel arches. This annoyed me enough that i had to cut the rear axle and suspension off the chassis and move it maybe half a millimetre to align the wheels centrally. That was the only problem i found. The kits comes with two machine guns on the back, a 0.50 and 0.30 calibre, one on each side, and some stowage. I added a bit more from my supplies and also added a British driver from AB figures. The decals came from spares. I always base my wheeled vehicles, no one likes a broken axle. The finished scout car was given the usual olive drab treatment with a dark brown wash, highlights, and then some weathering powders. I might add some other crew or commander at some point, we shall see.
I do have a couple of metal and resin versions of the M3, which i may make as a comparison. And the chances of finding another plastic M3 kit are about as good as England winning a game in the Ashes……….