MAC Kits Steyr 1500 Heavy Car in 1/72 Scale

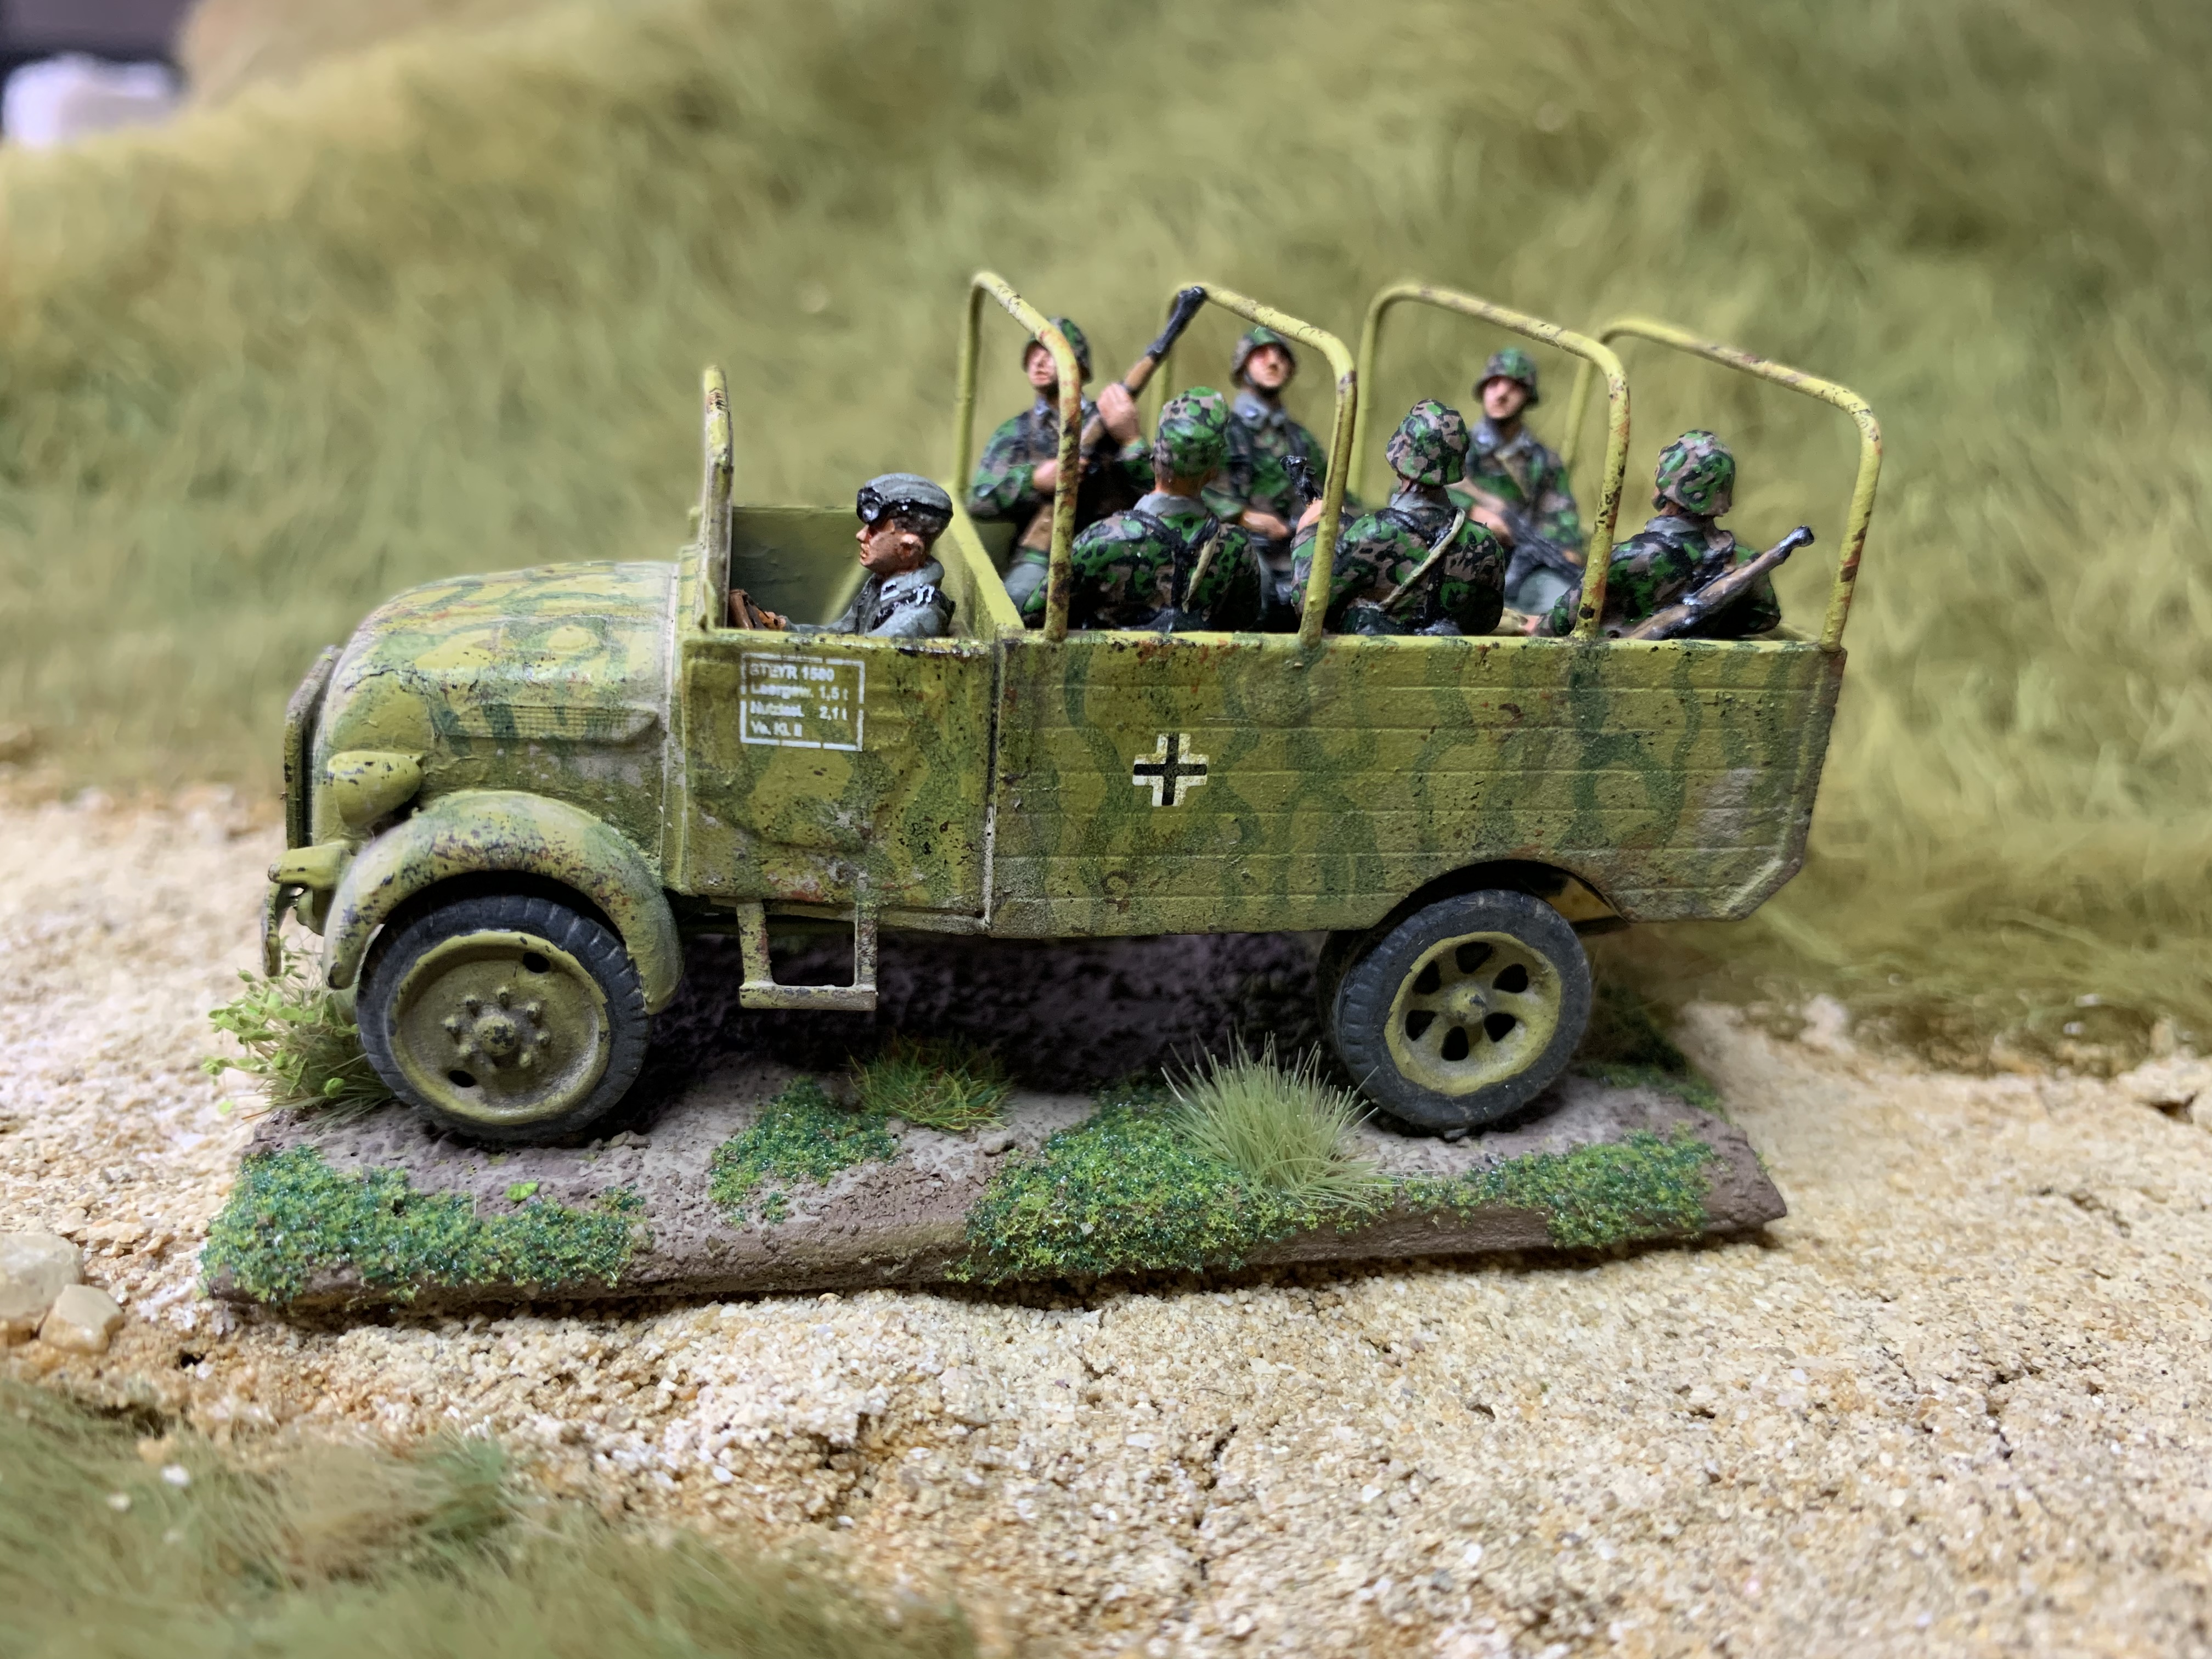
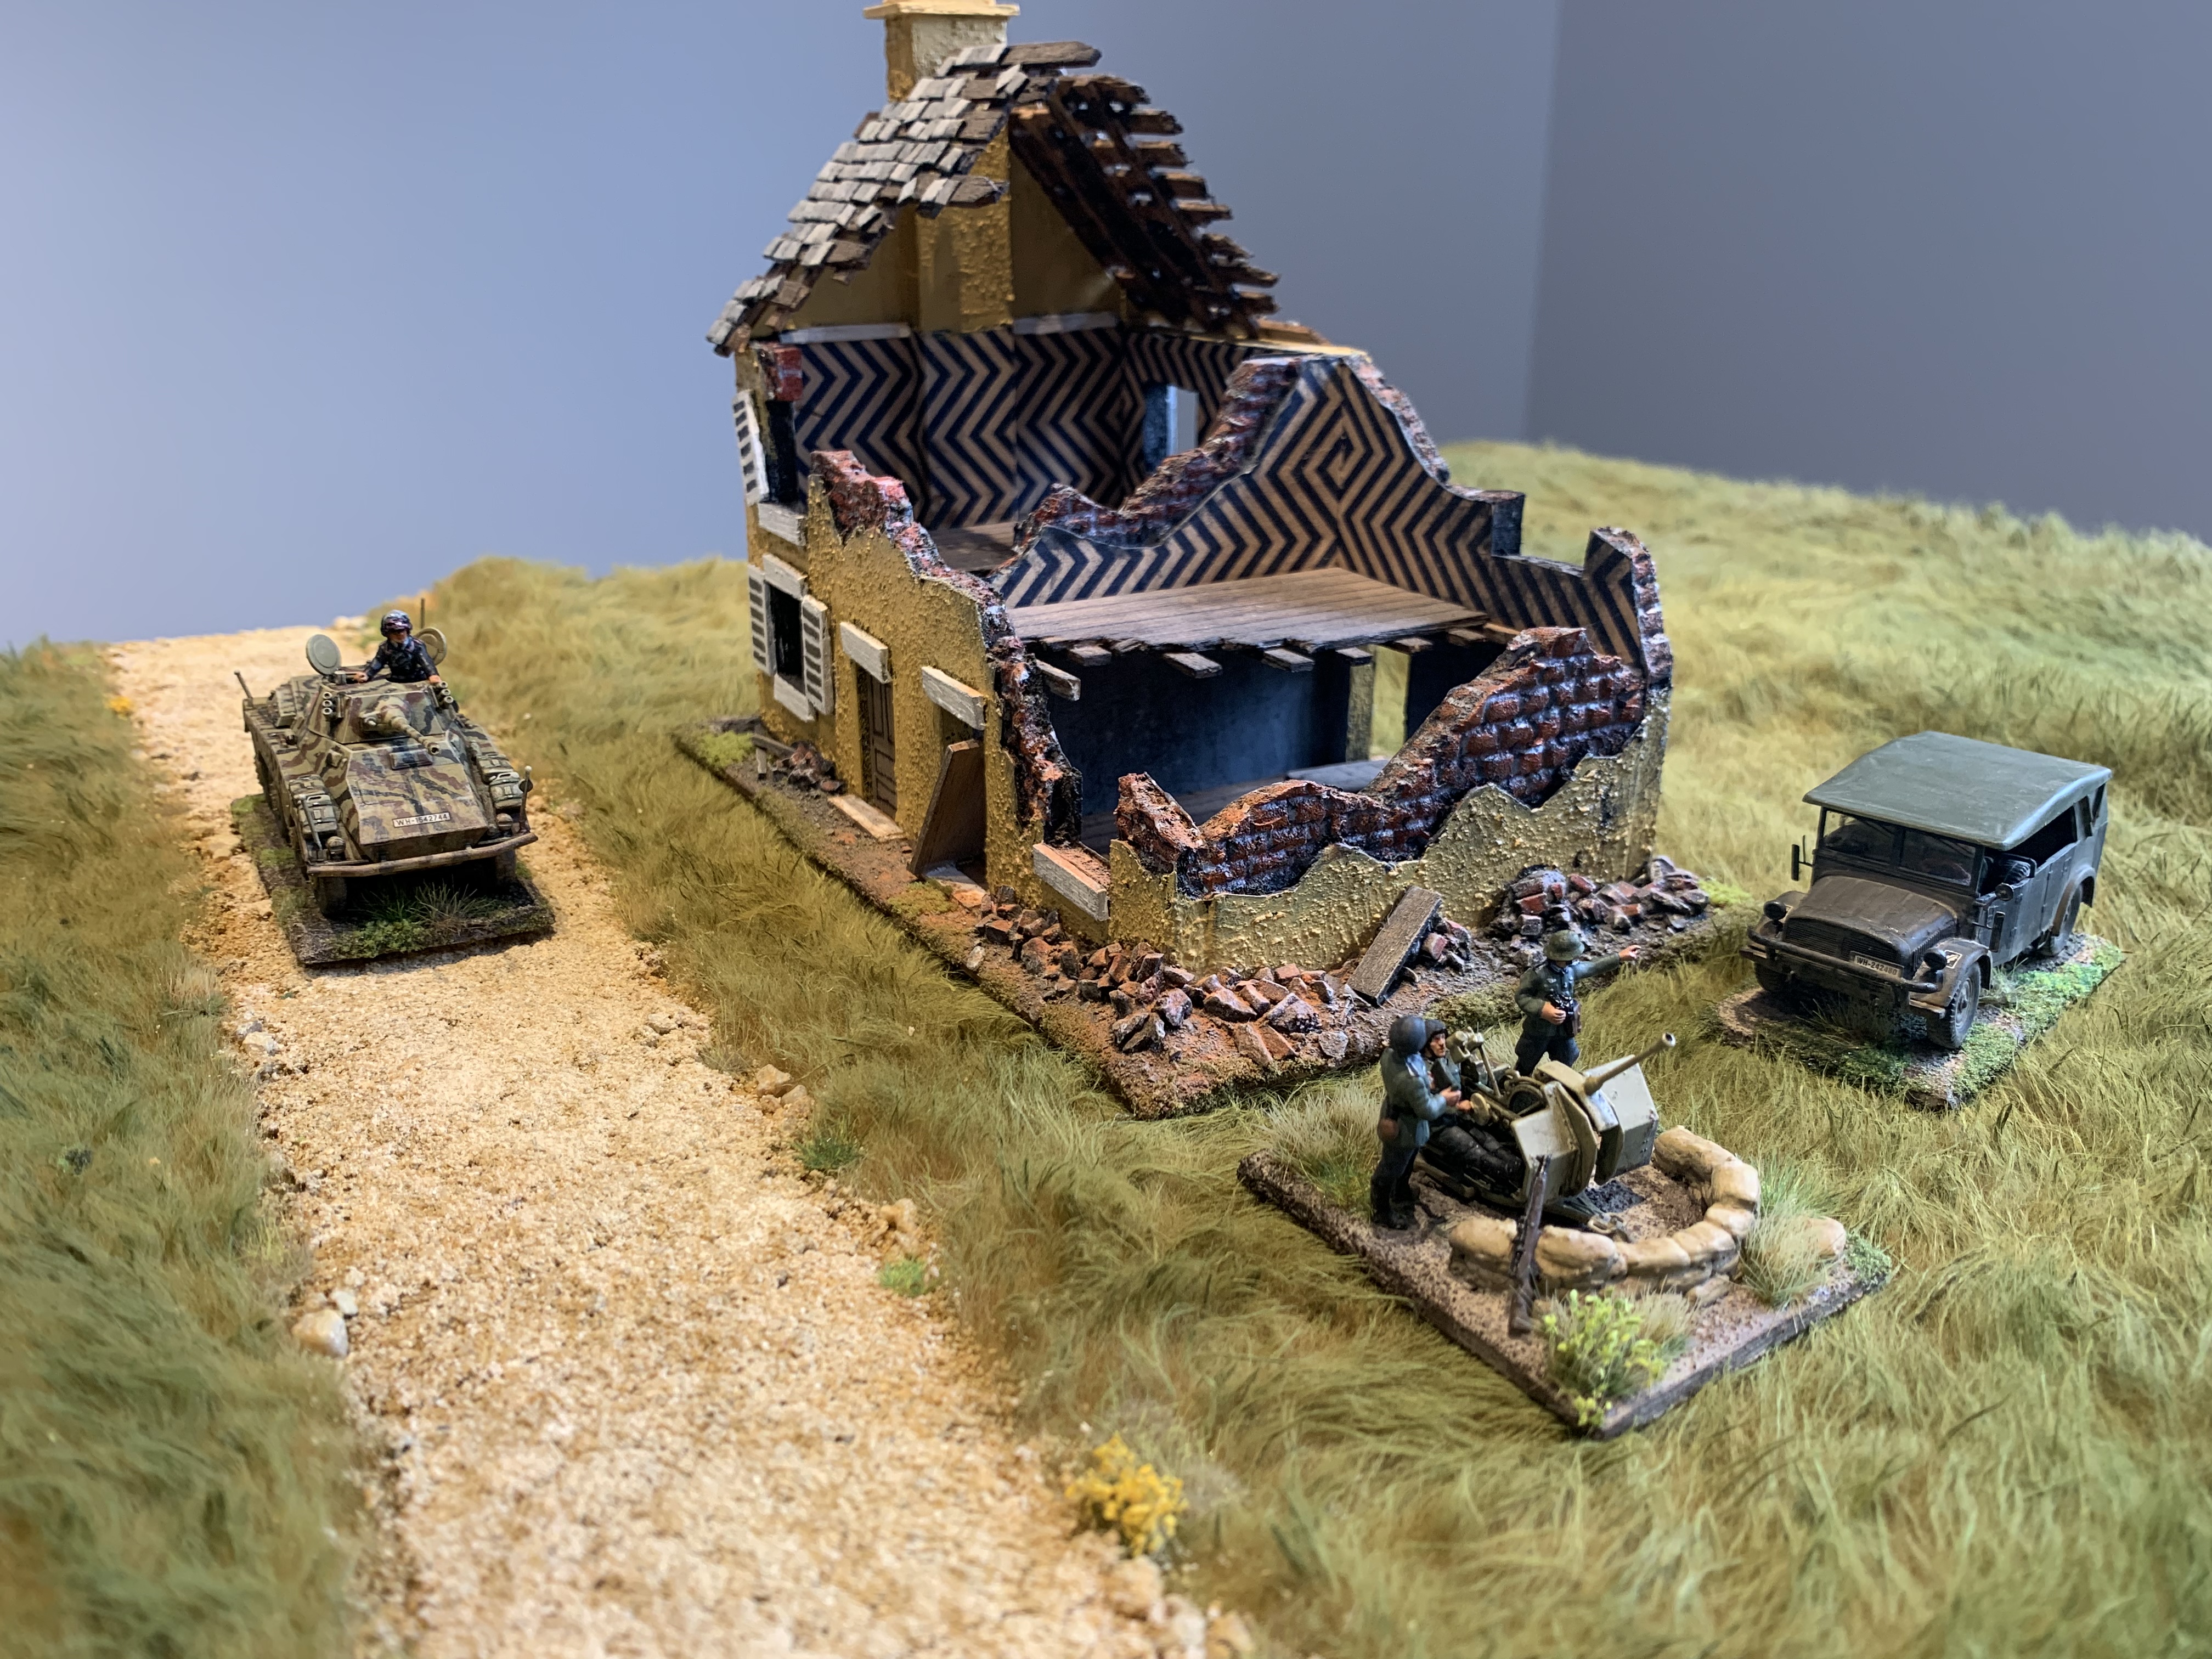
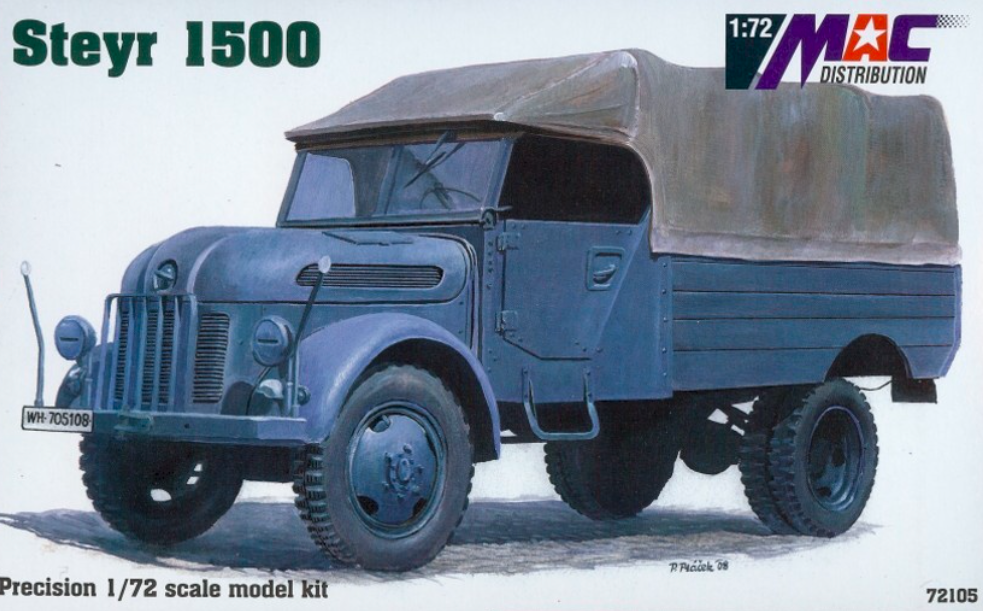
This was the first kit I have made from MAC Kits. I am pretty sure it is also the last. This was a horrible experience from start to finish. The plastic was weird kind of waxy and did not like my glue. The fit was awful and lots of the bits did not have obvious location points. The detail is also poor on much of it. Even on the box art you do not get all the bits you see. Like the metal steps on the door are not actually in the kit so I ended up making my own. I think MAC must make 1/35 kits too and perhaps the box photo is from a larger scale version. I am pretty sure the instructions were also poor. So yes I will not buying any more MAC kits…….

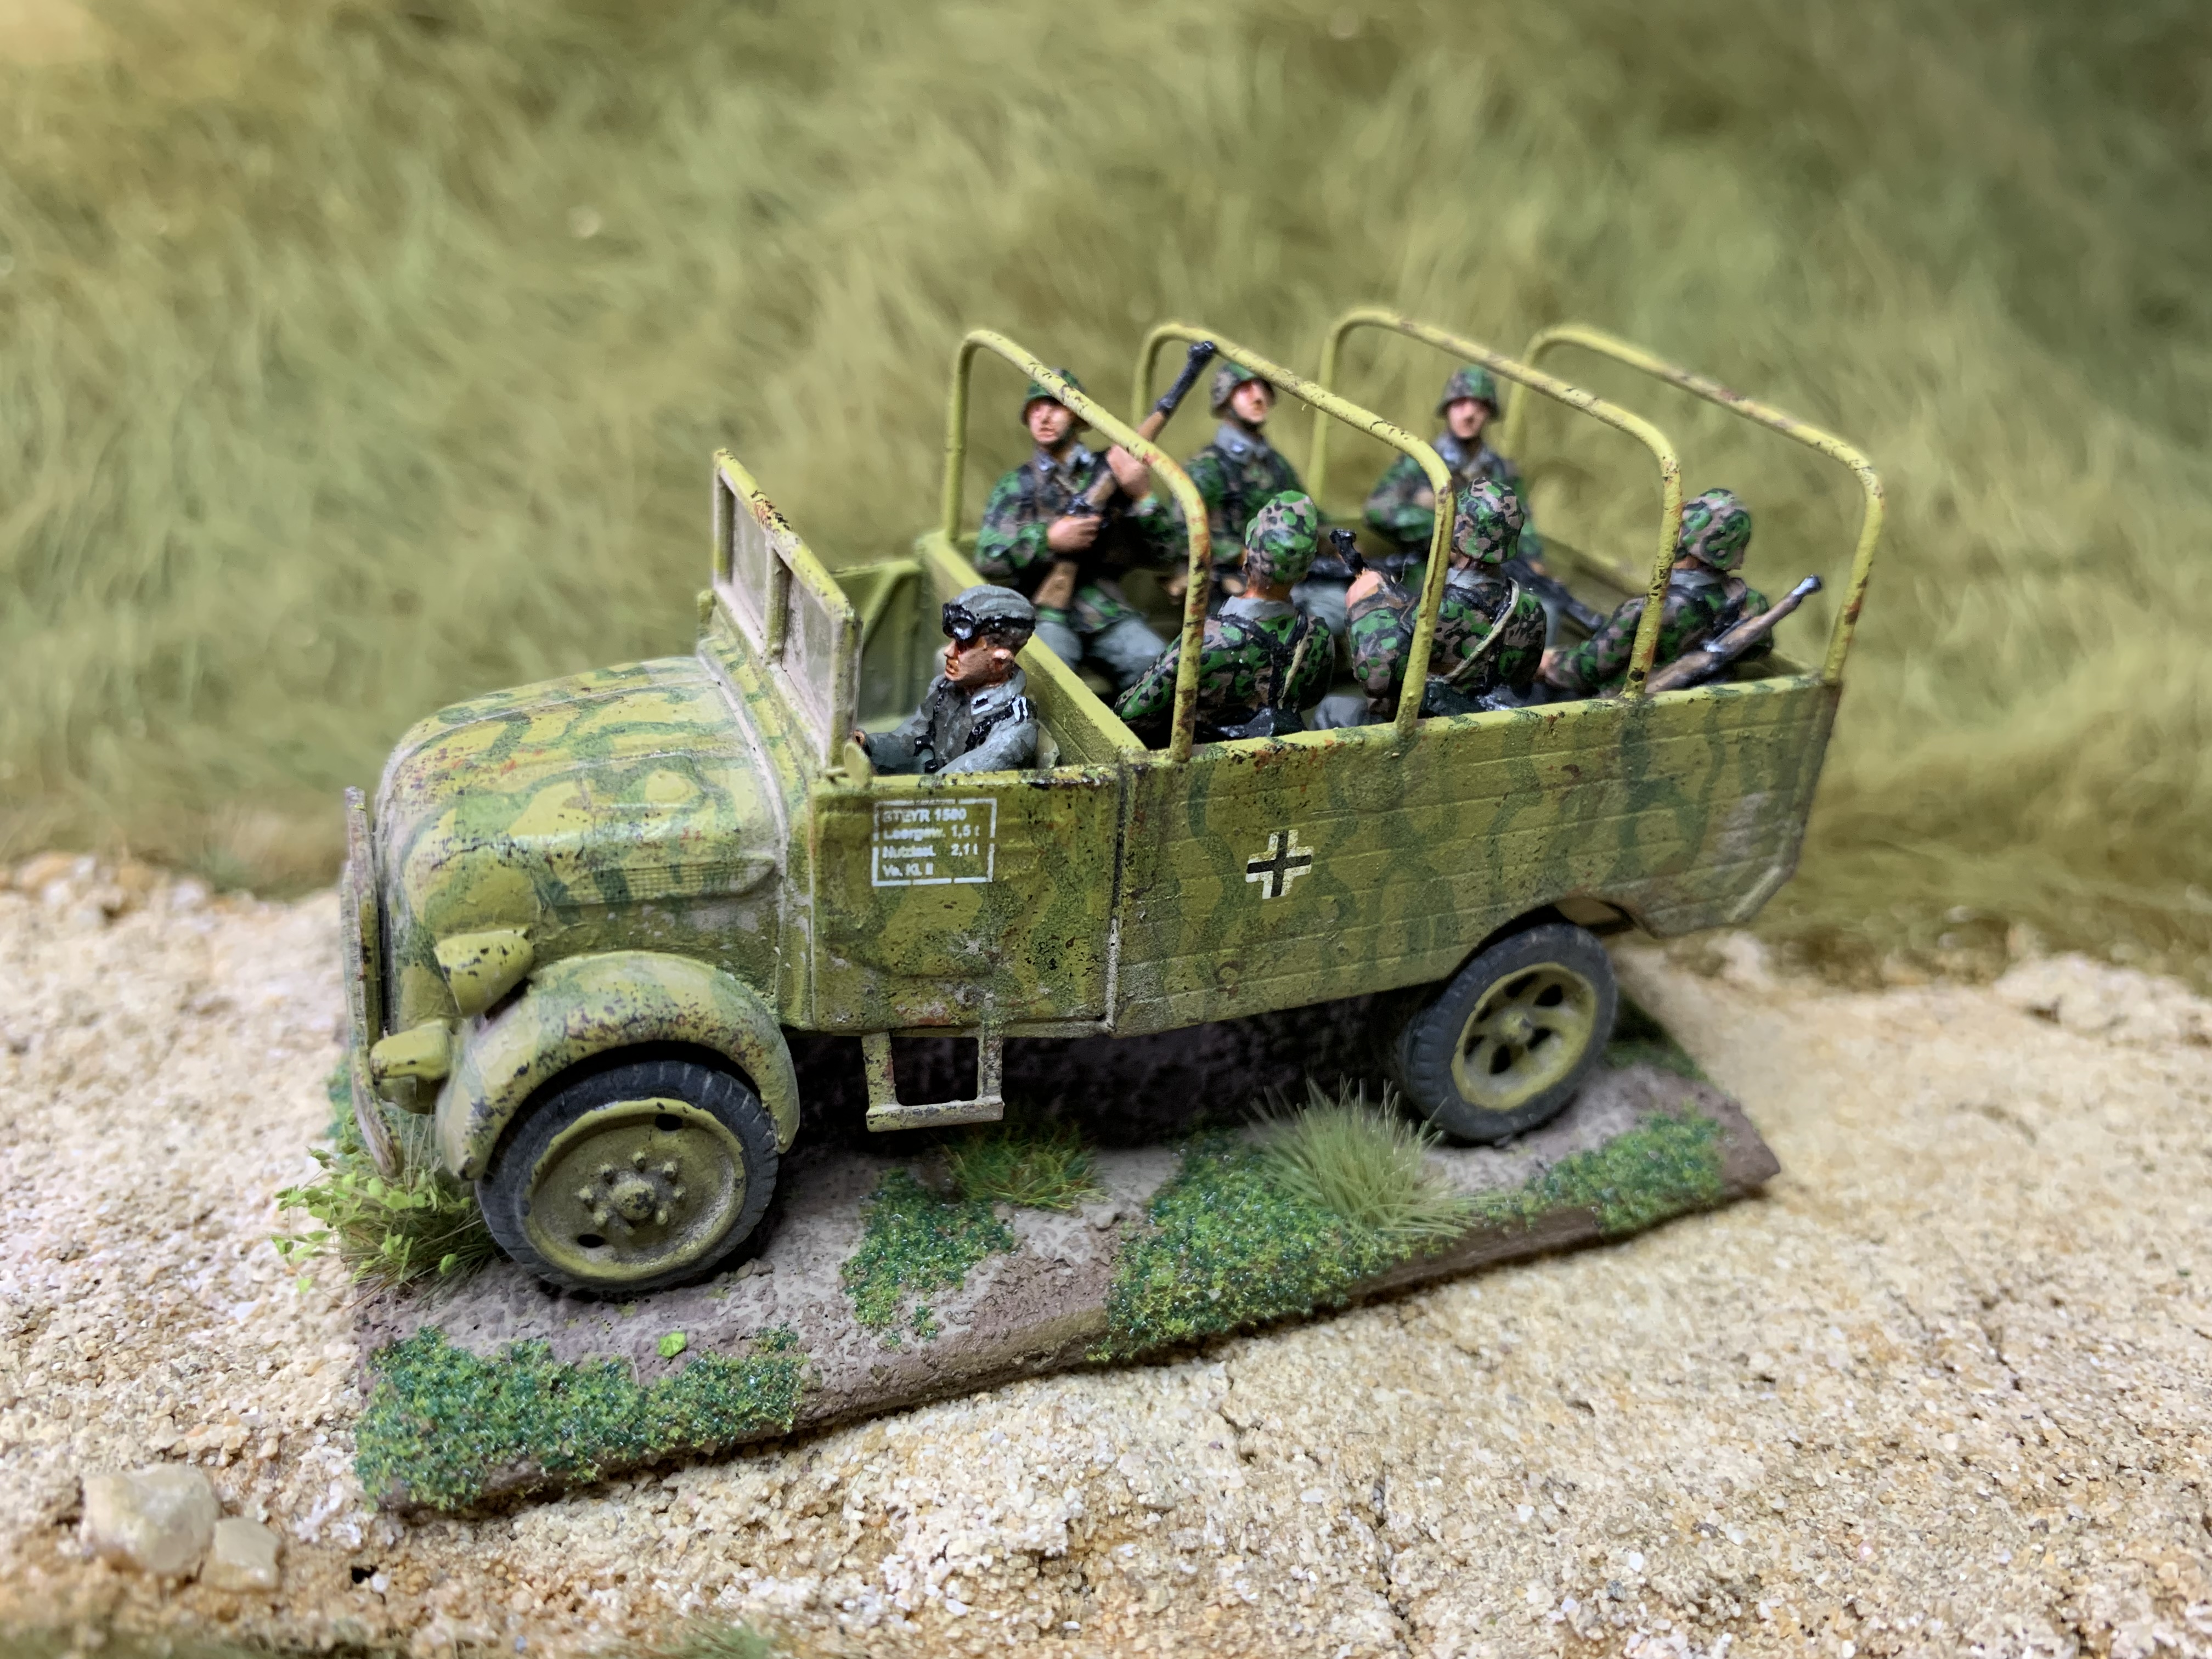
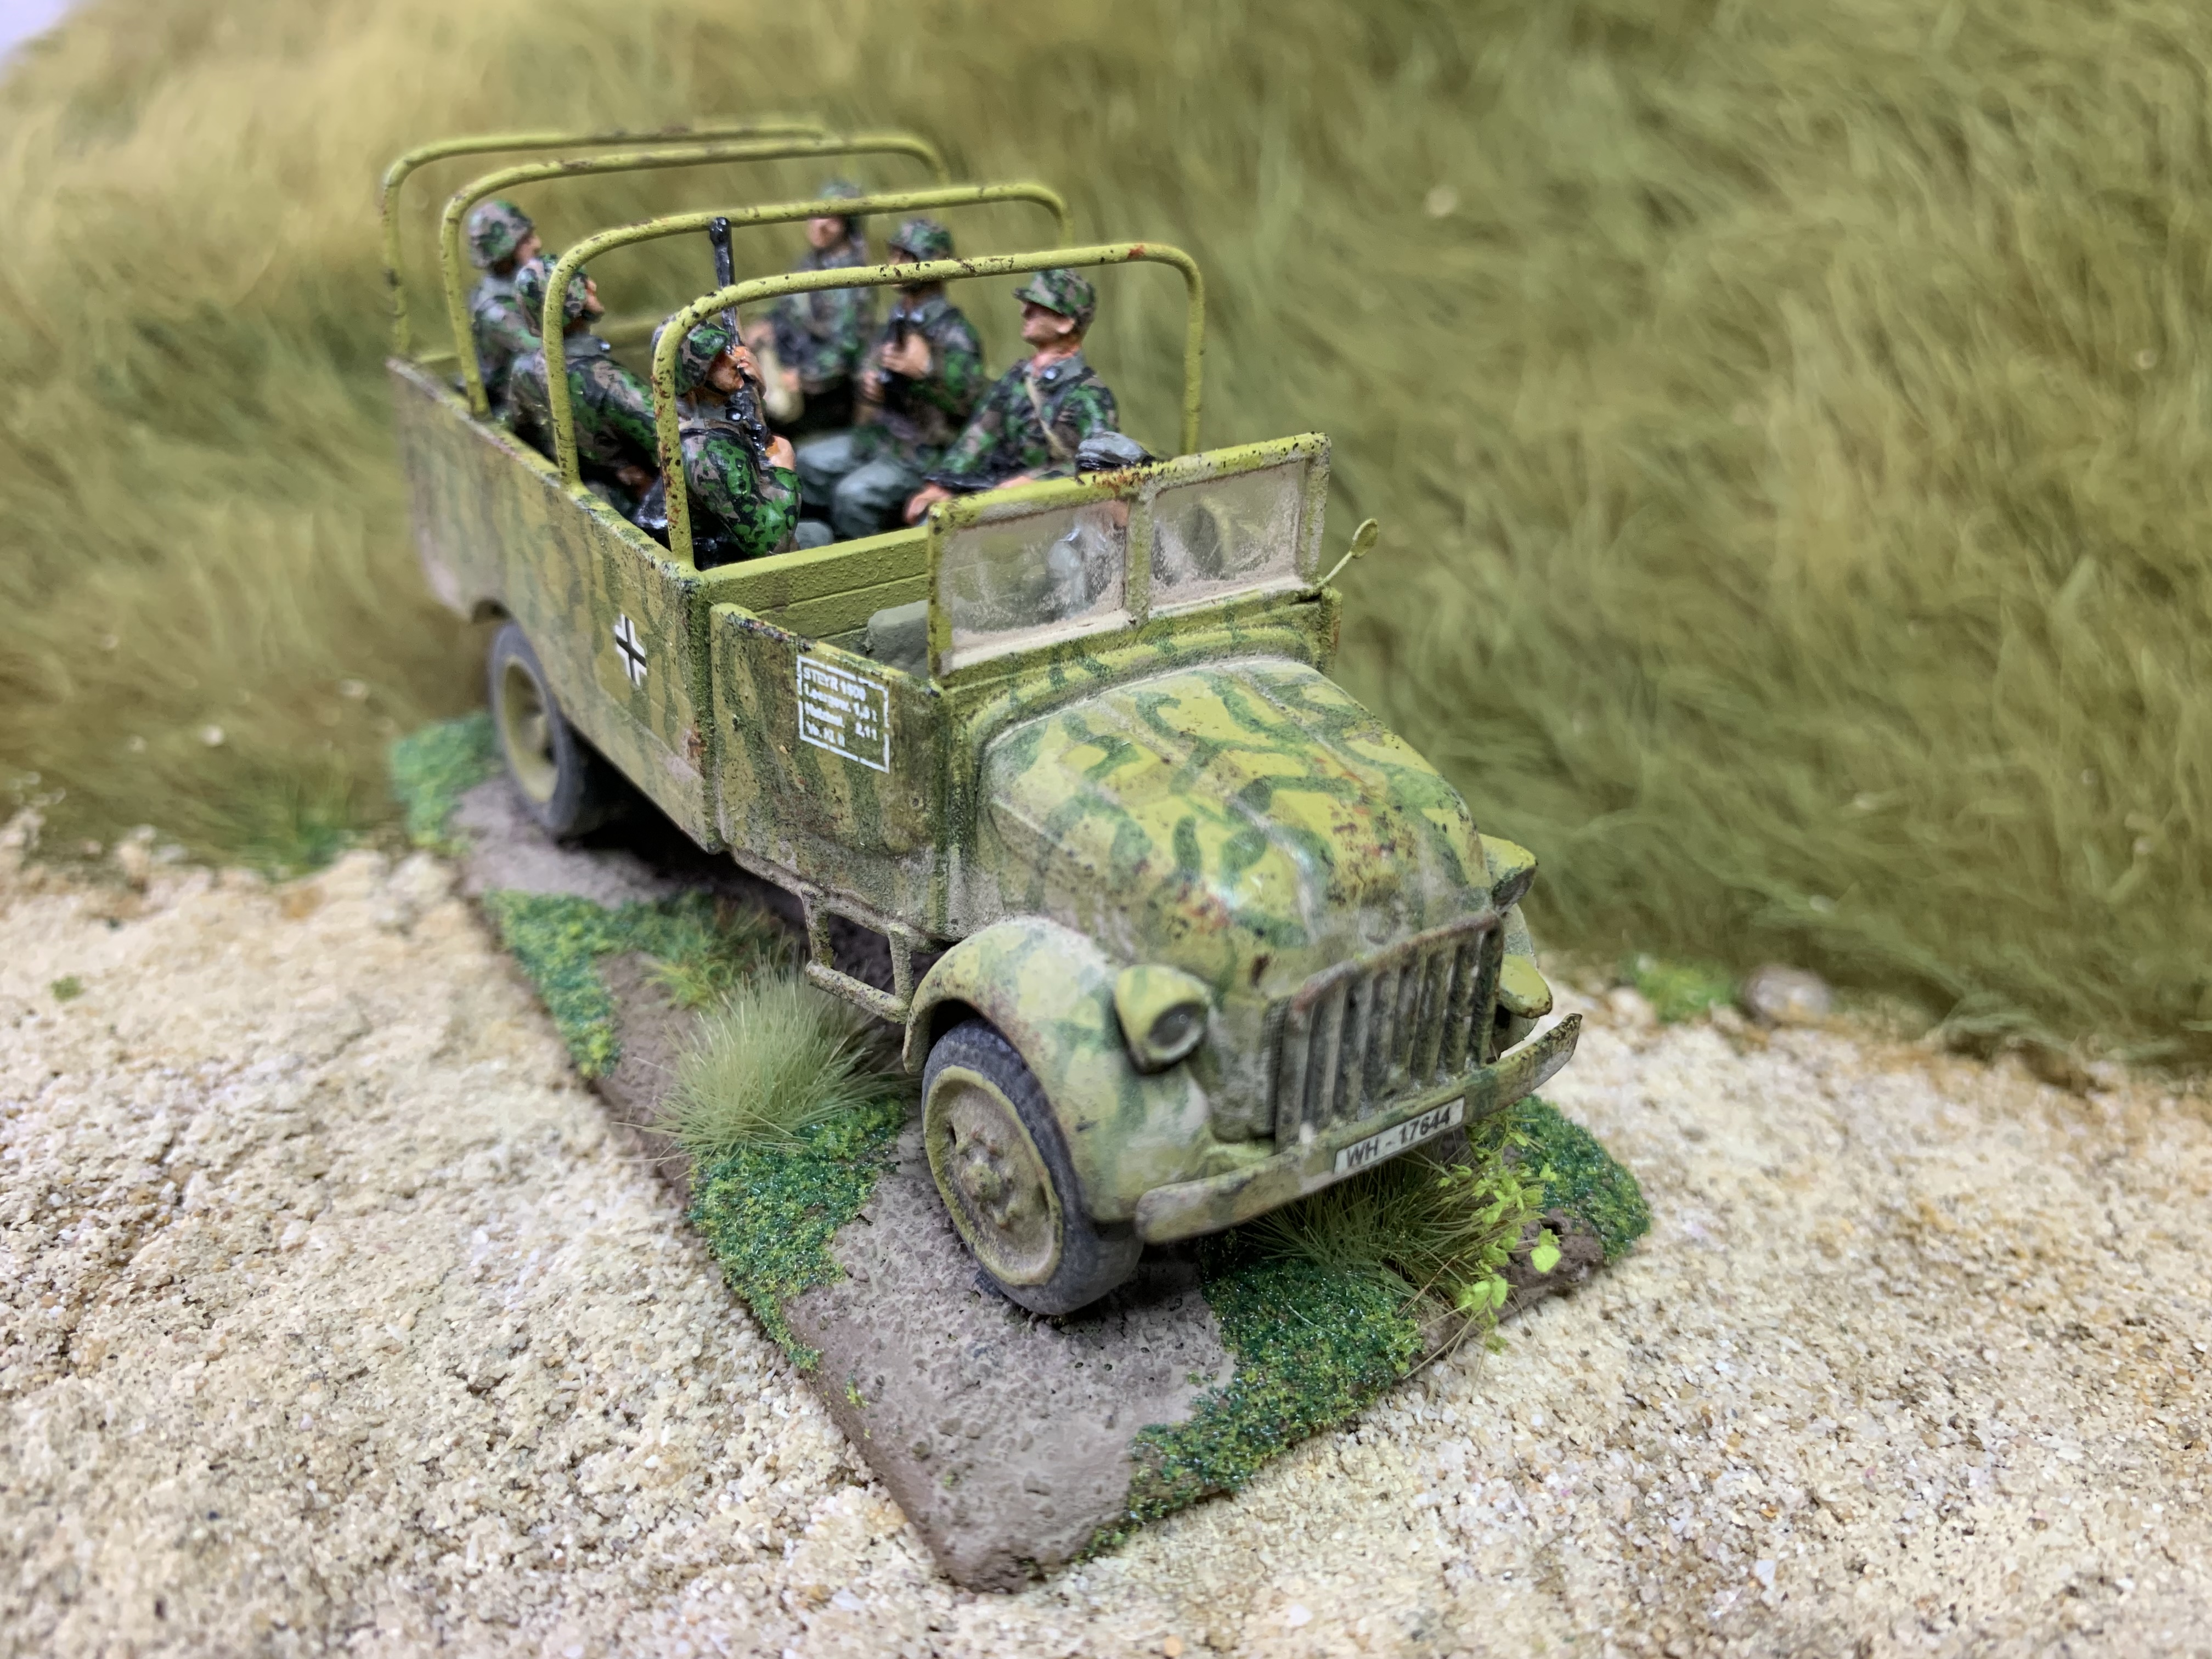
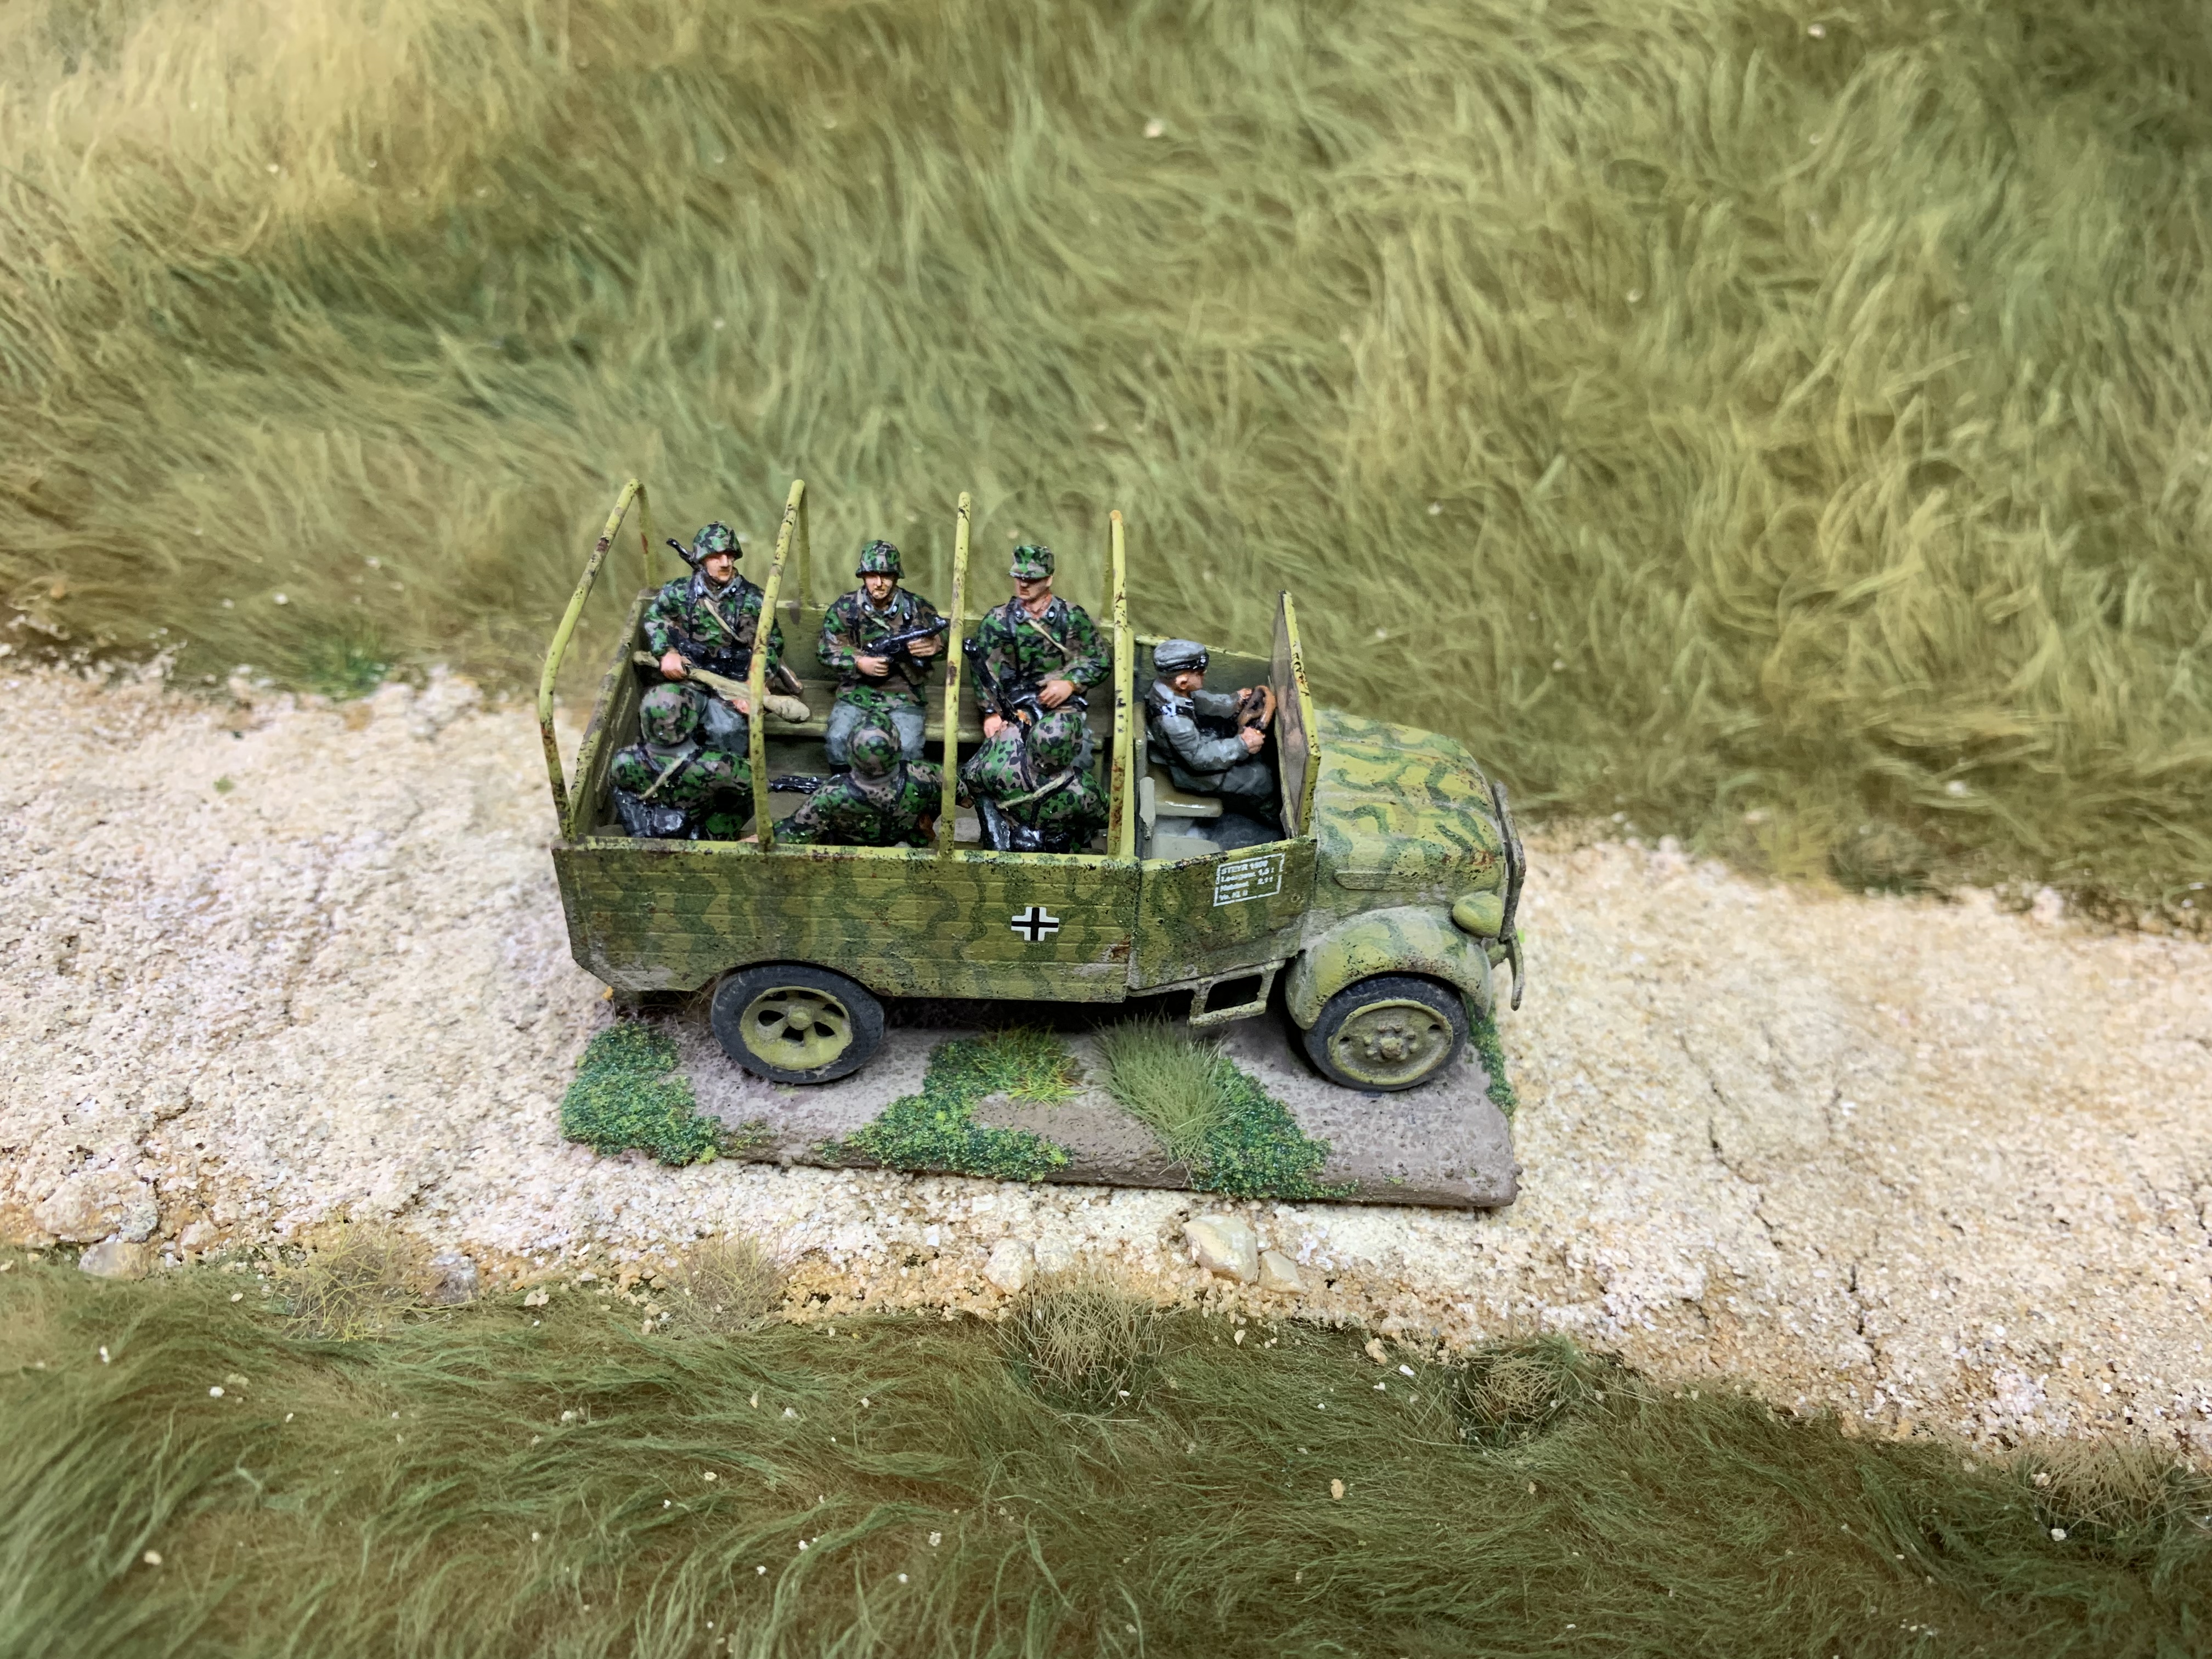
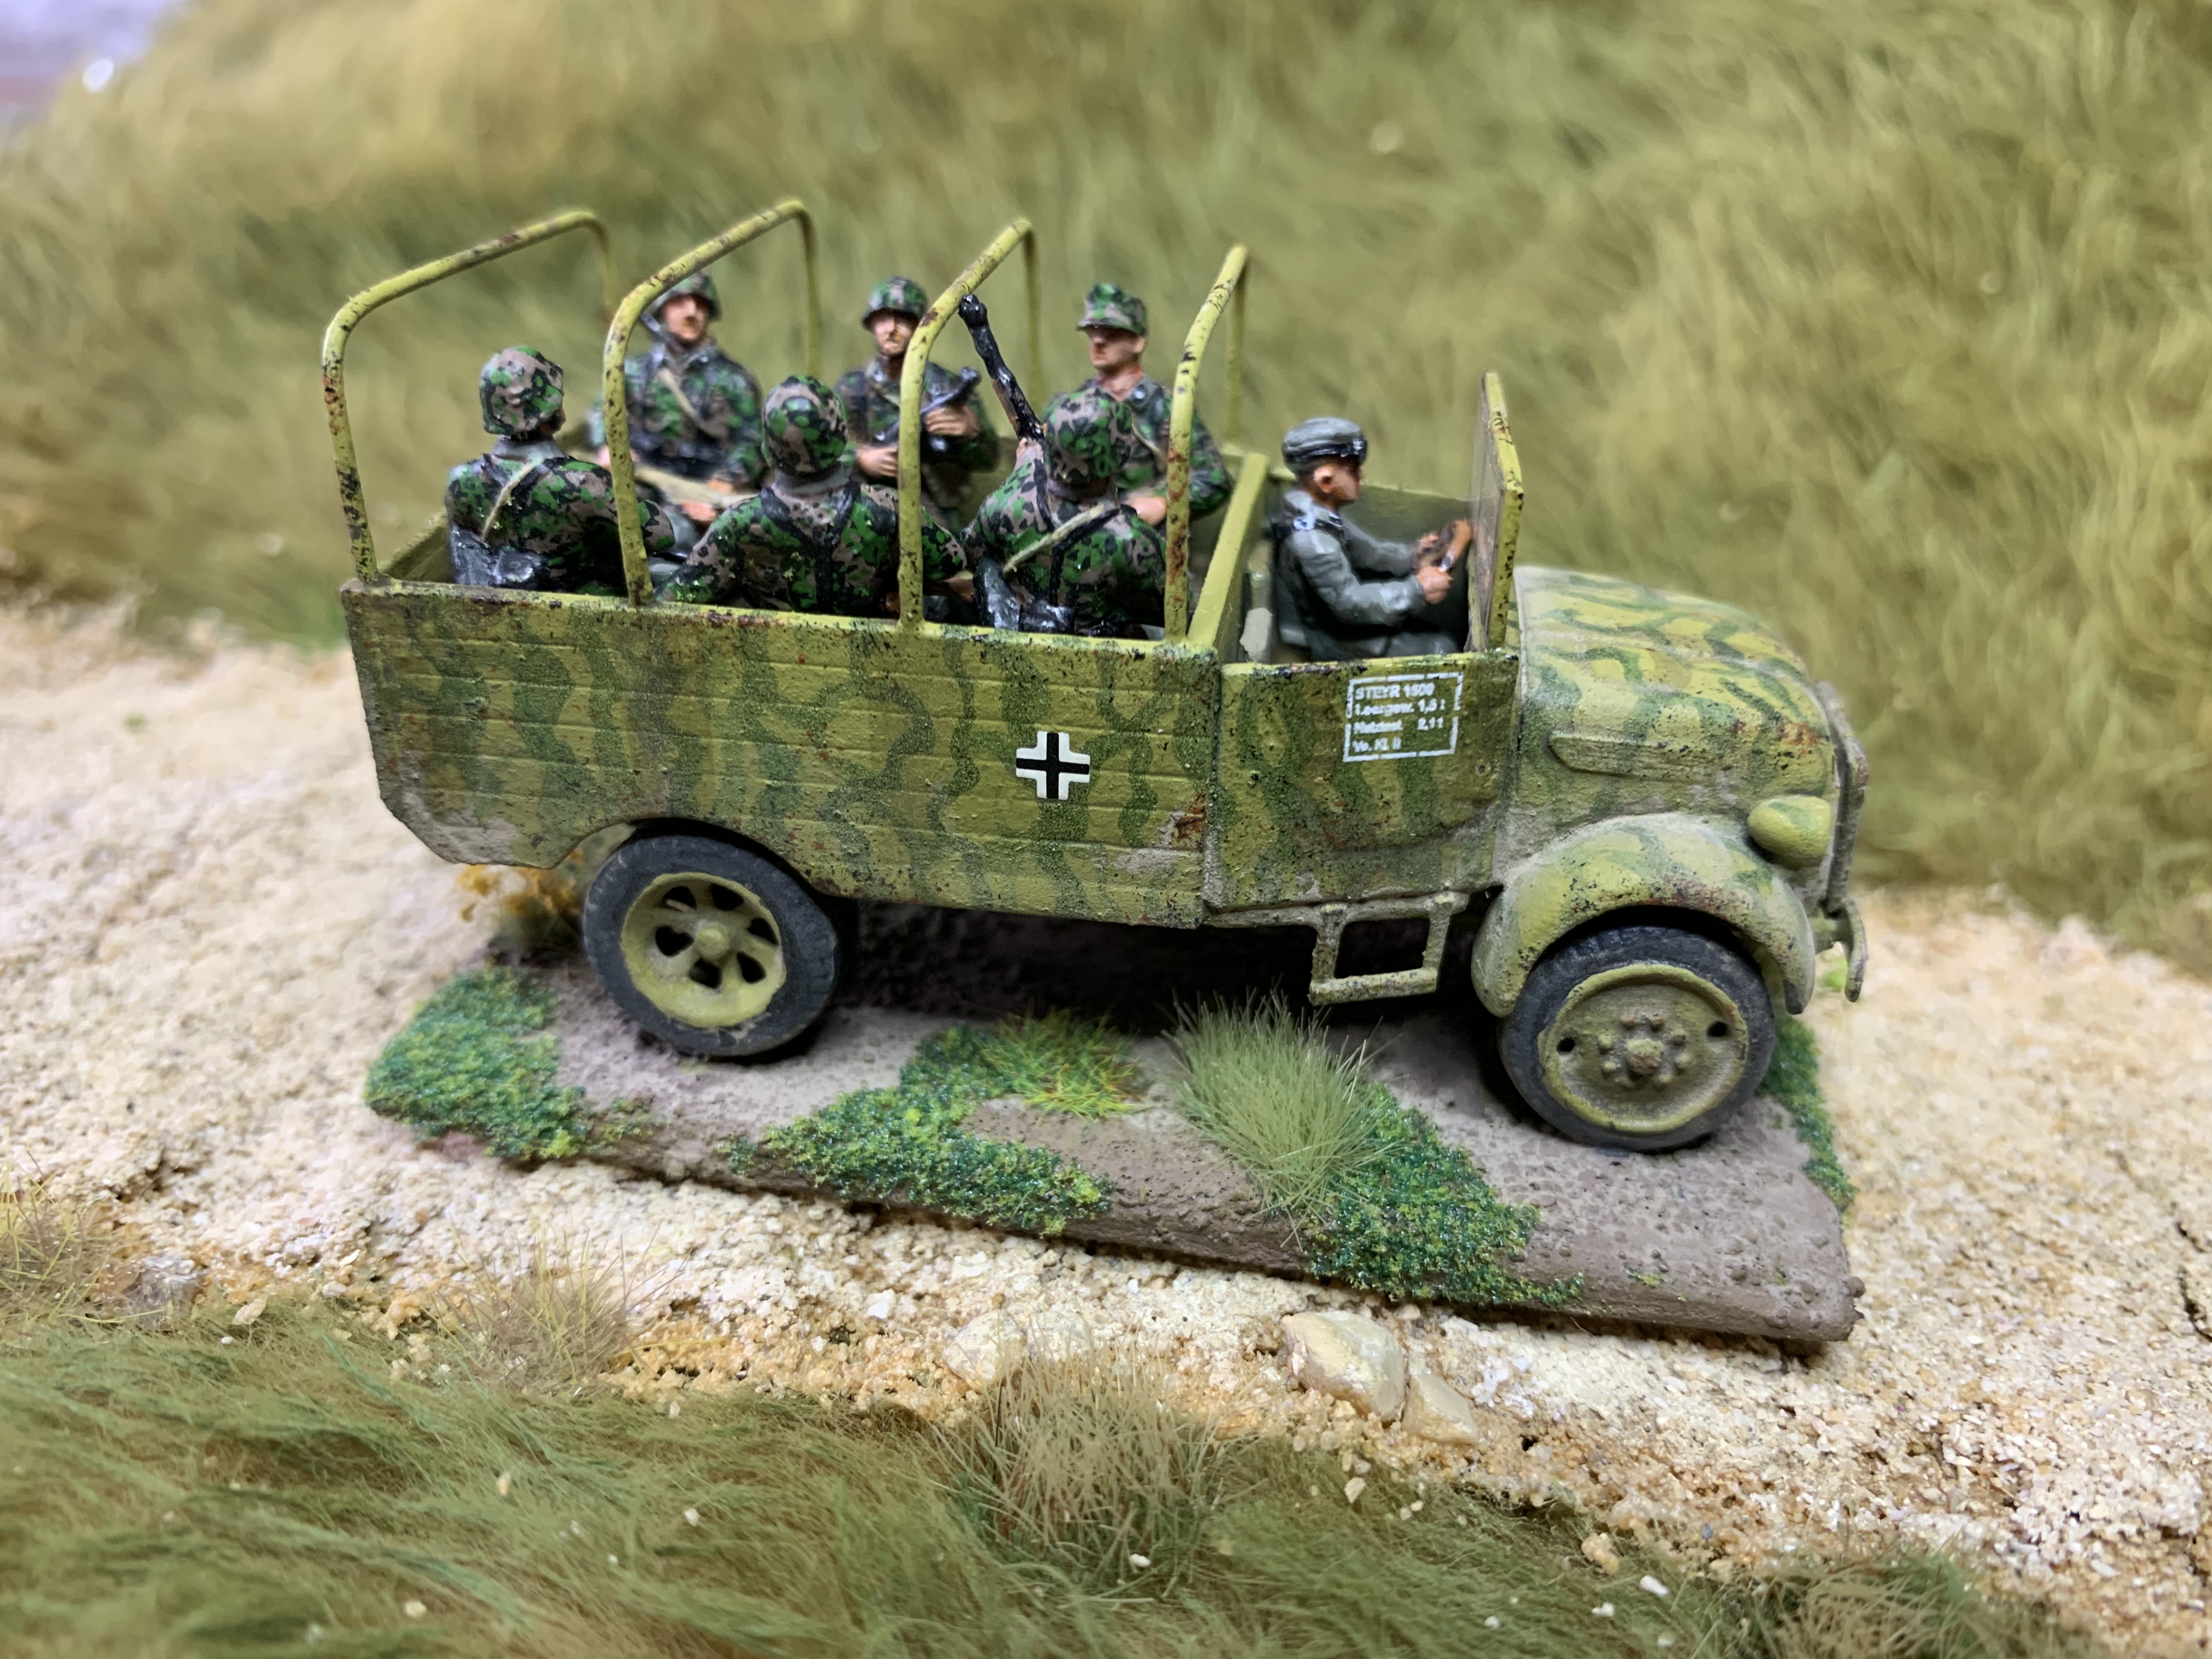
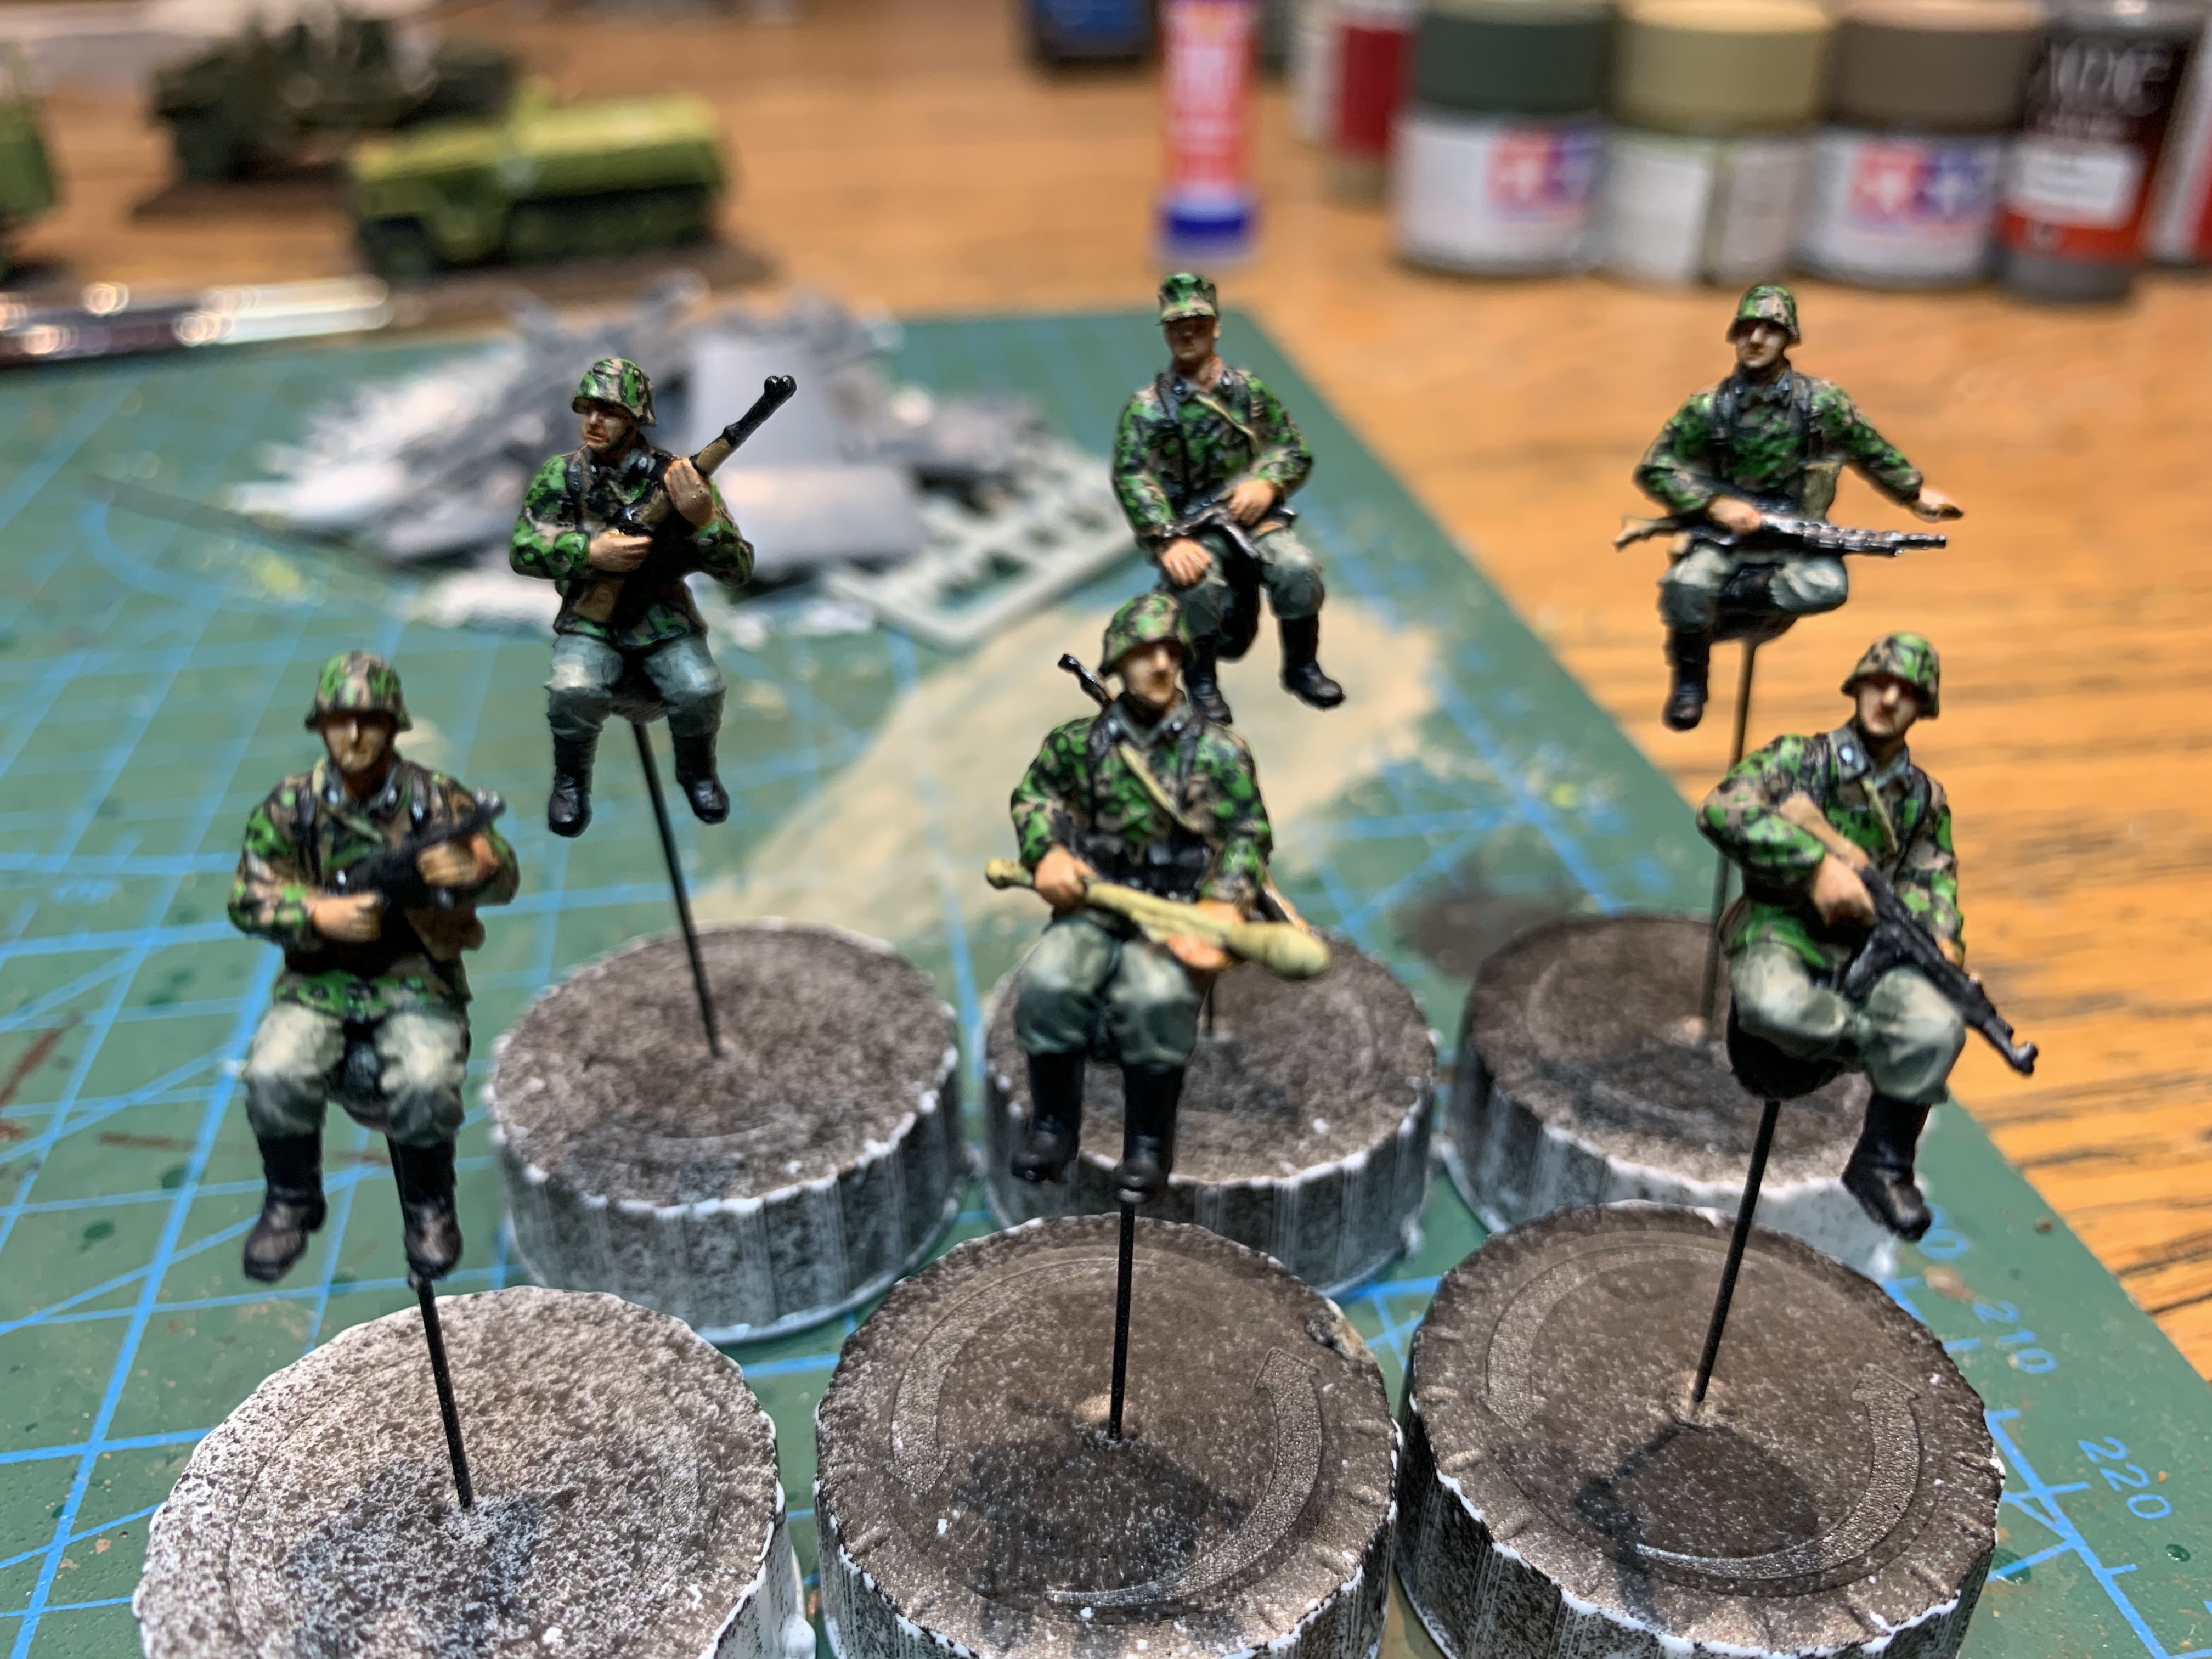
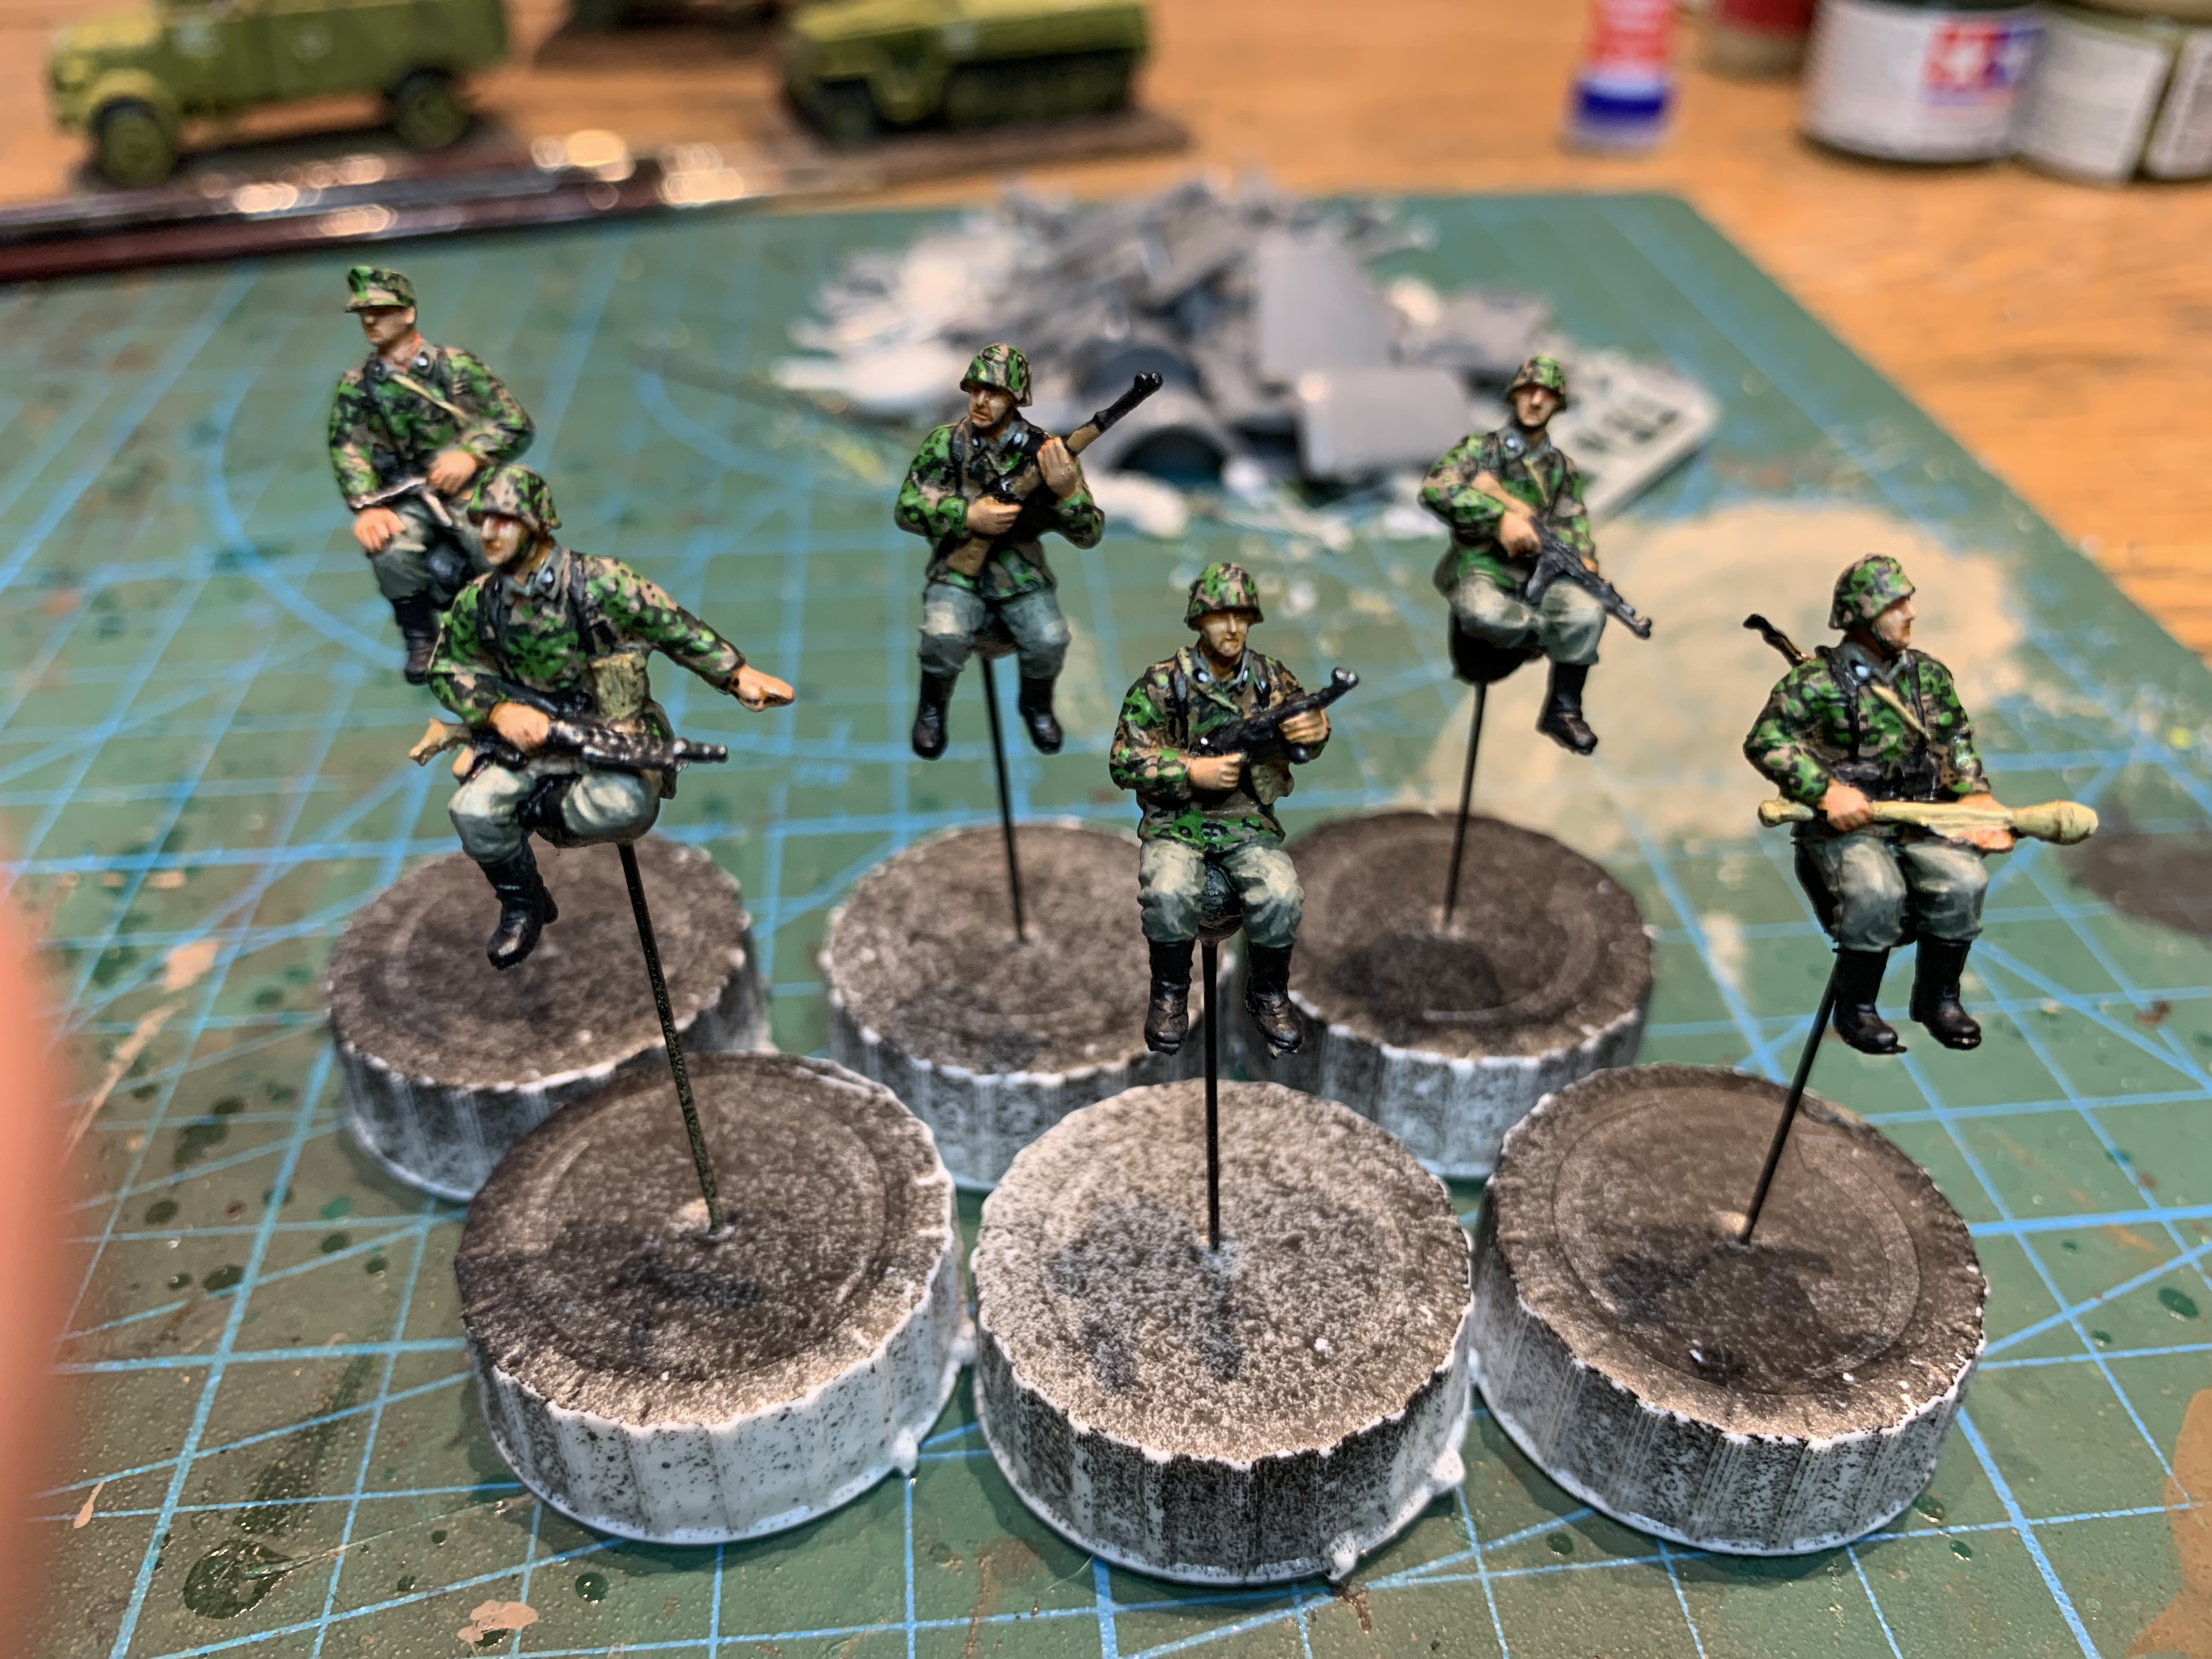
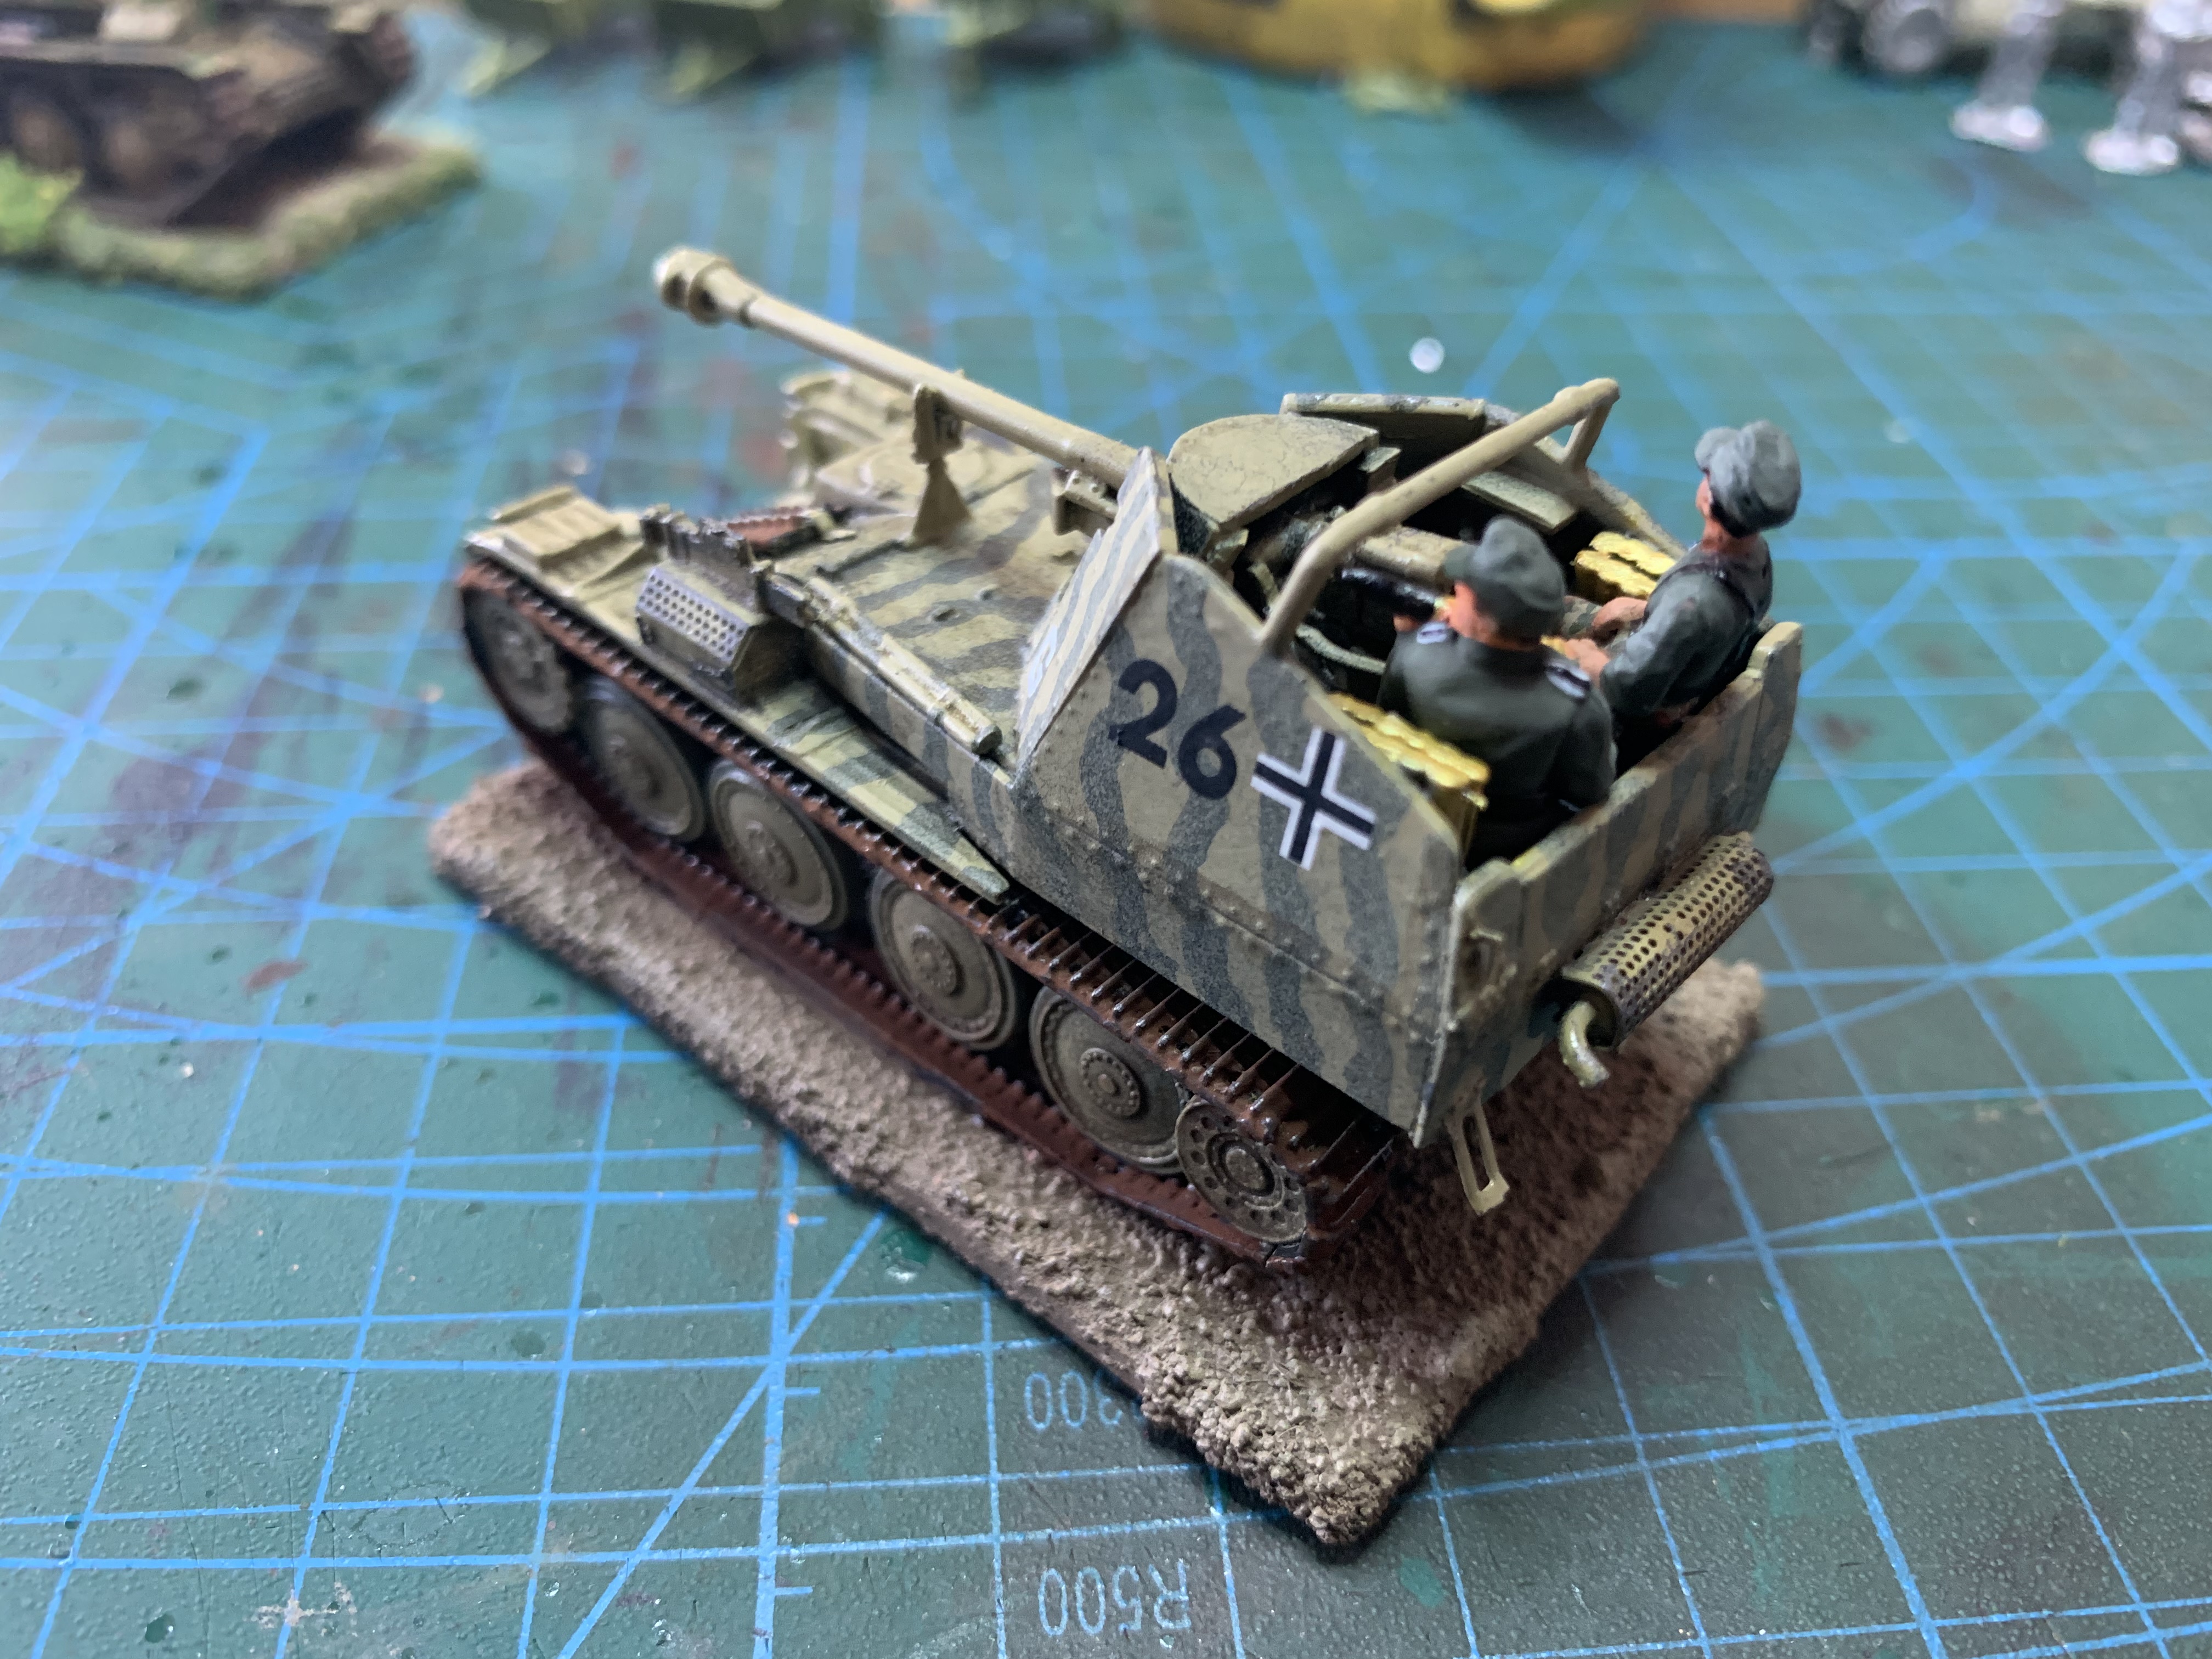
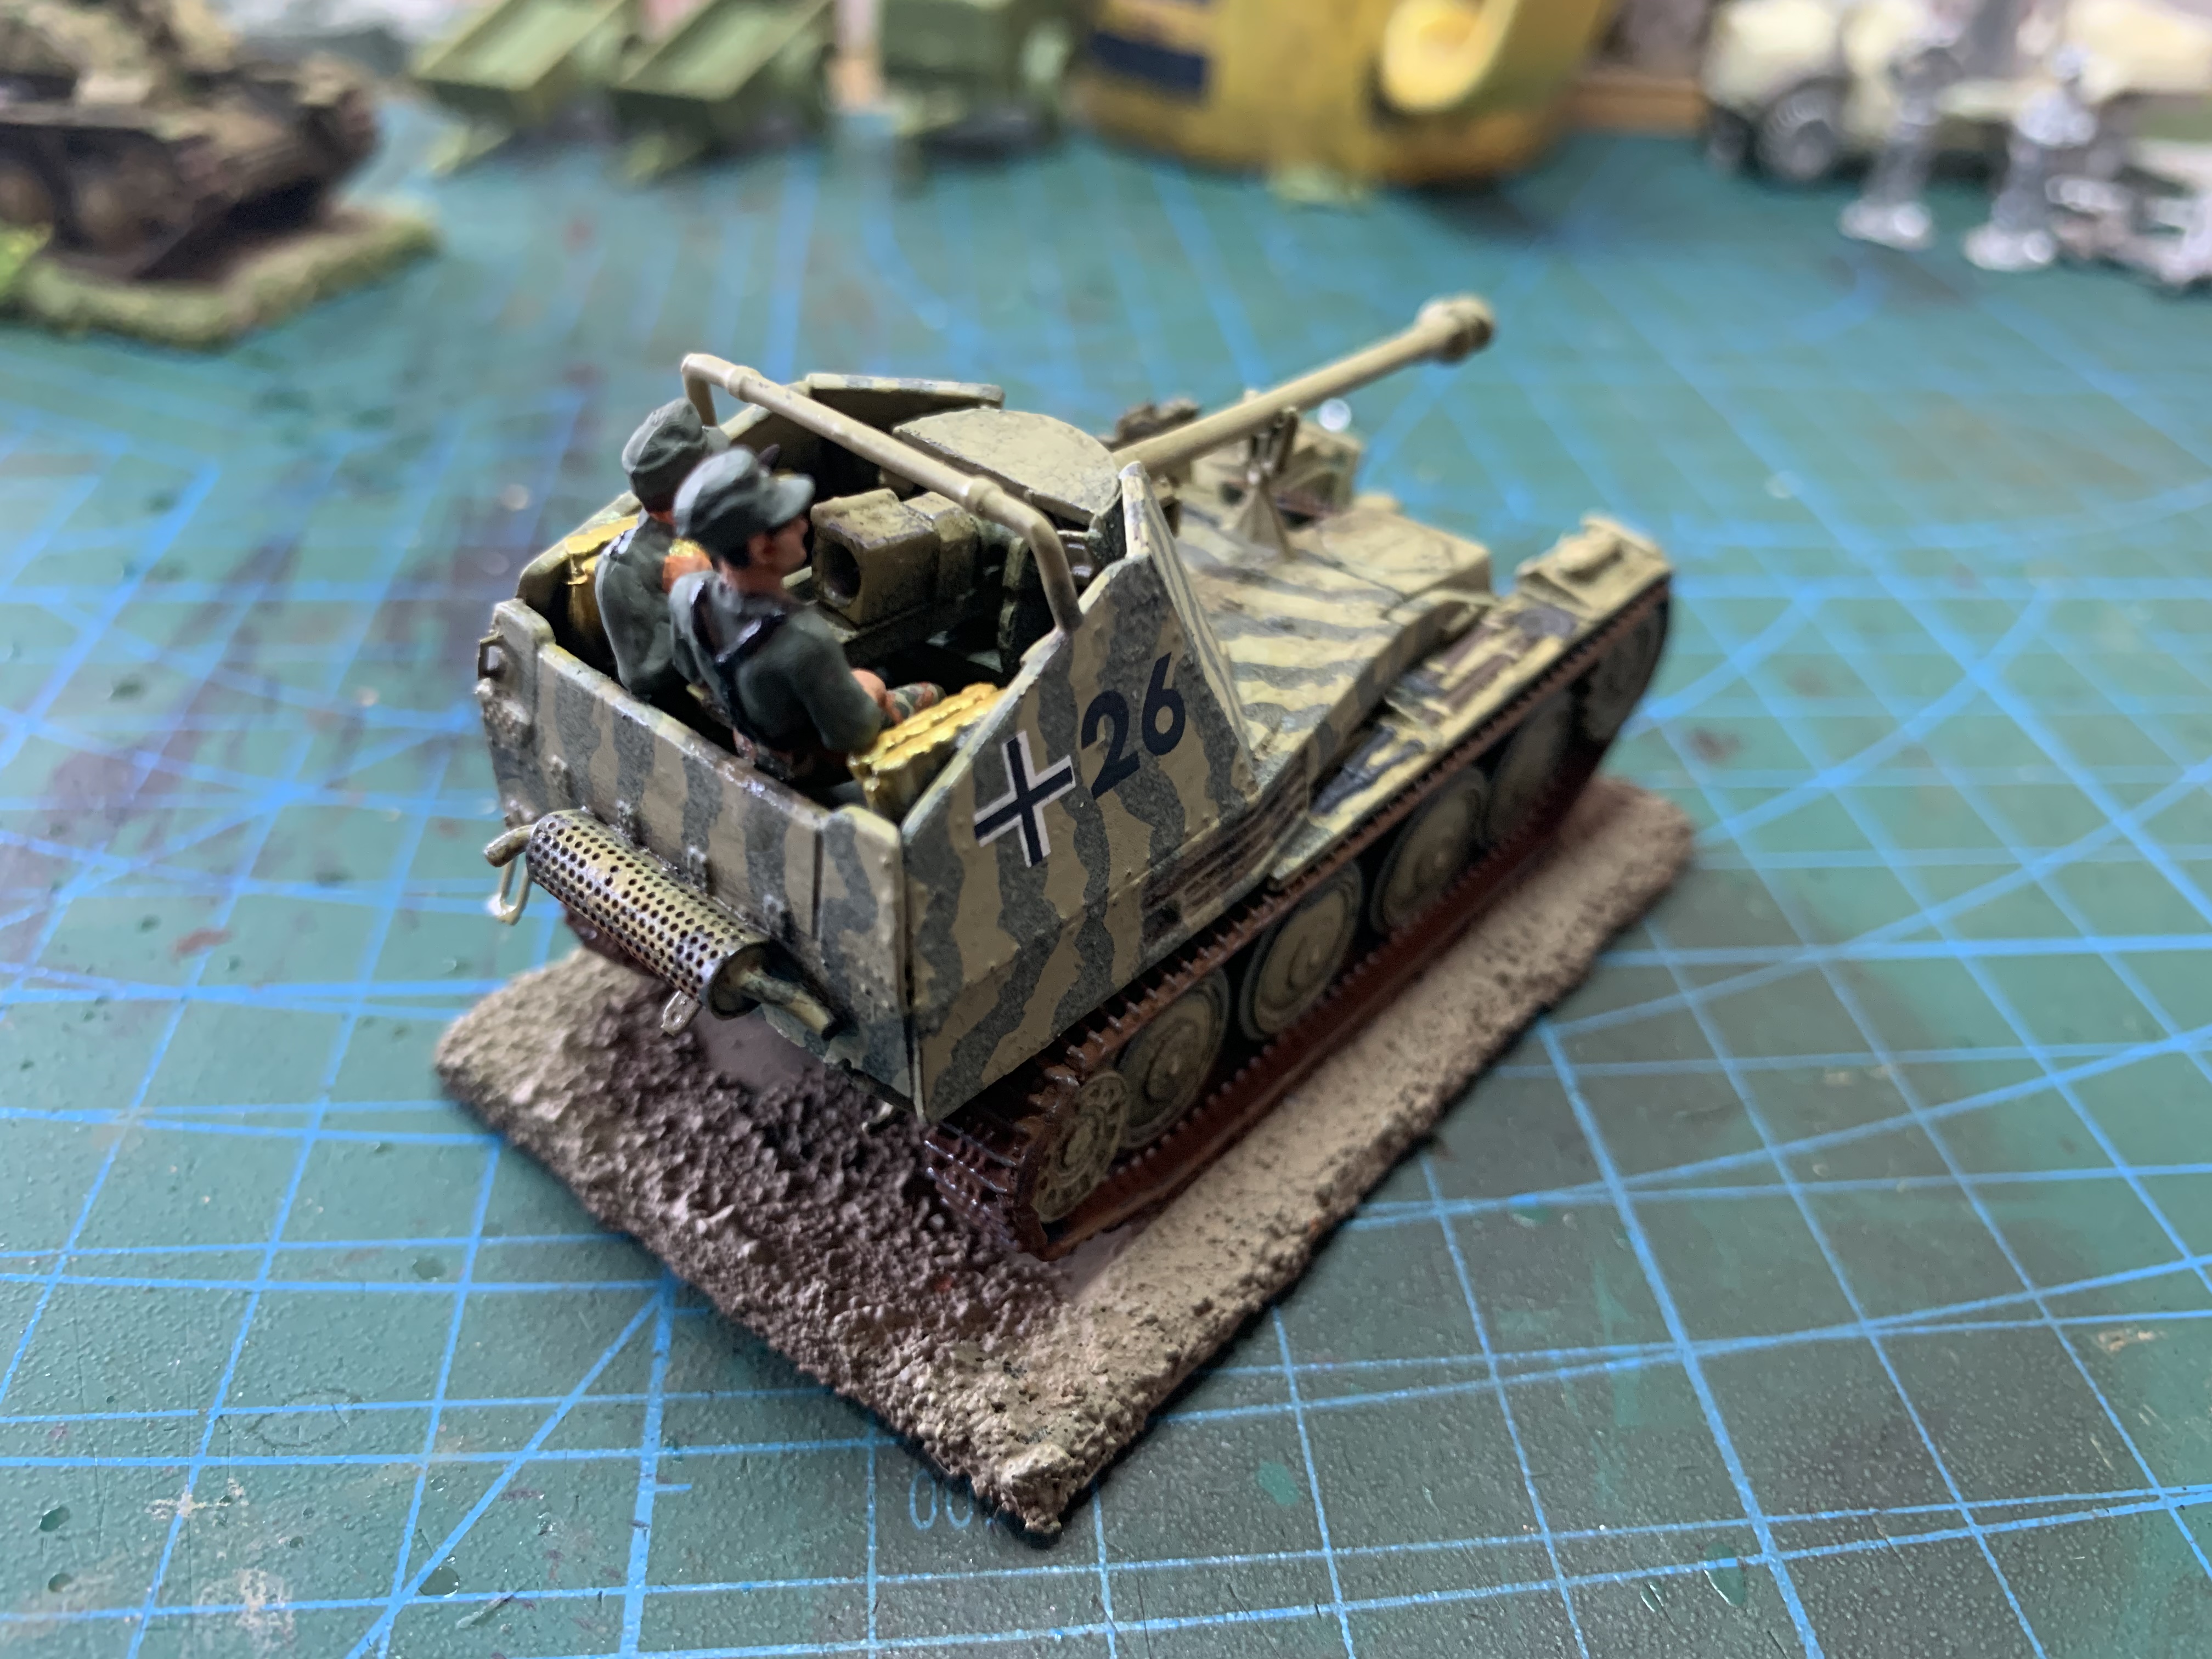
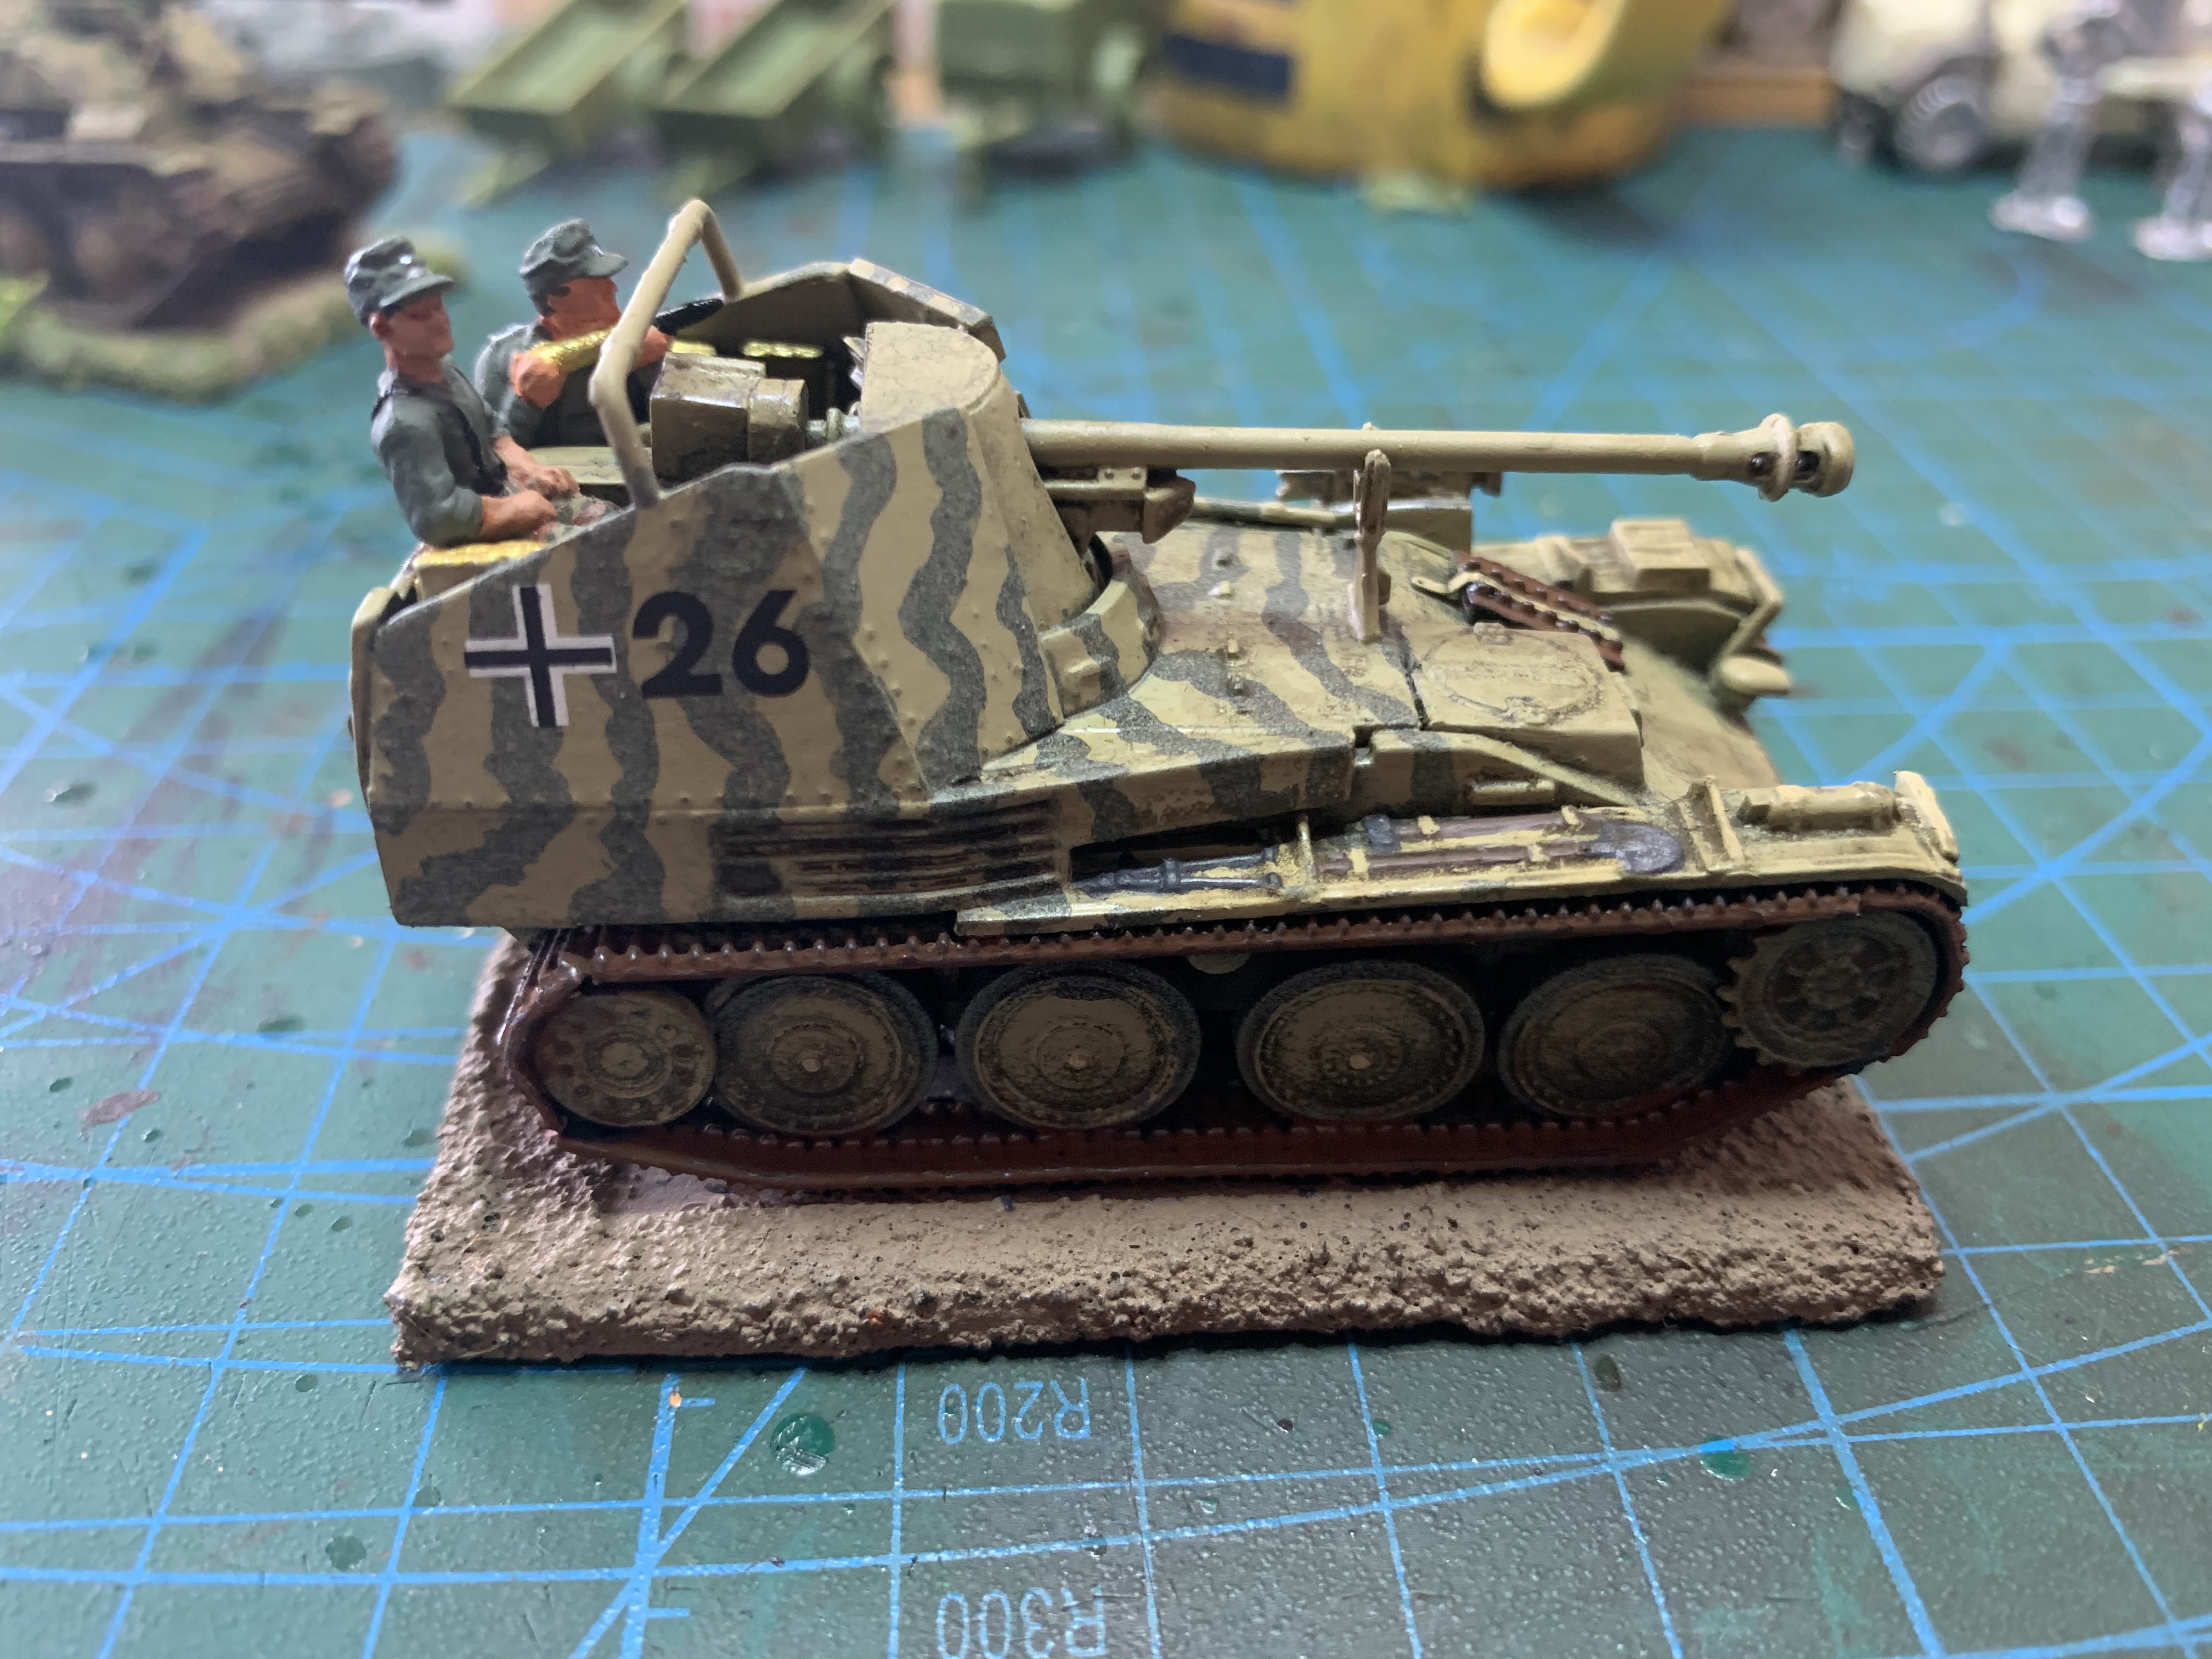
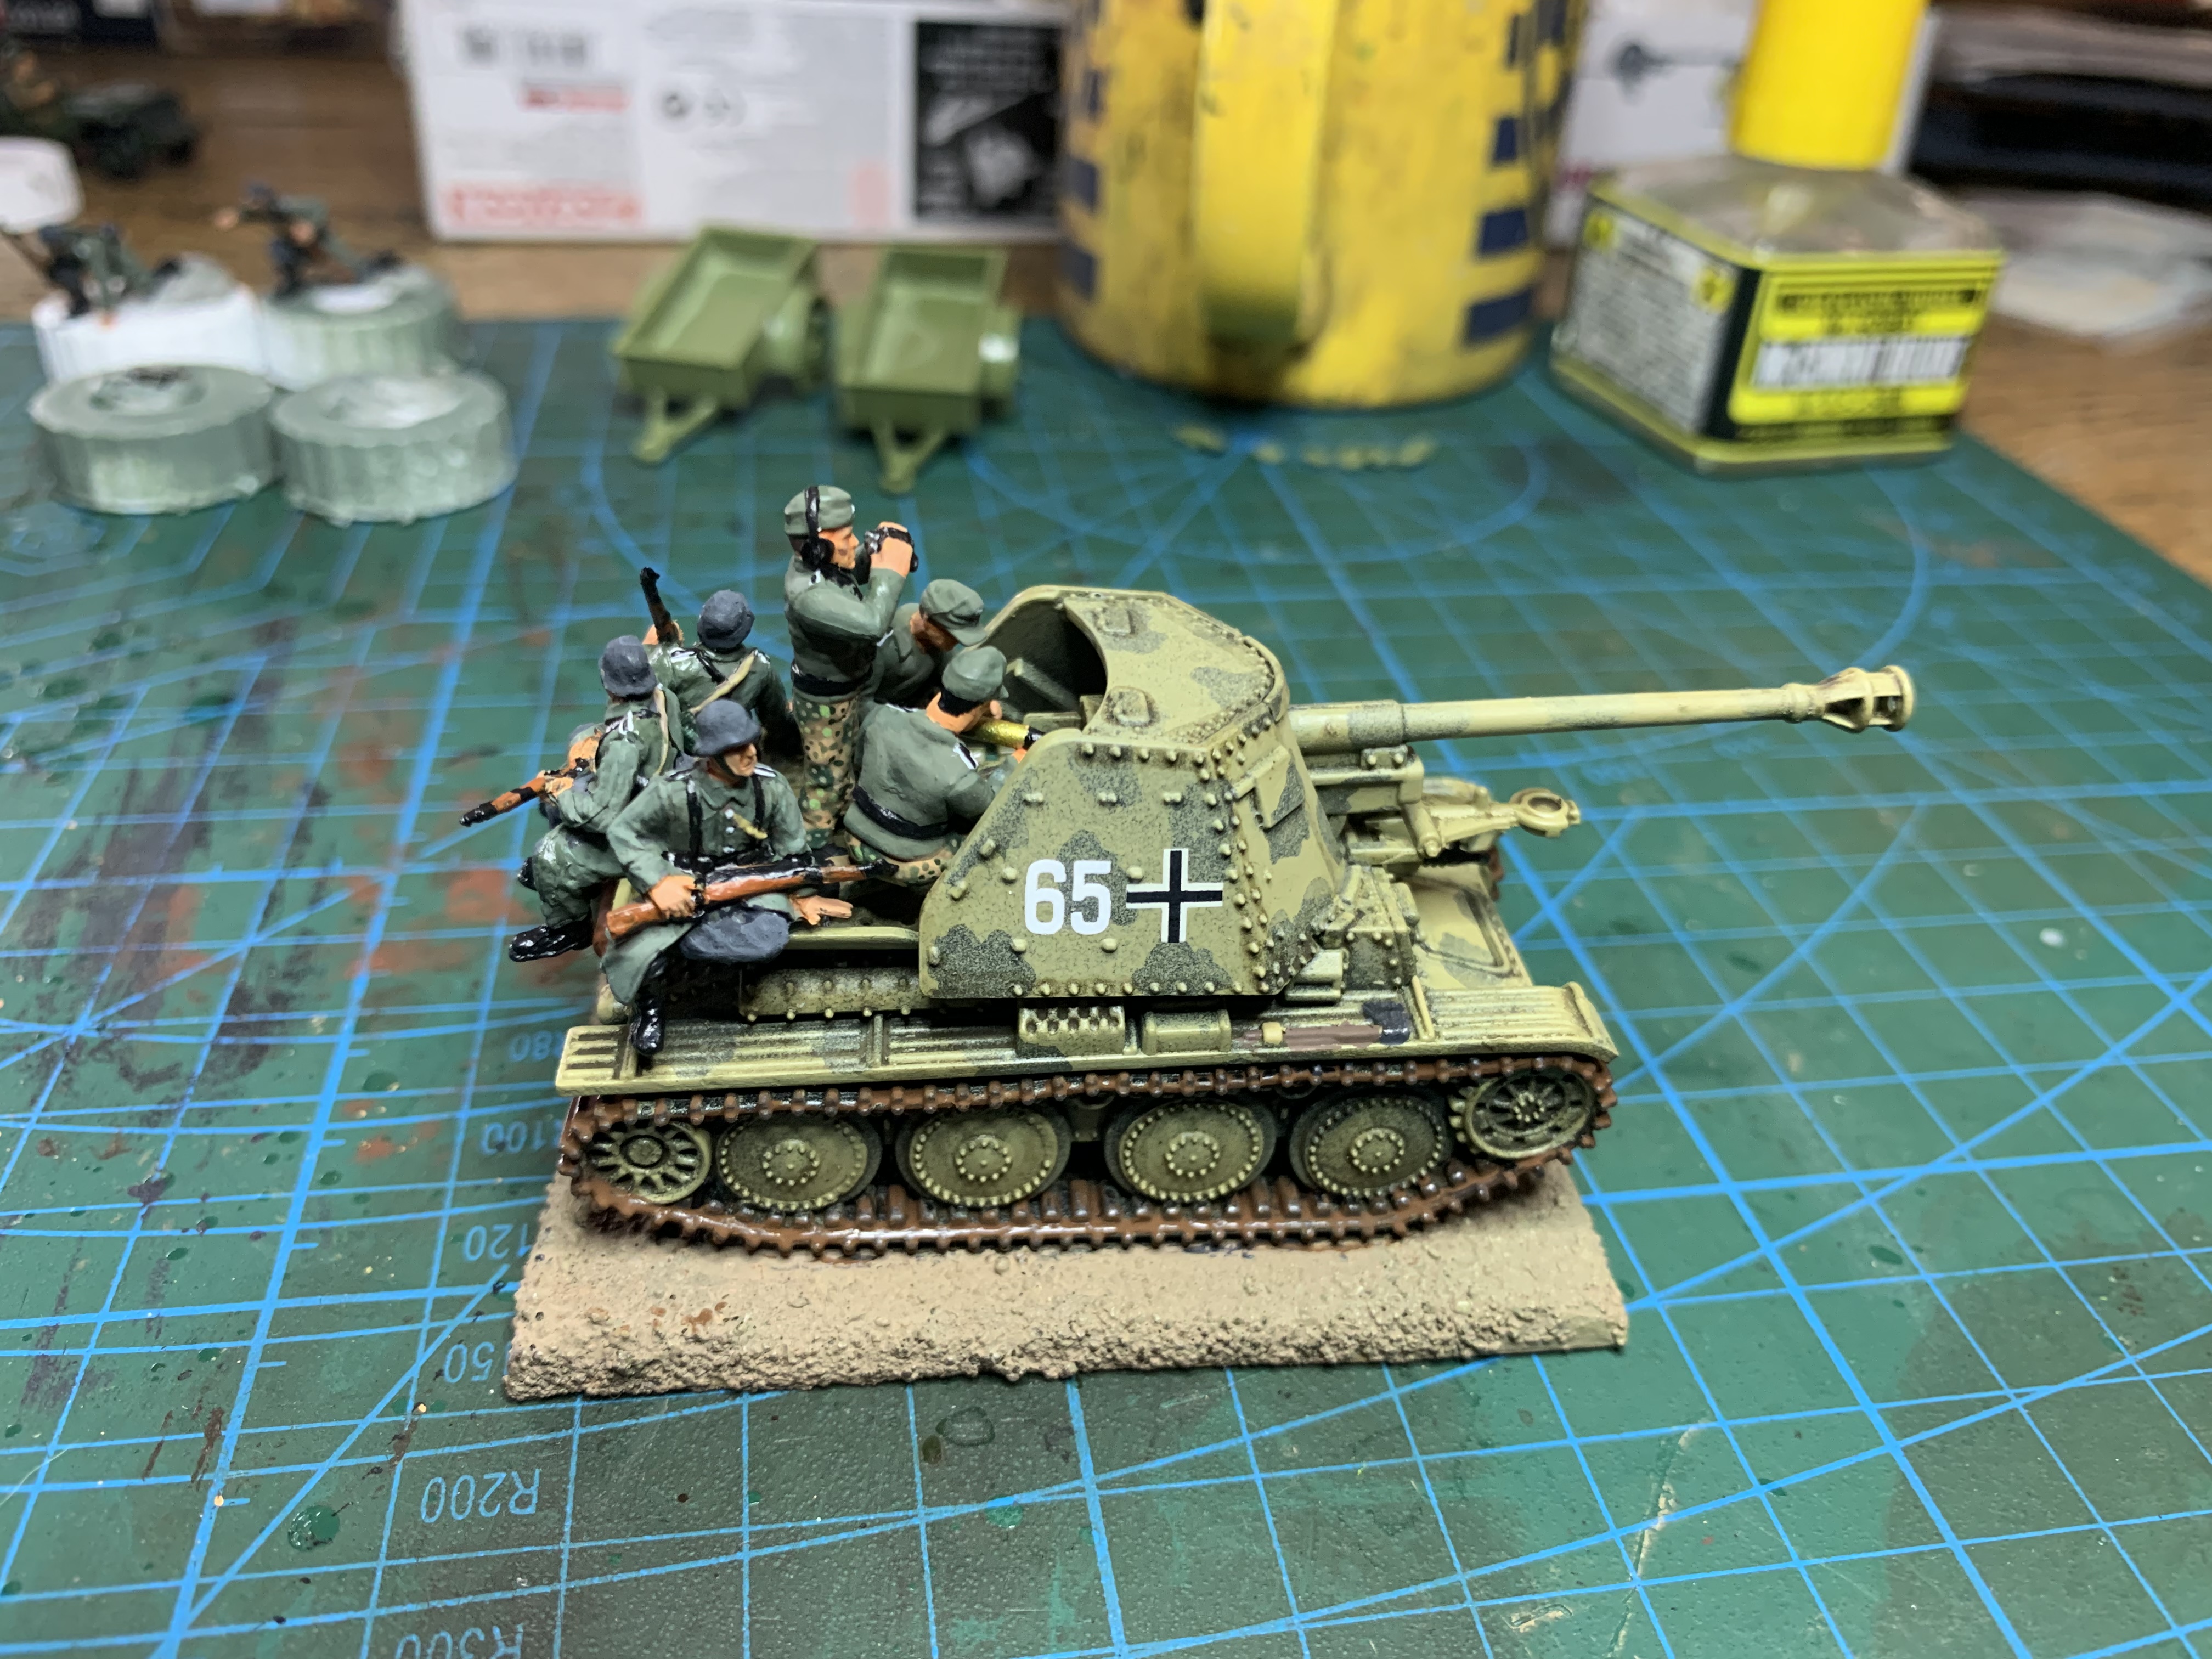
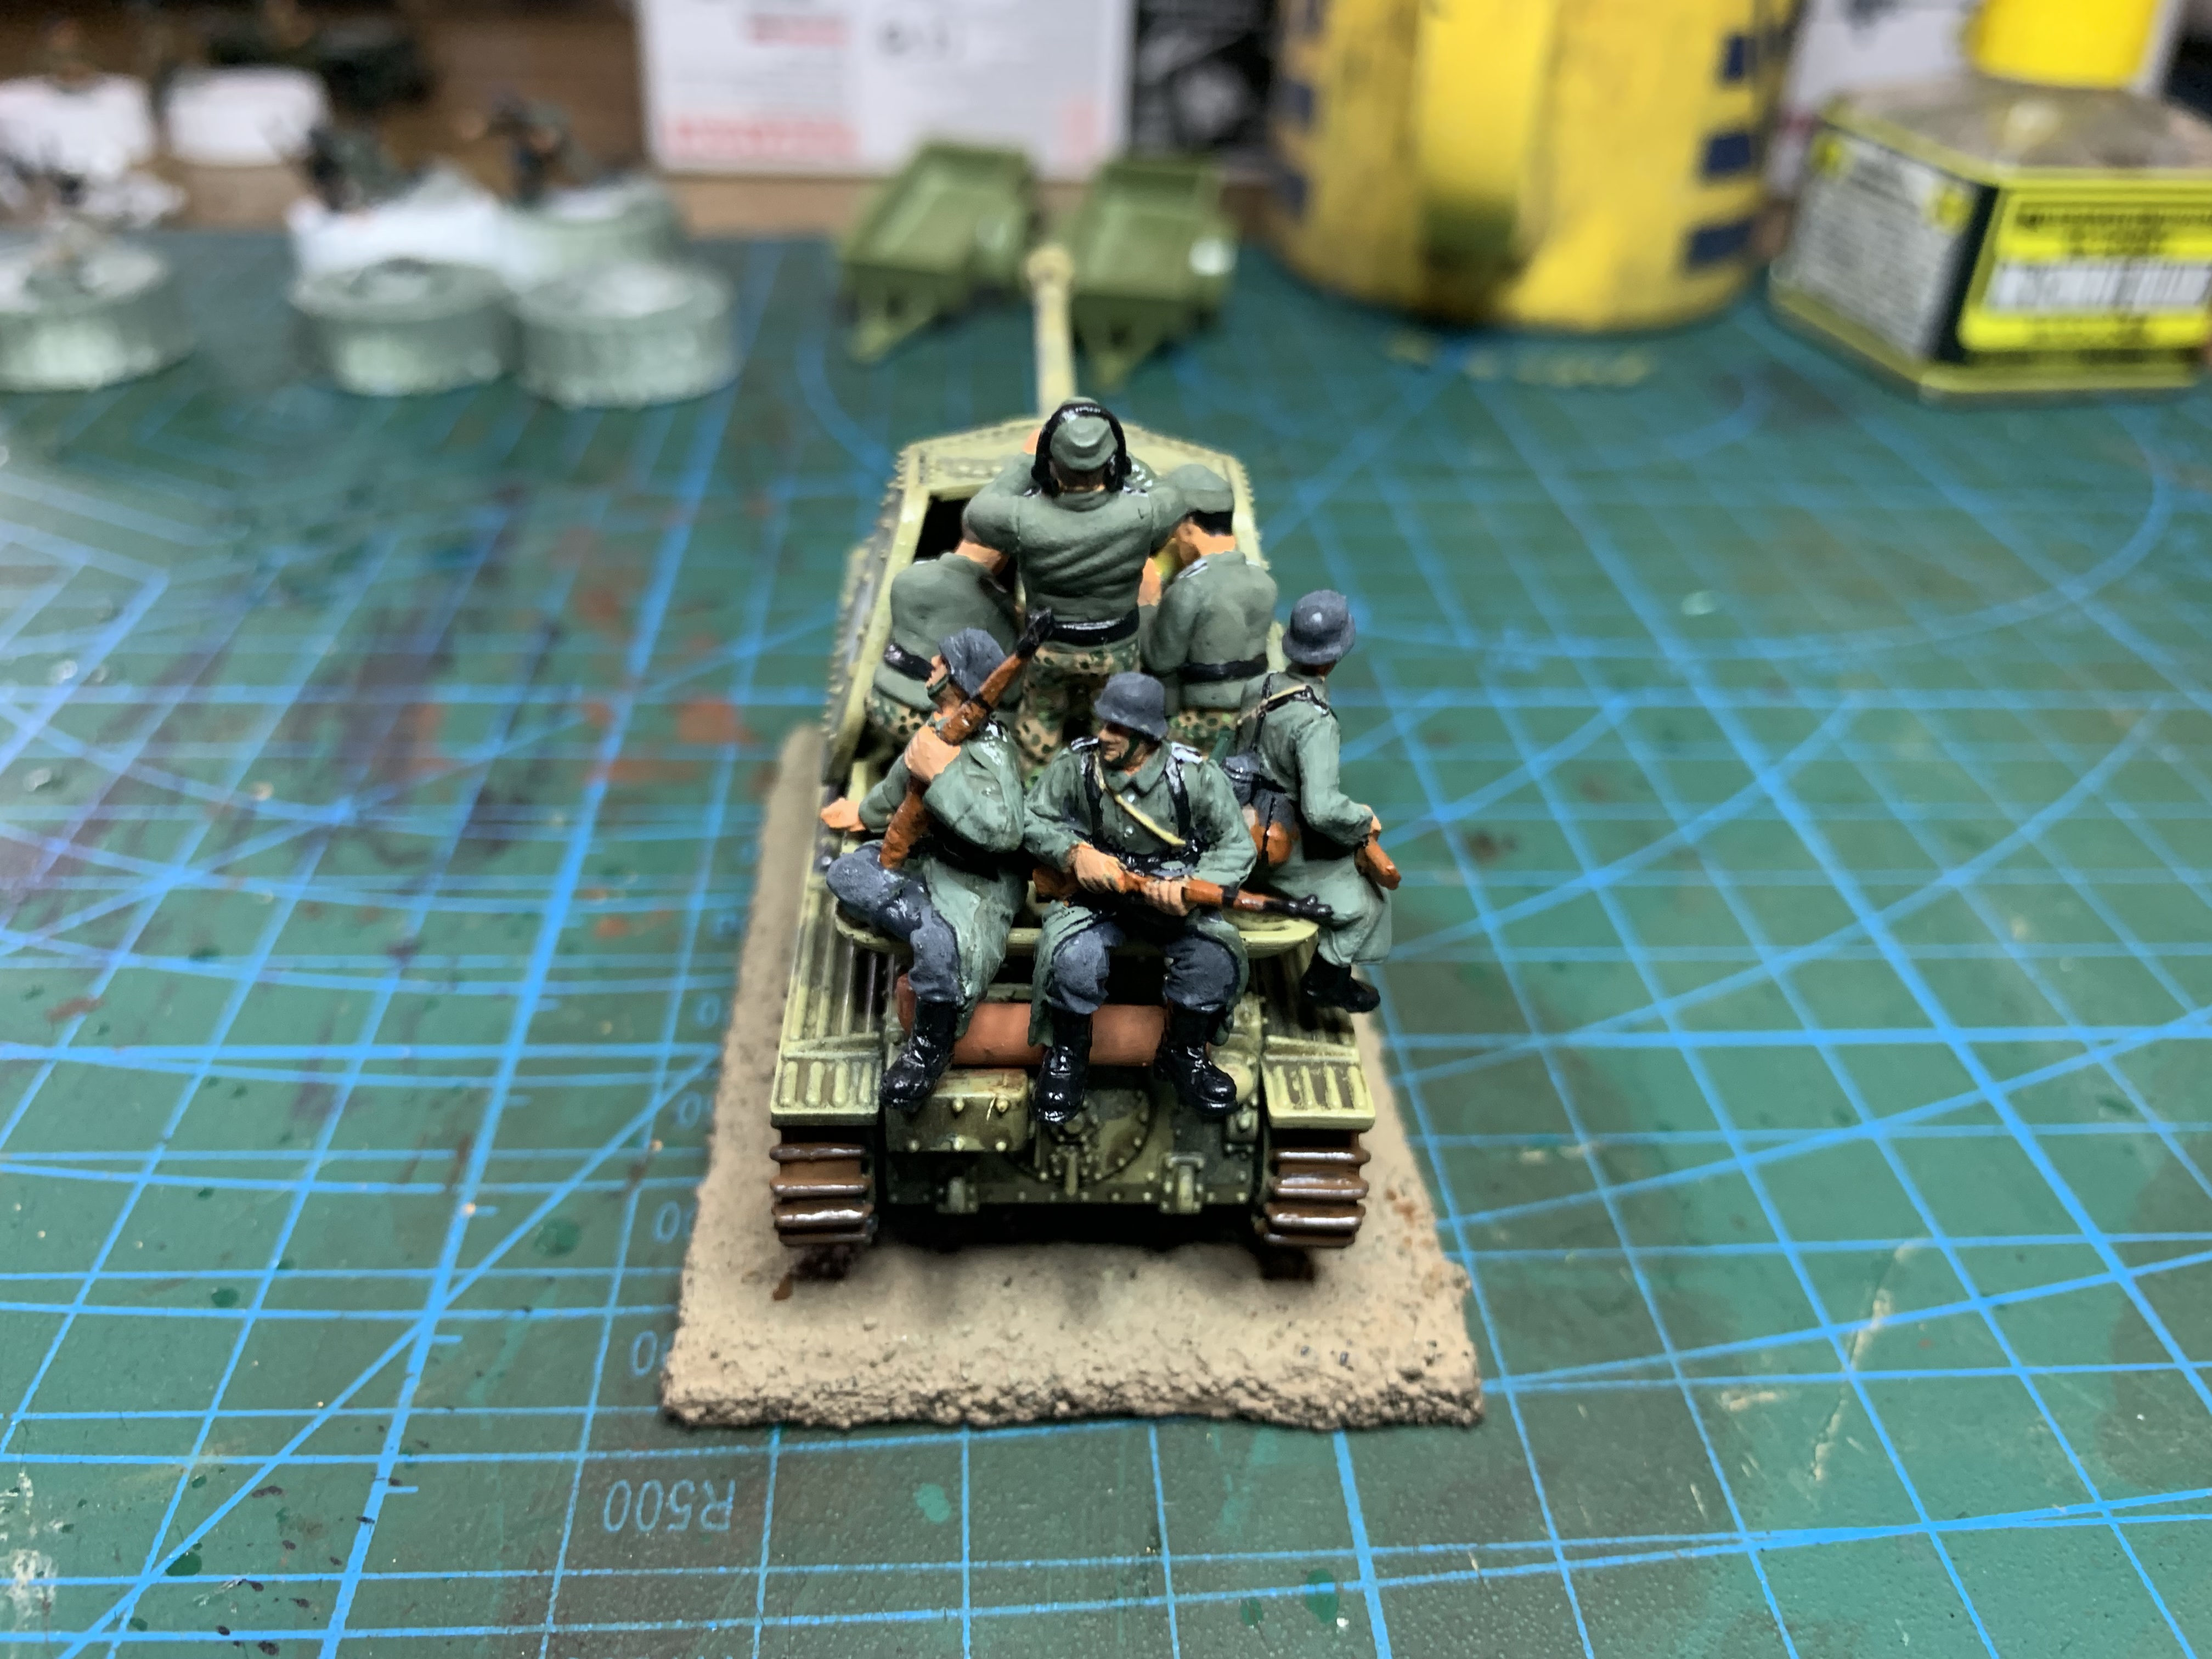
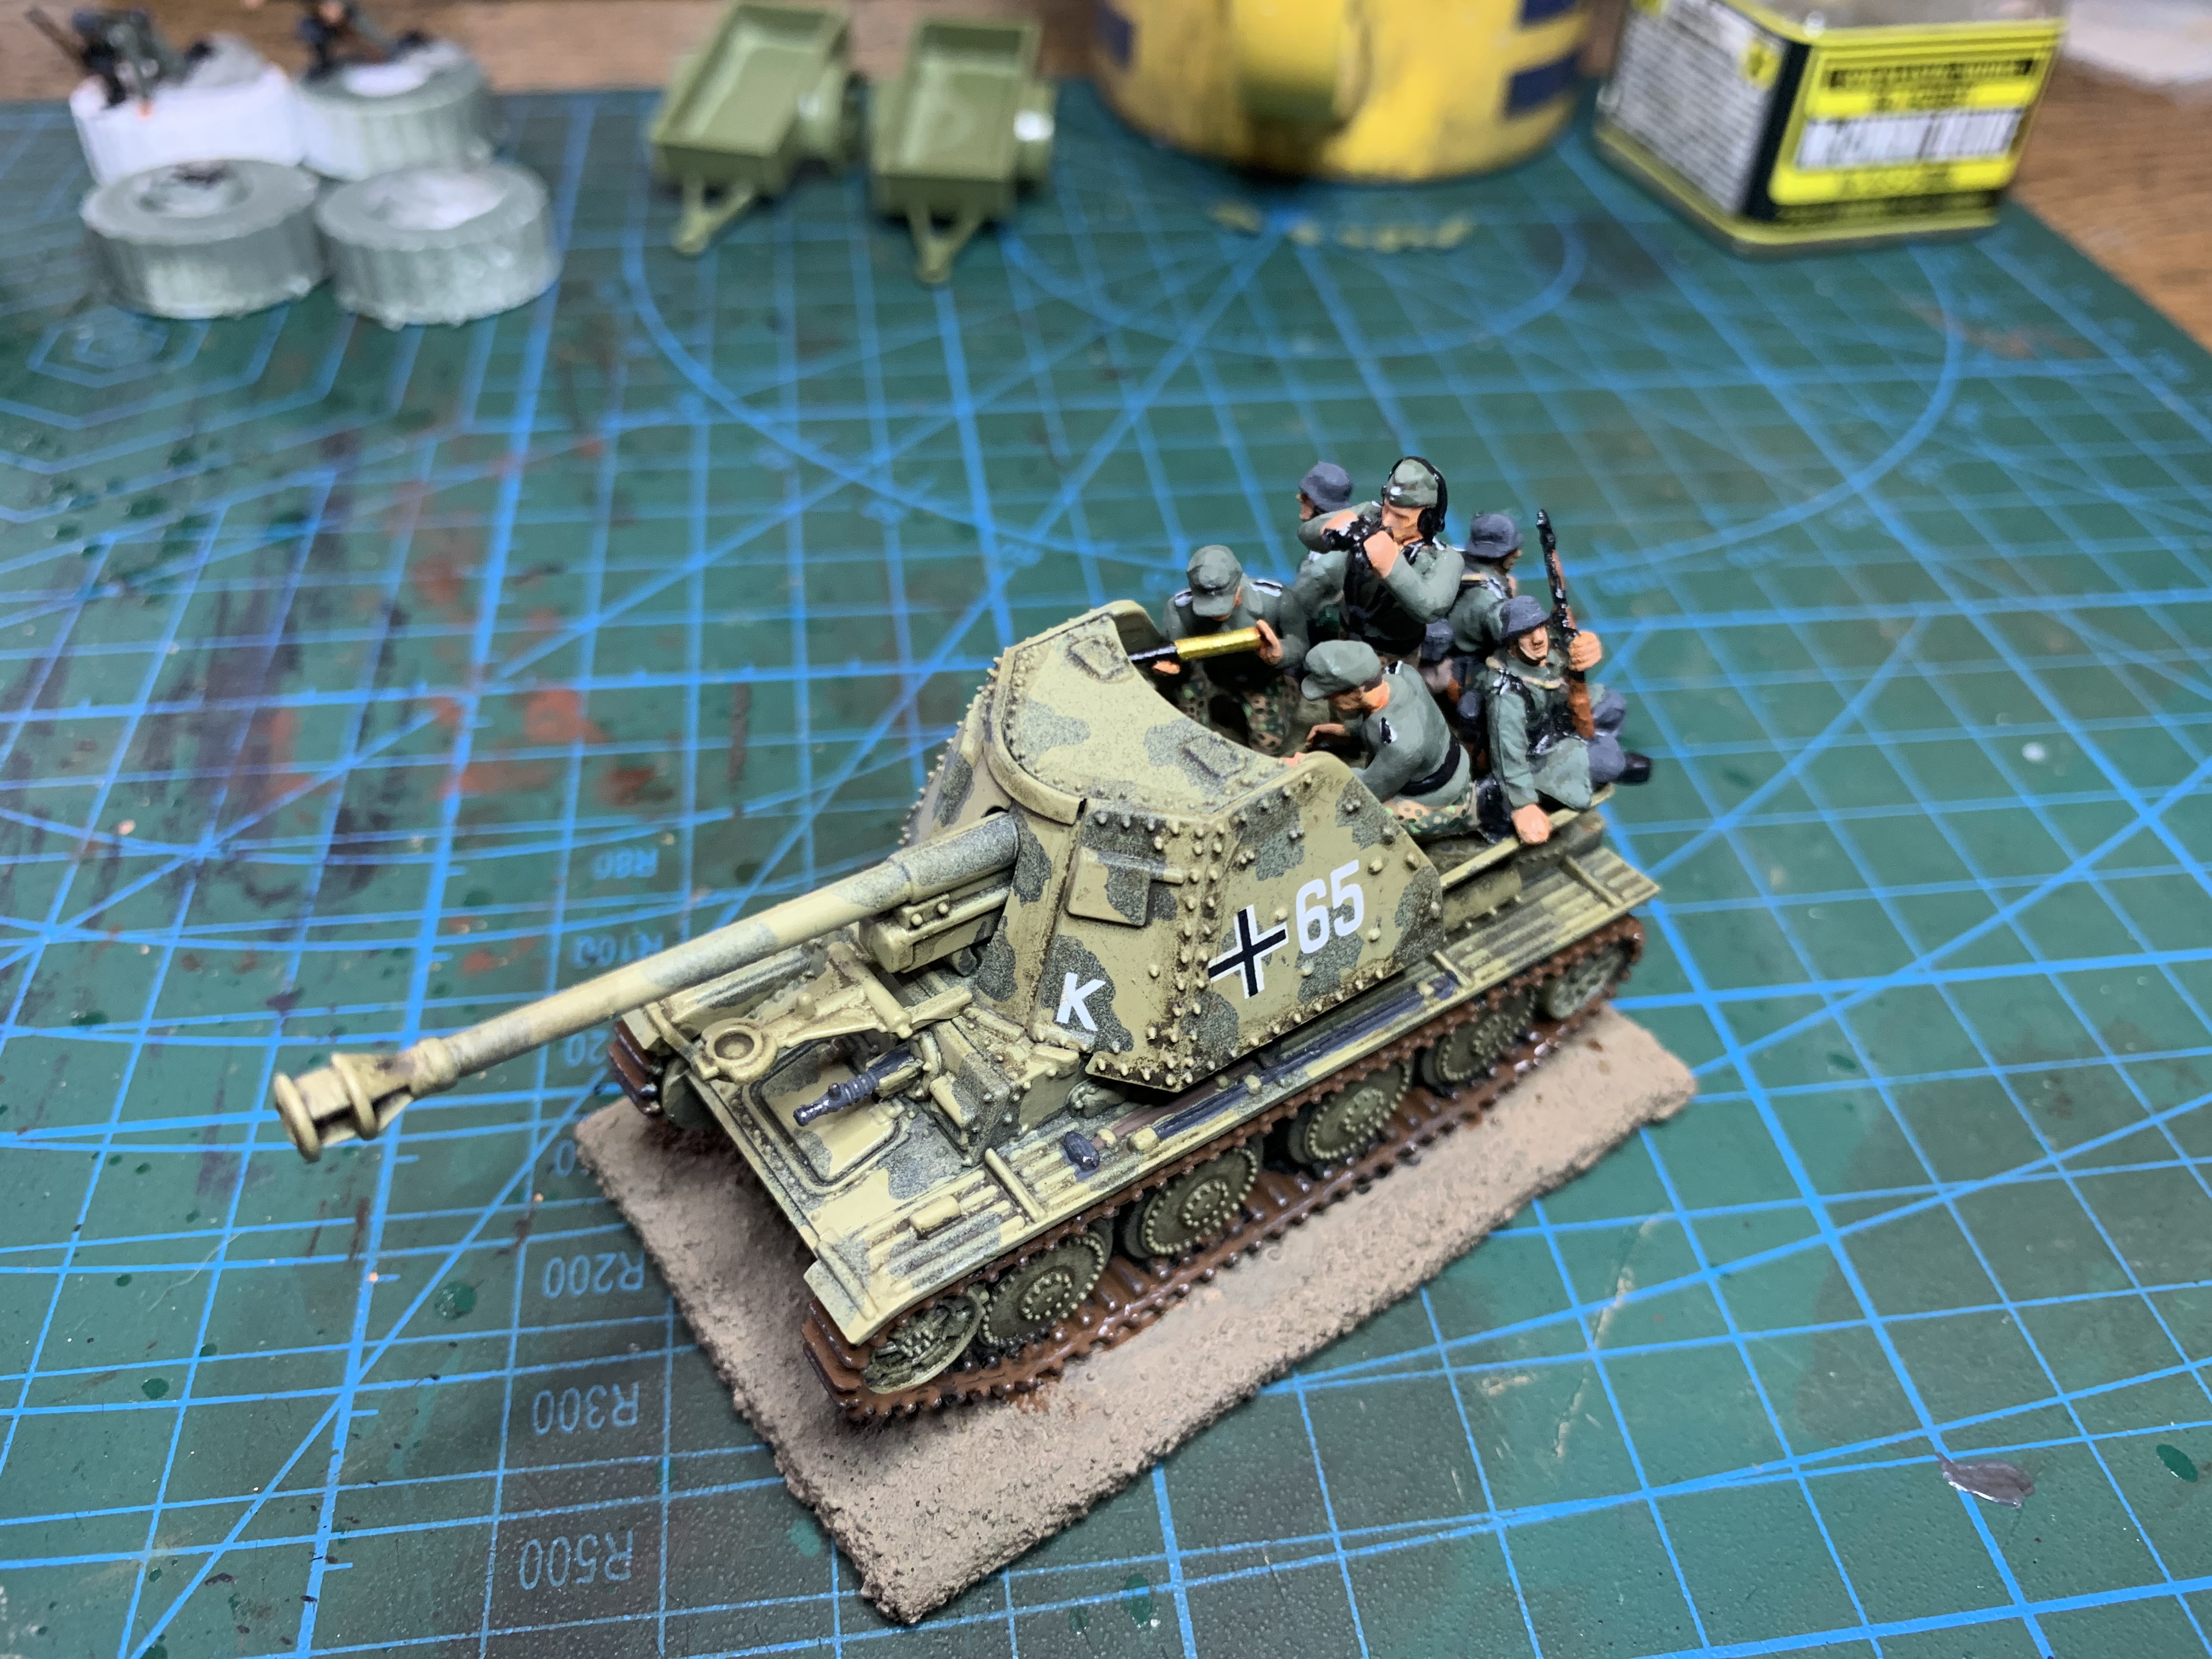
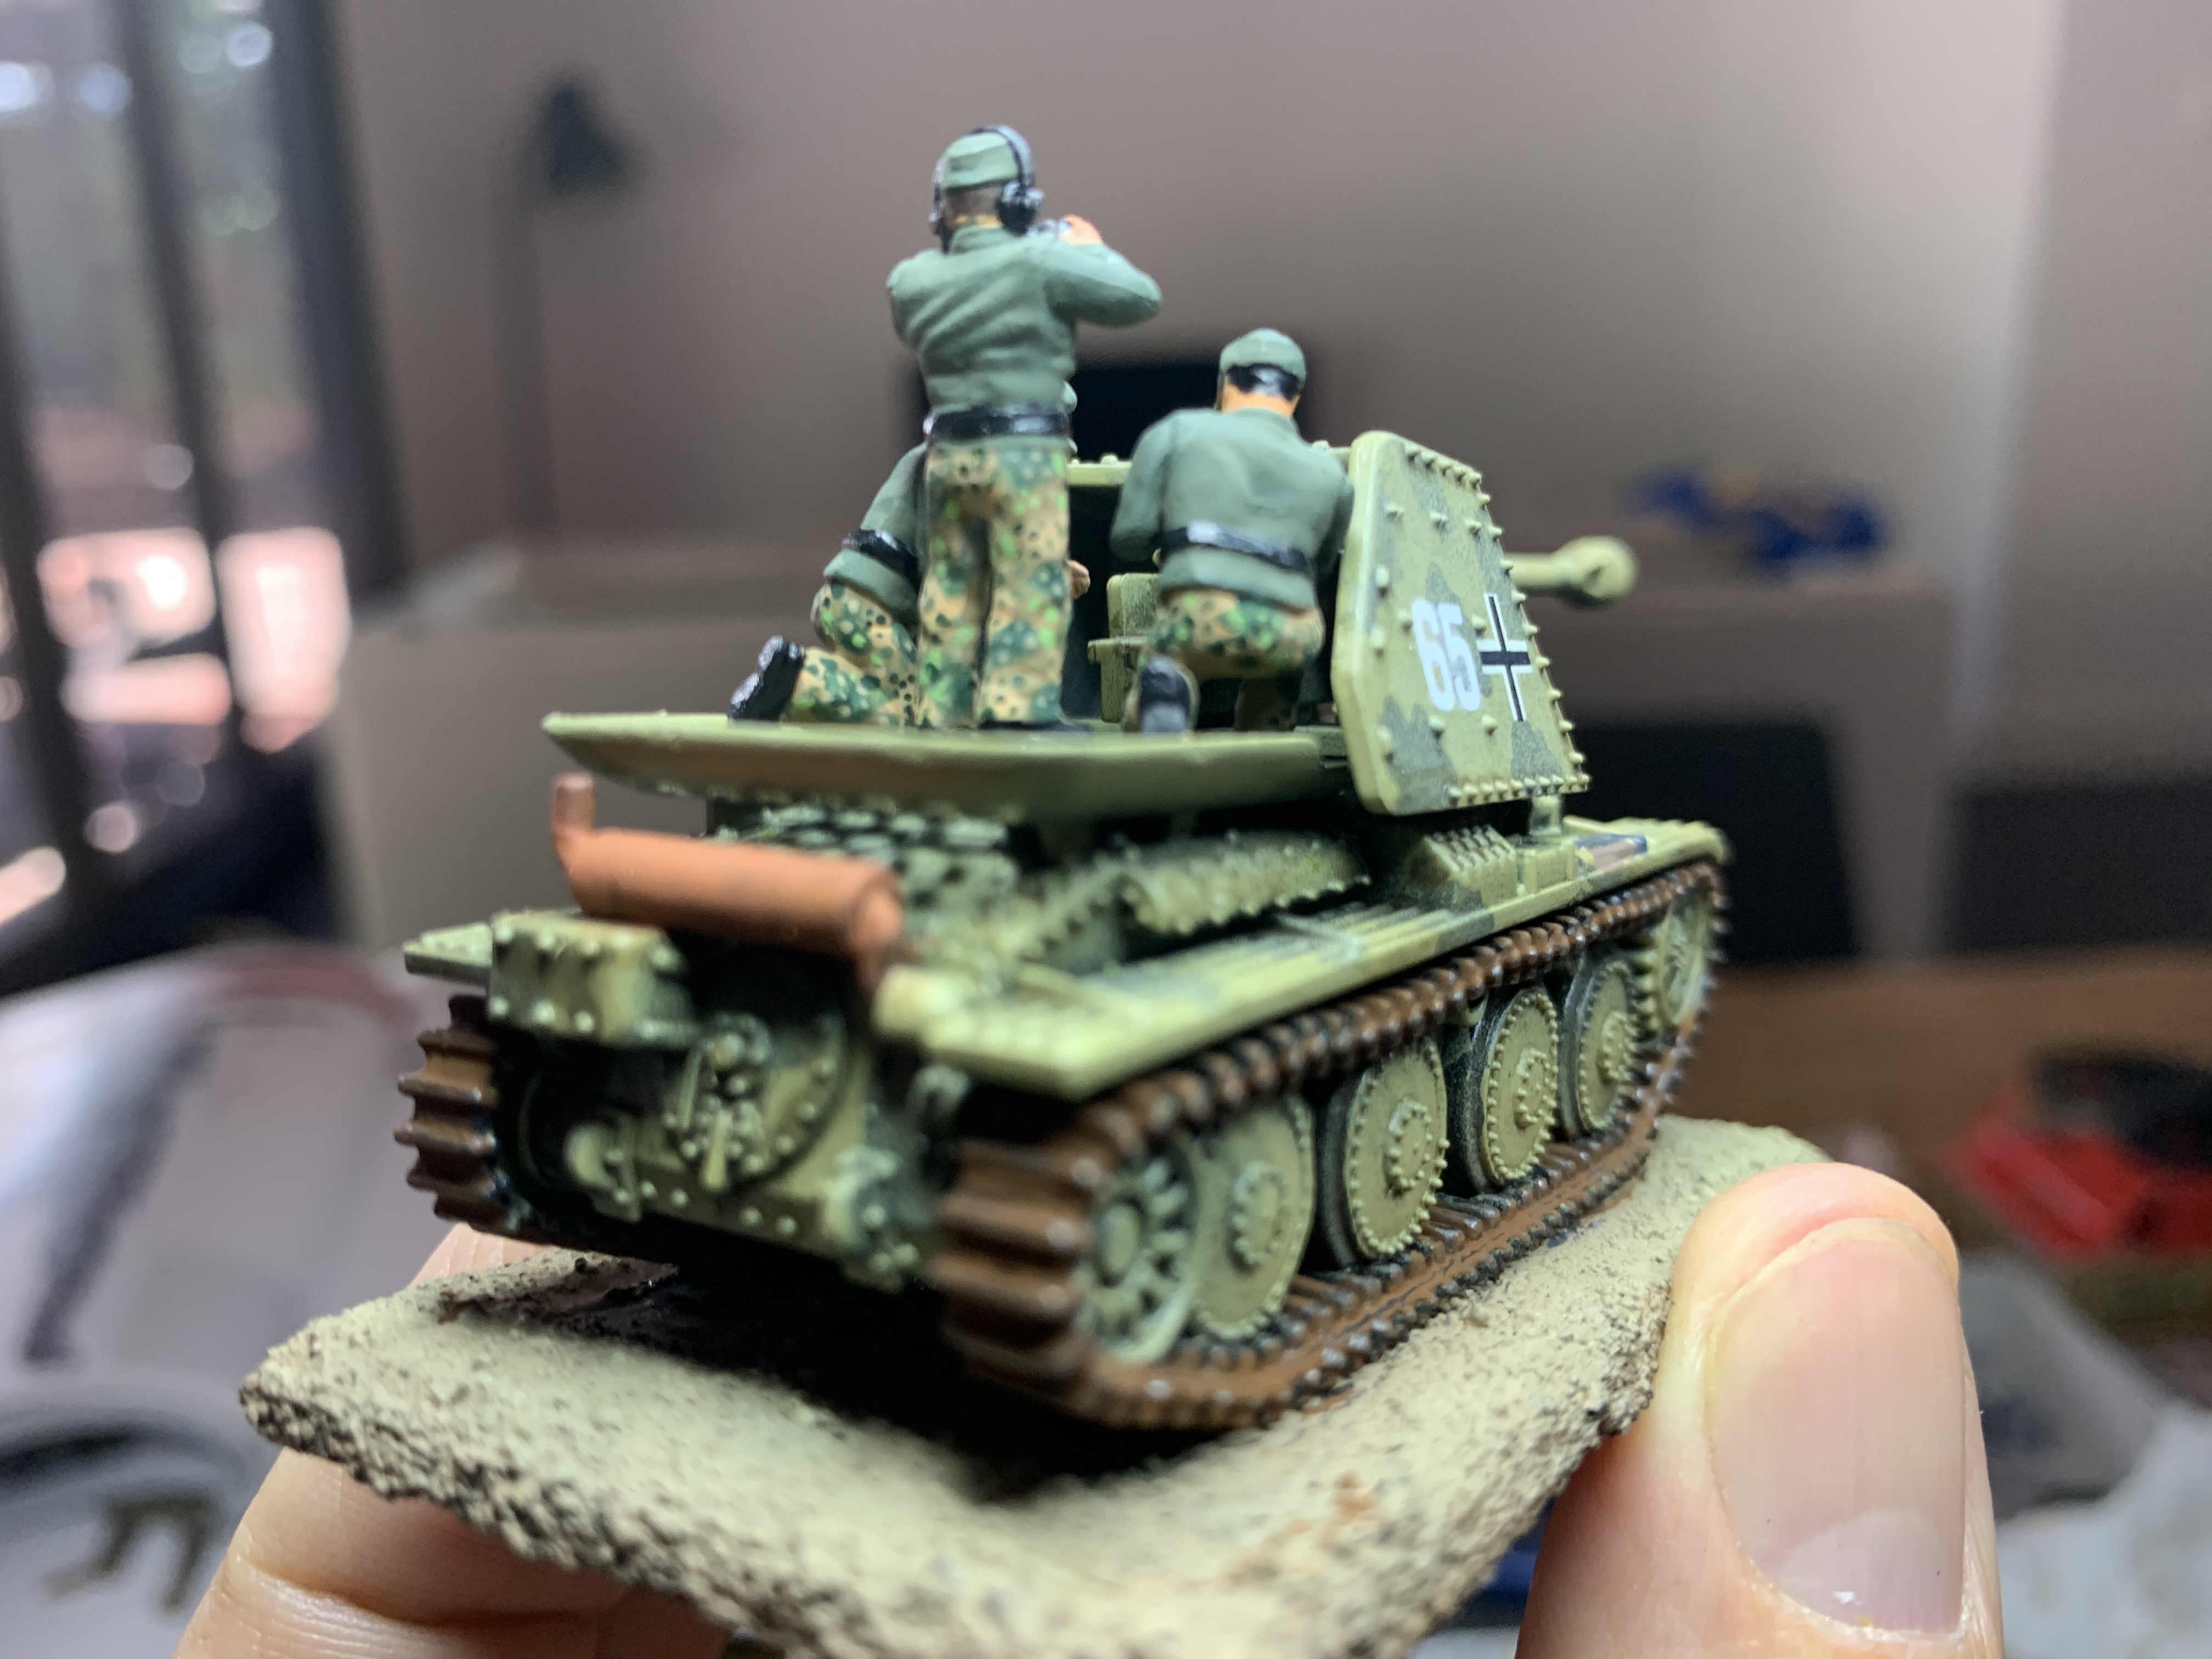
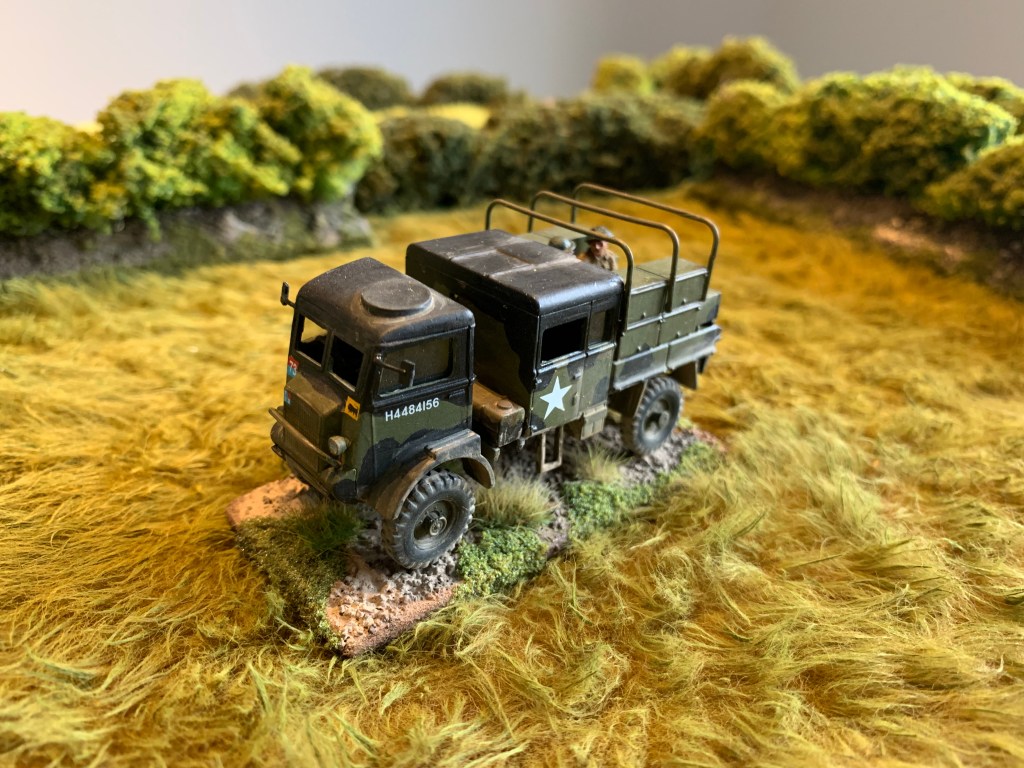
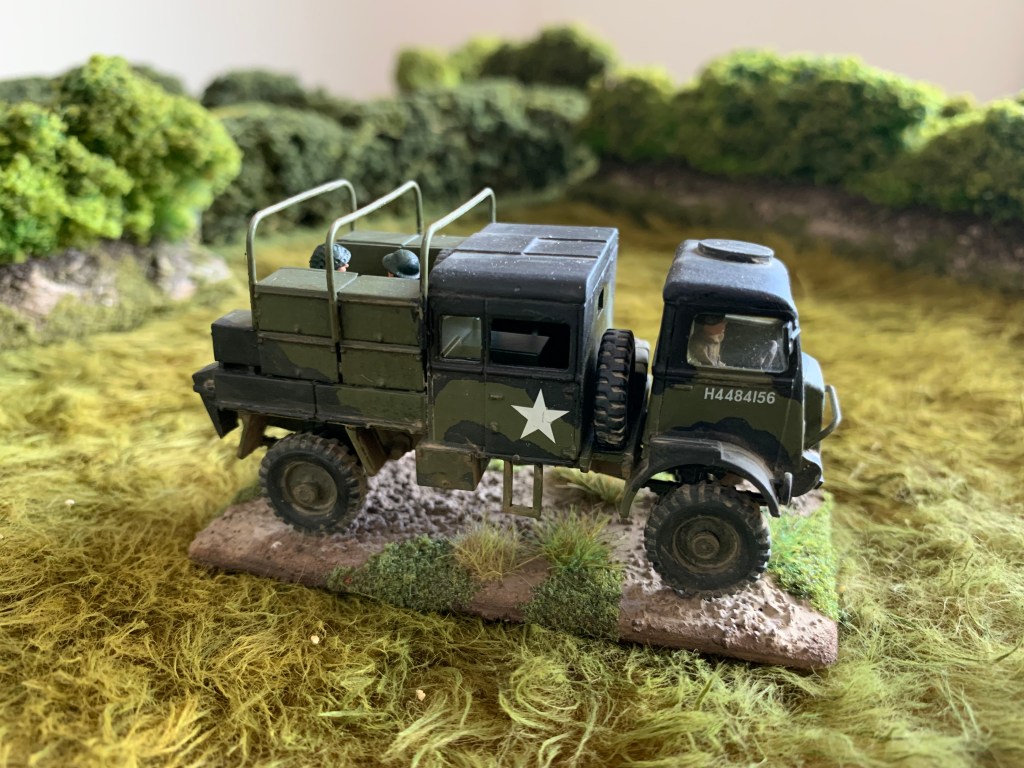
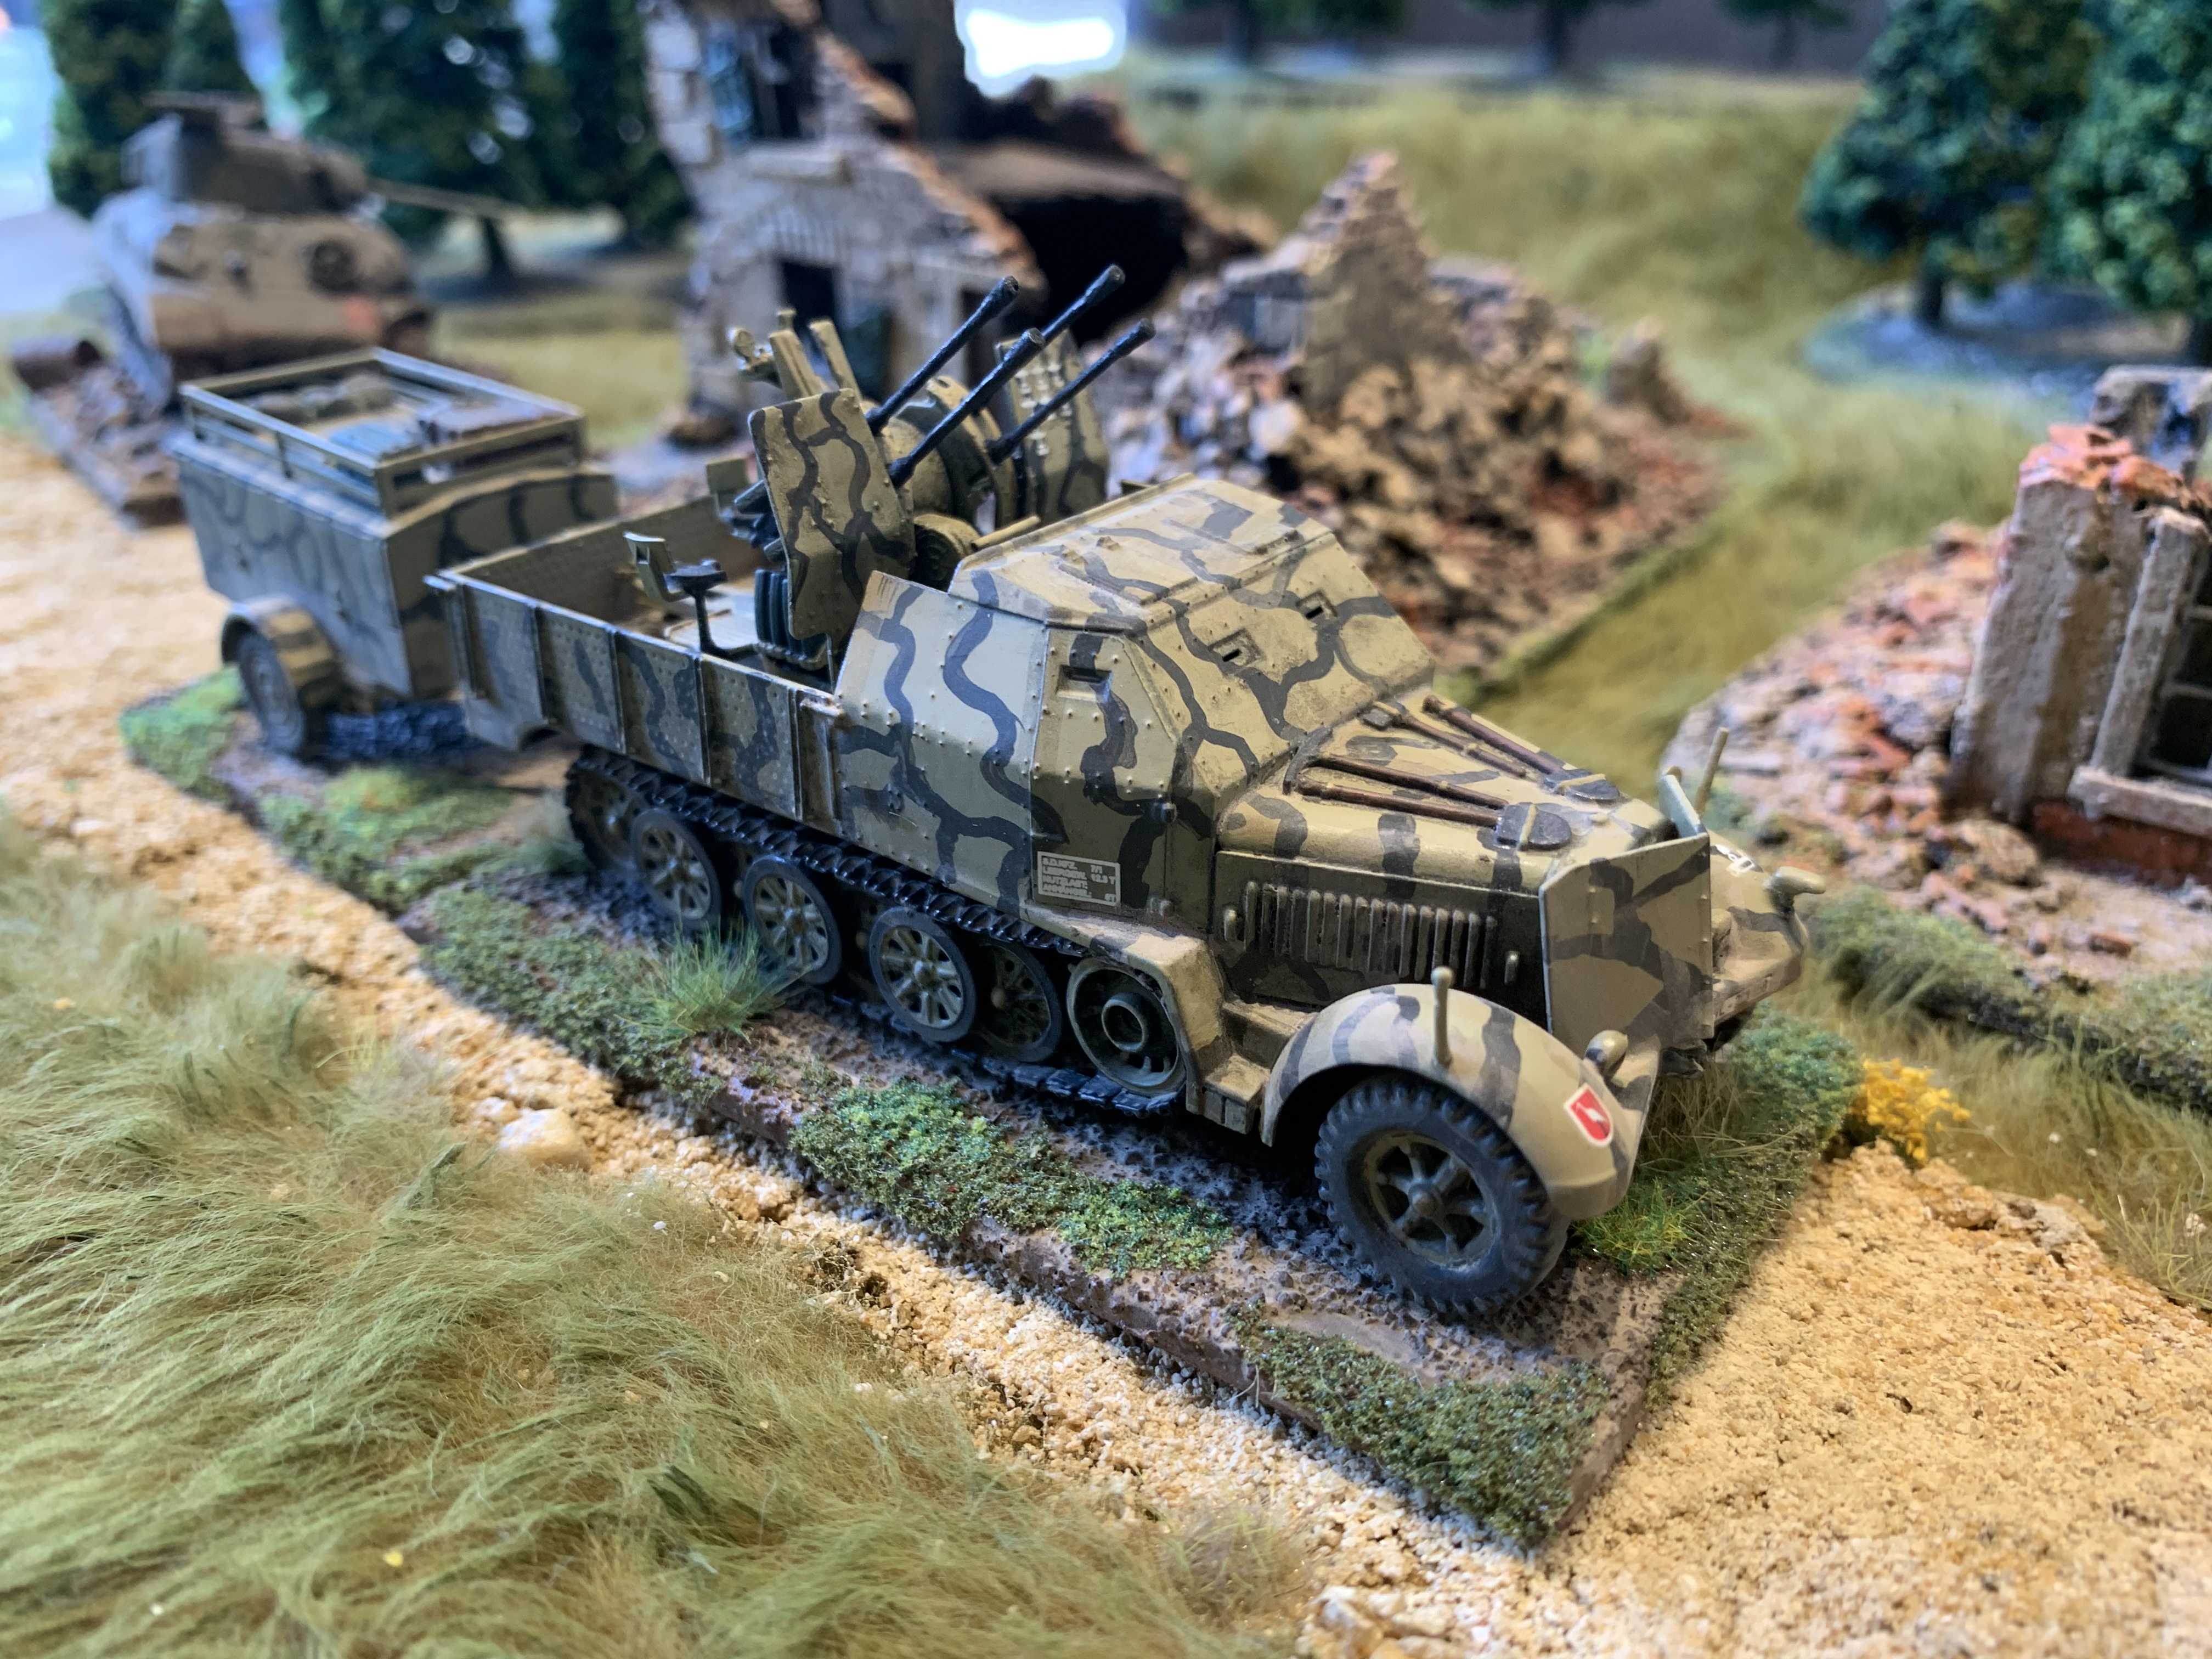
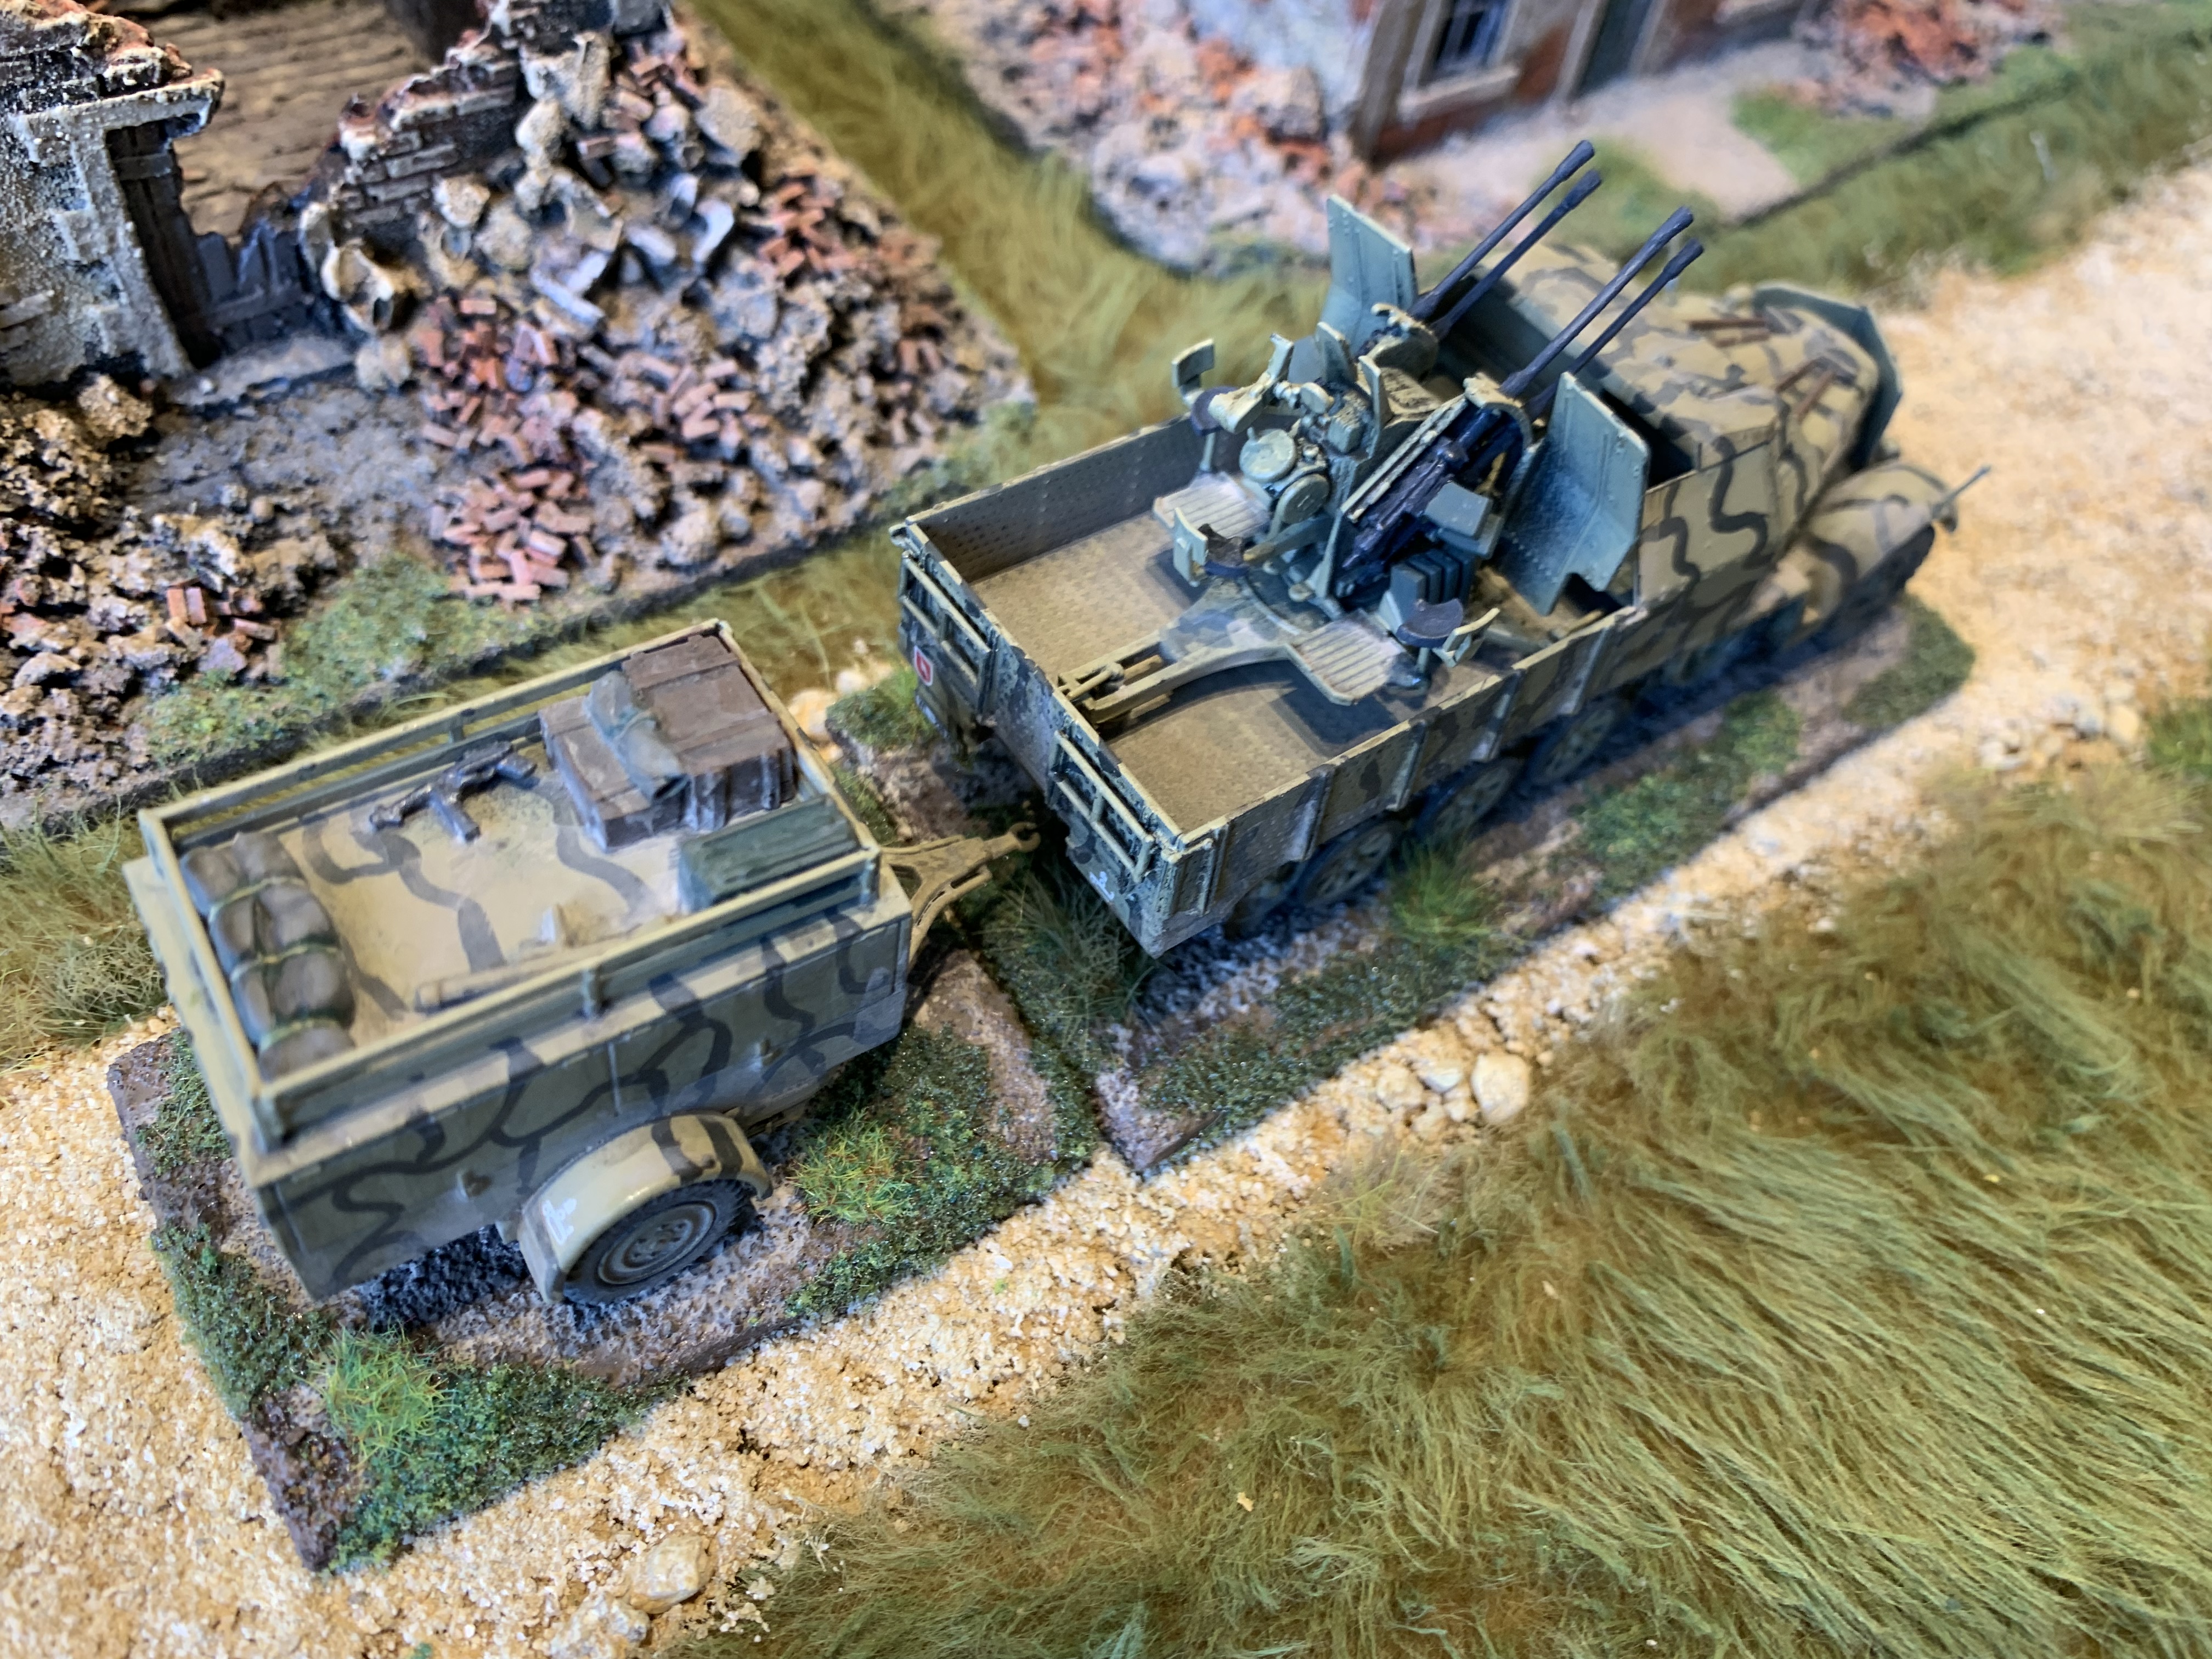
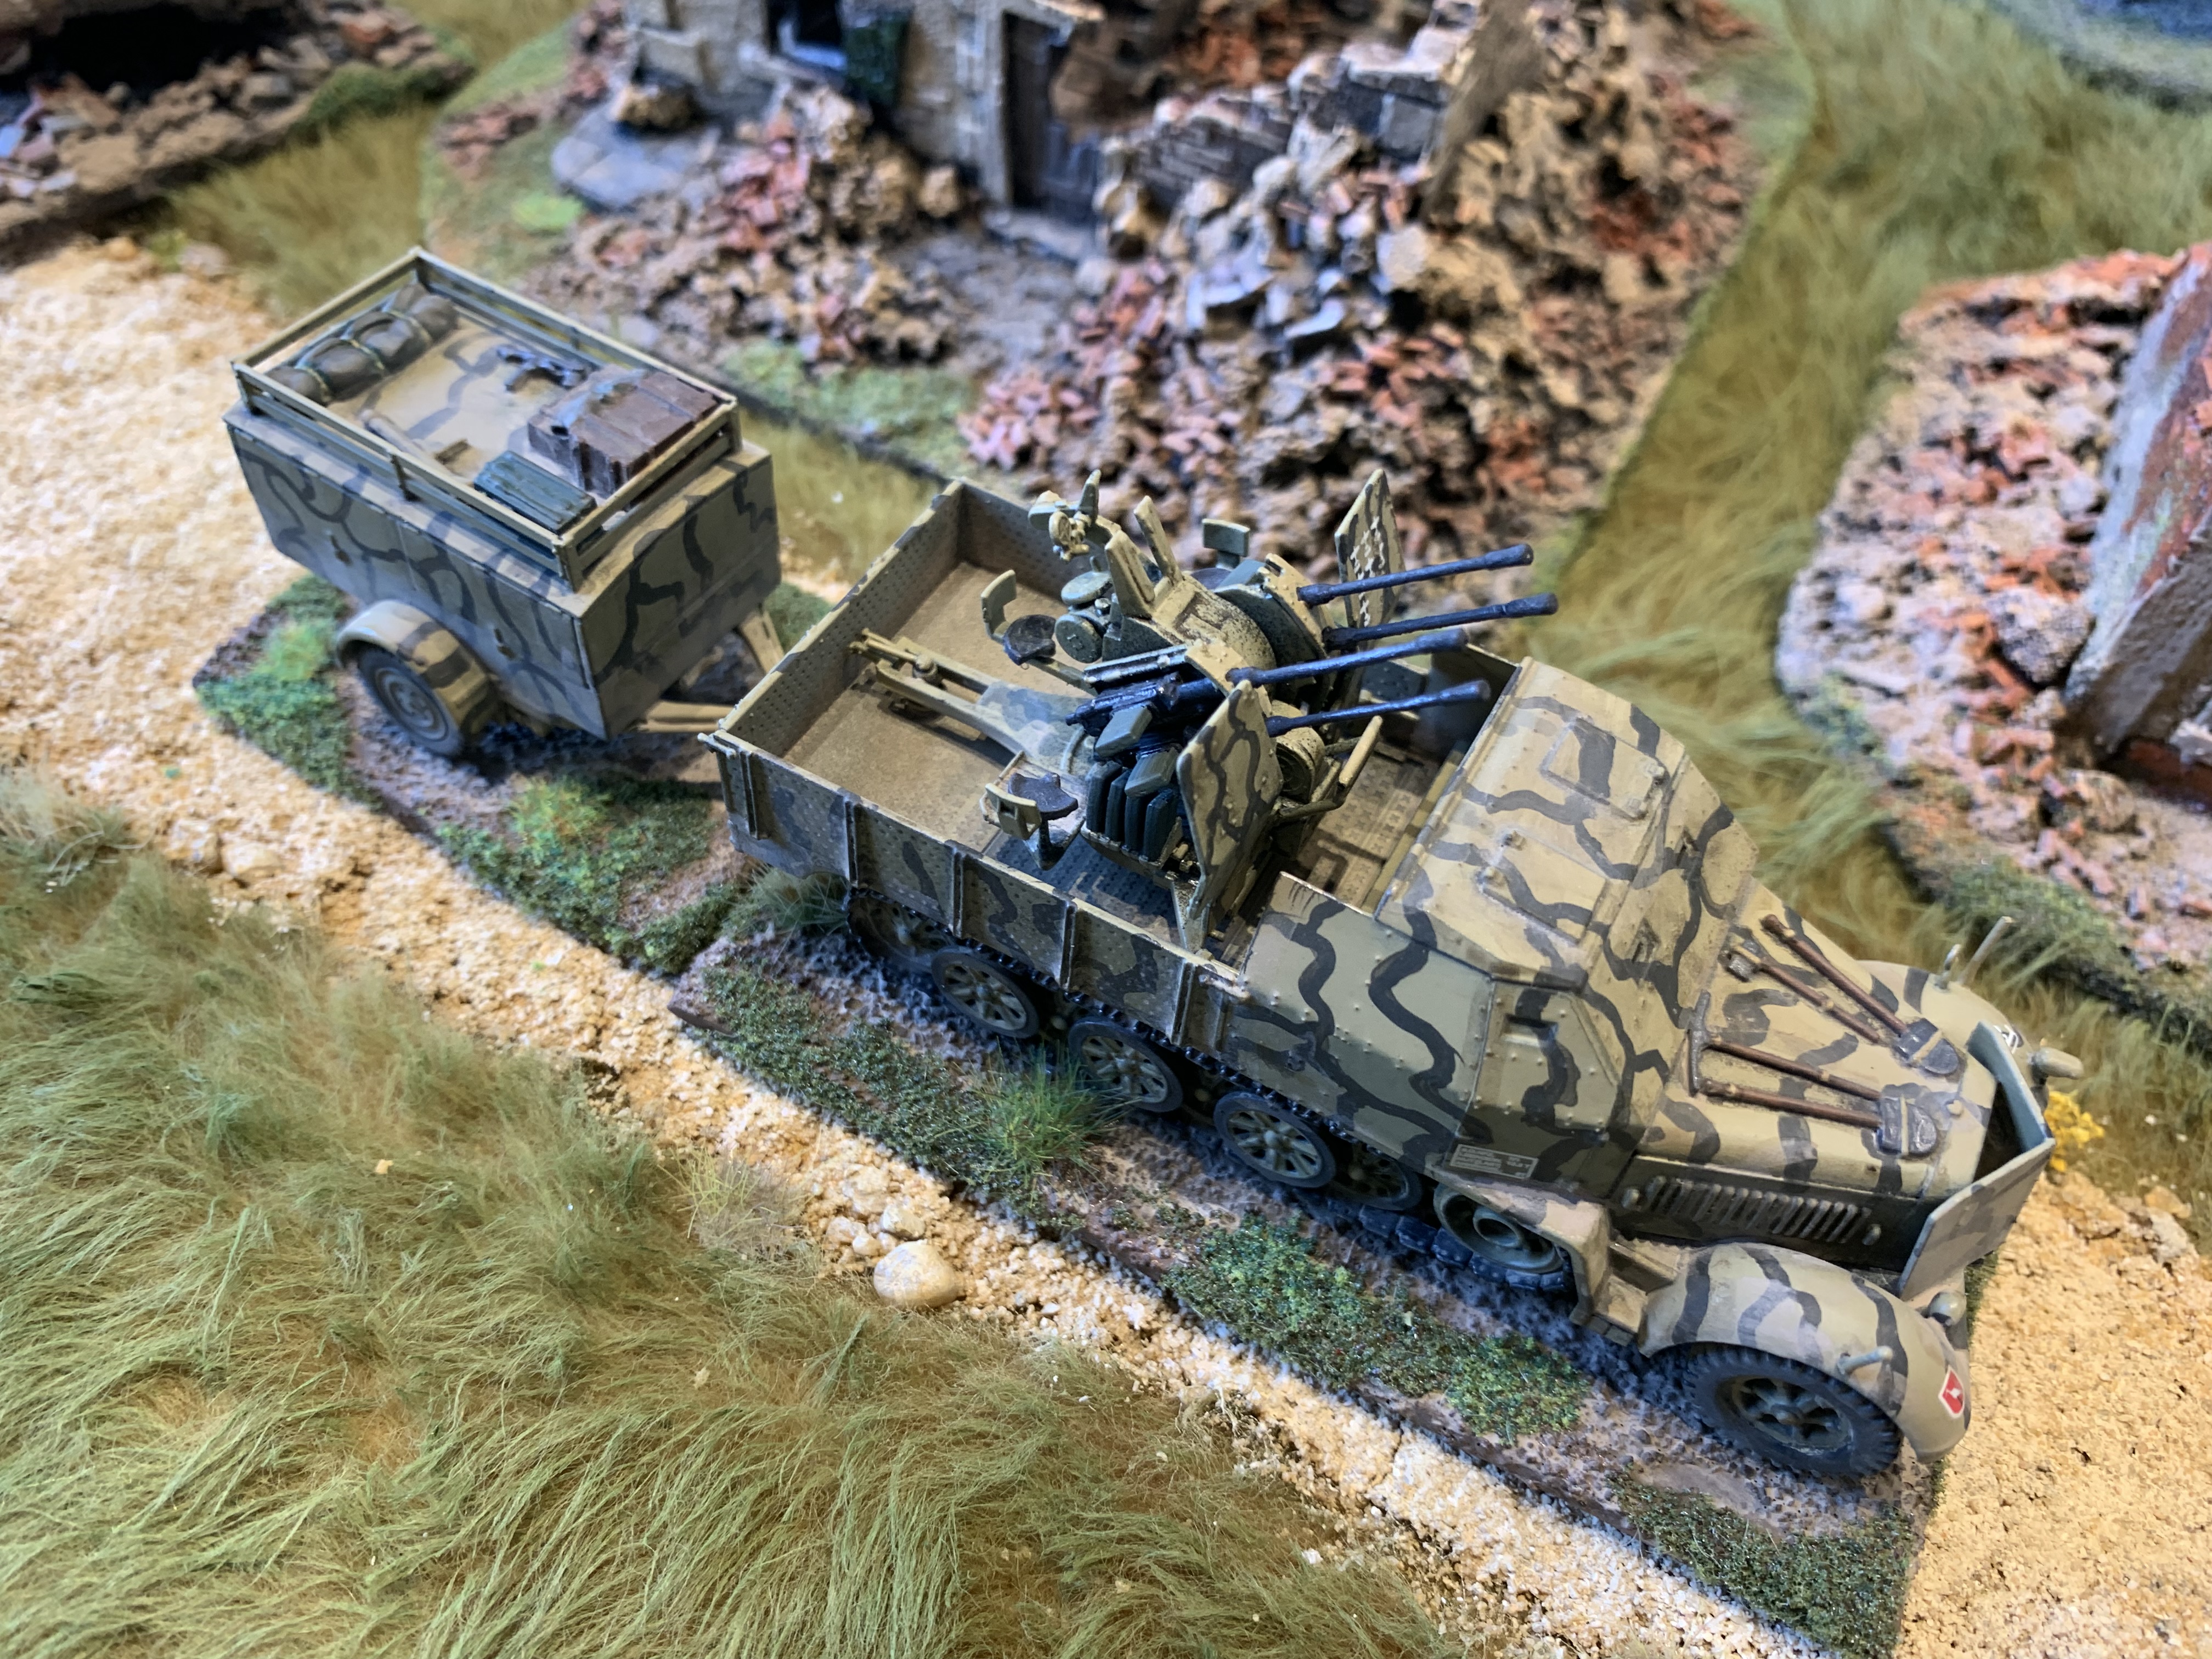
What did I do, well i pushed through, I kept on swimming and finished the job. Rather than put the canvas cover on the back I made my own frame from wire and decided to fill the back up with my recently painted seated dudes. The truck received some green camo random stripes and plenty of dirt and dust. Oh and on a positive note the decals were good and I did use them. They also supply a tiny bit of clear plastic sheet to make a windshield. I think I did try to use the PE supplied but was mainly over the whole thing by then and tossed them out in a finger sticking super glued moment of despair.

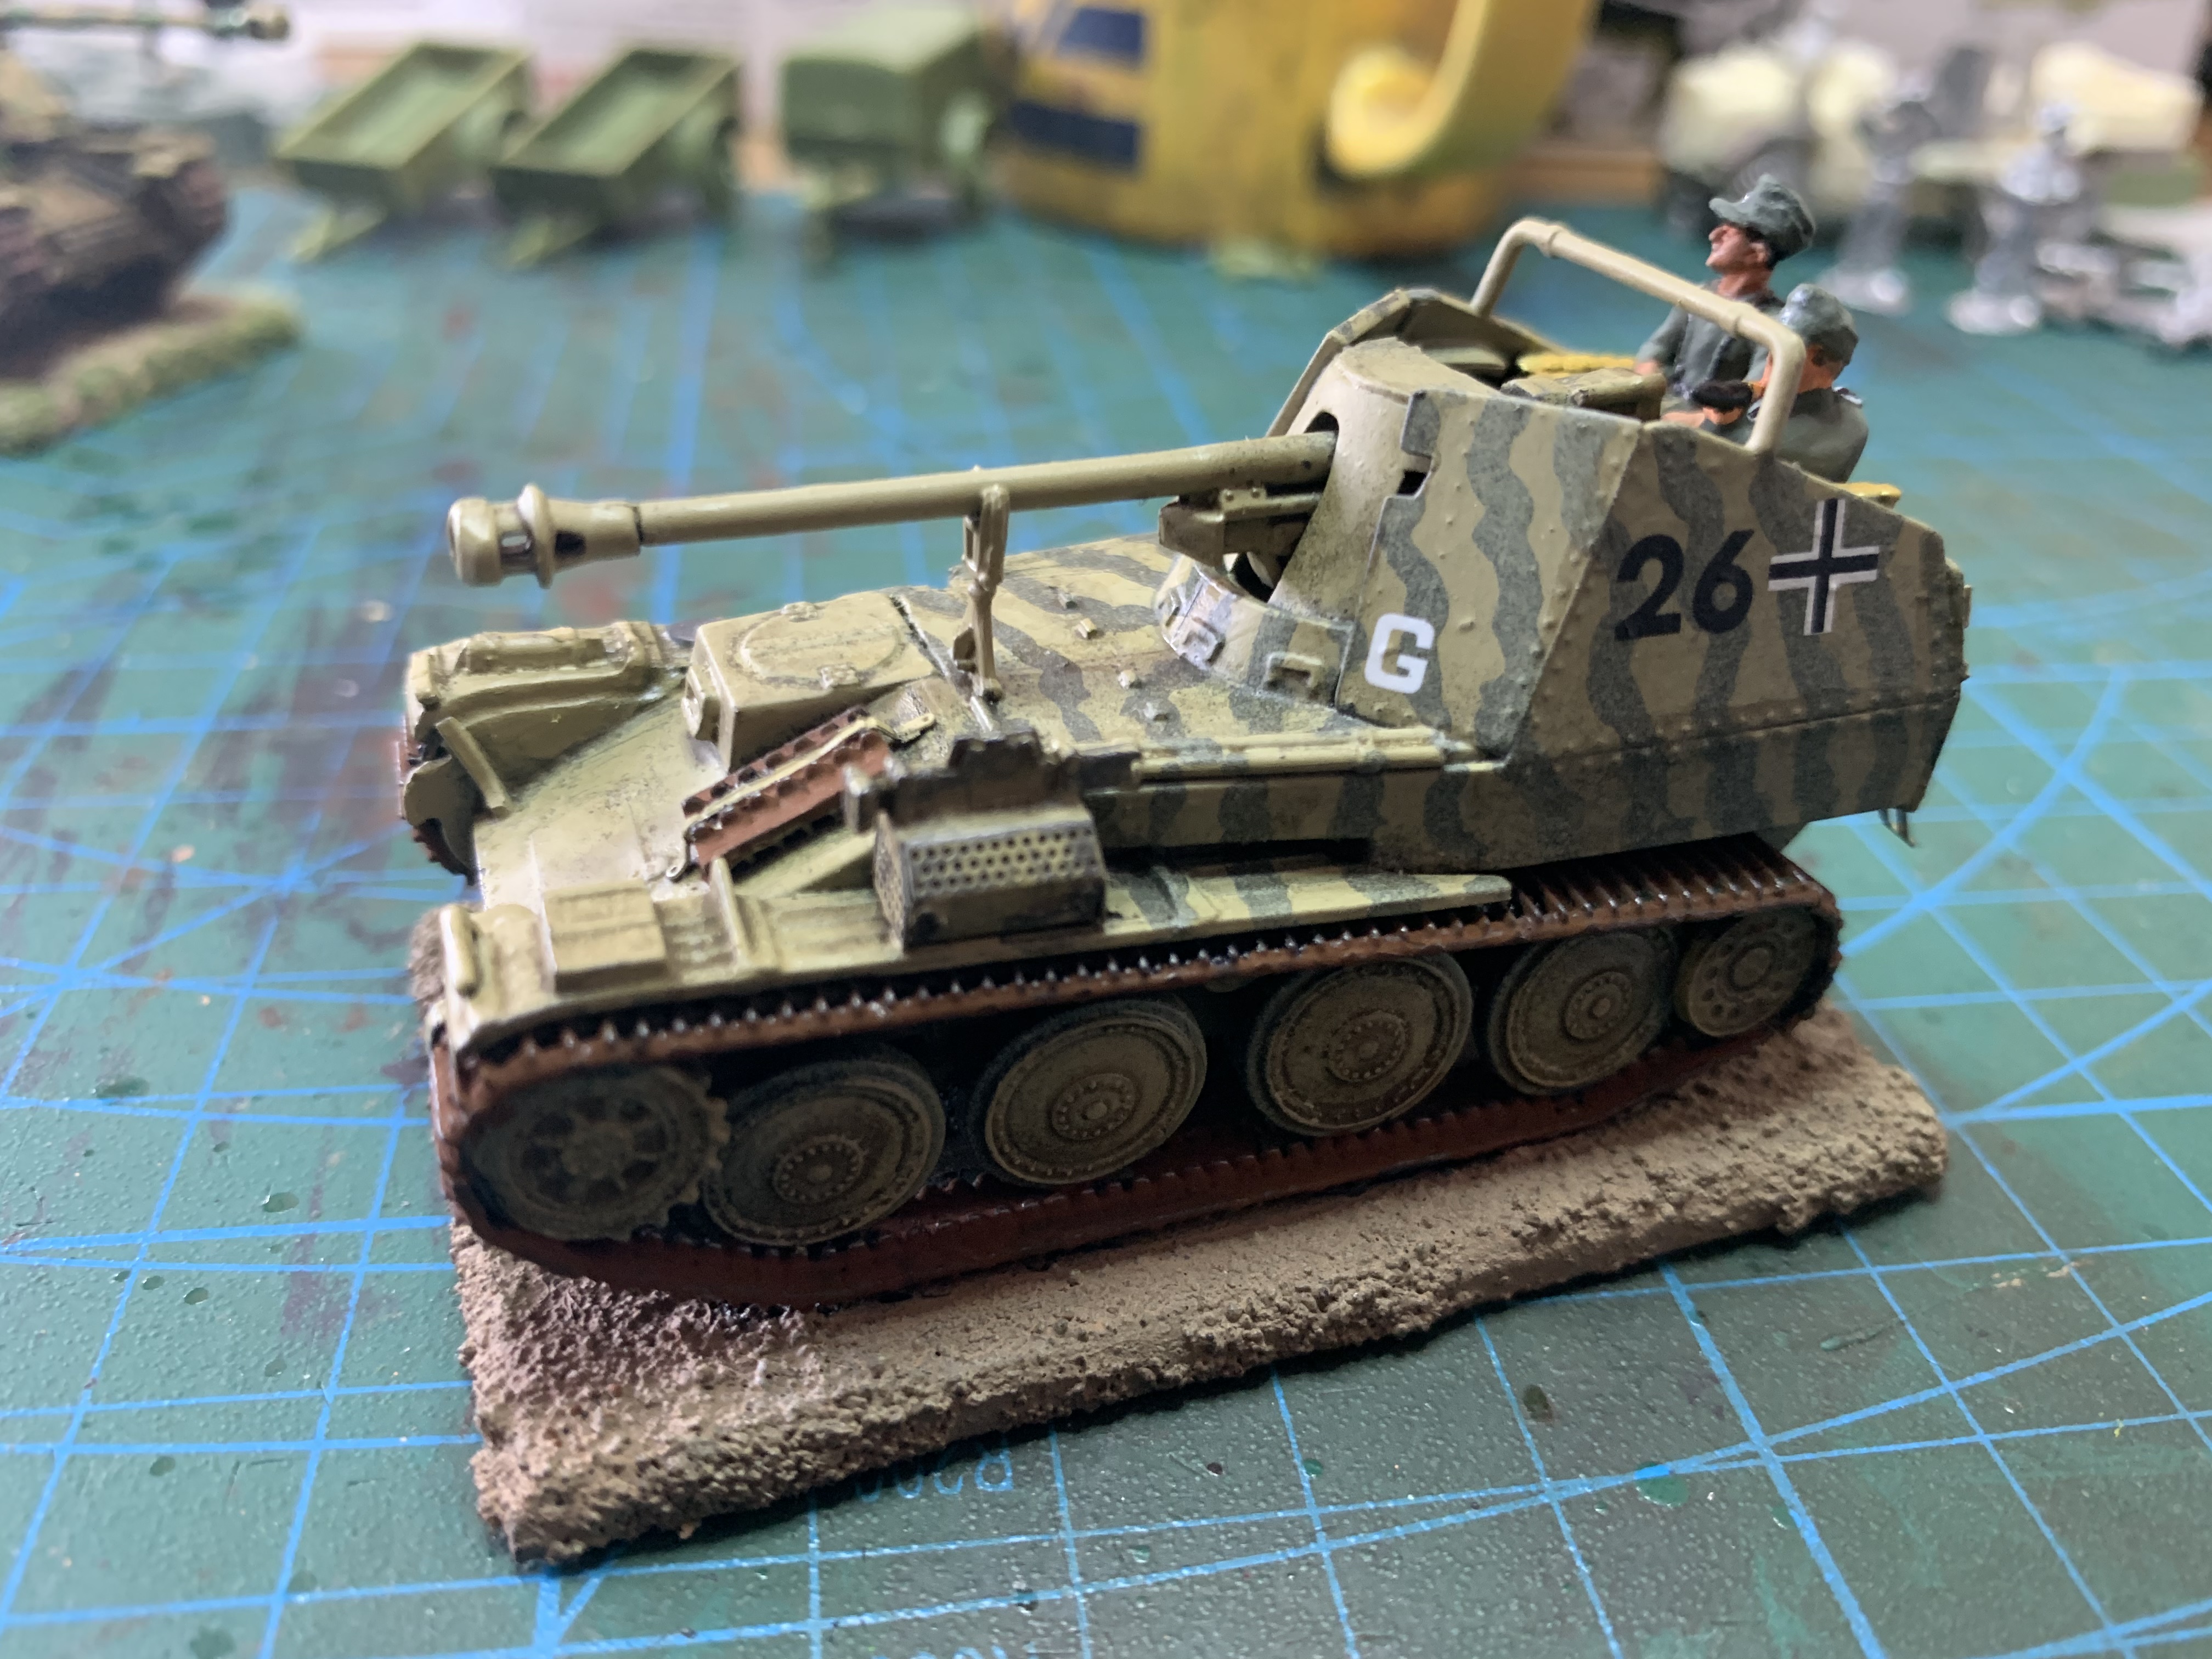
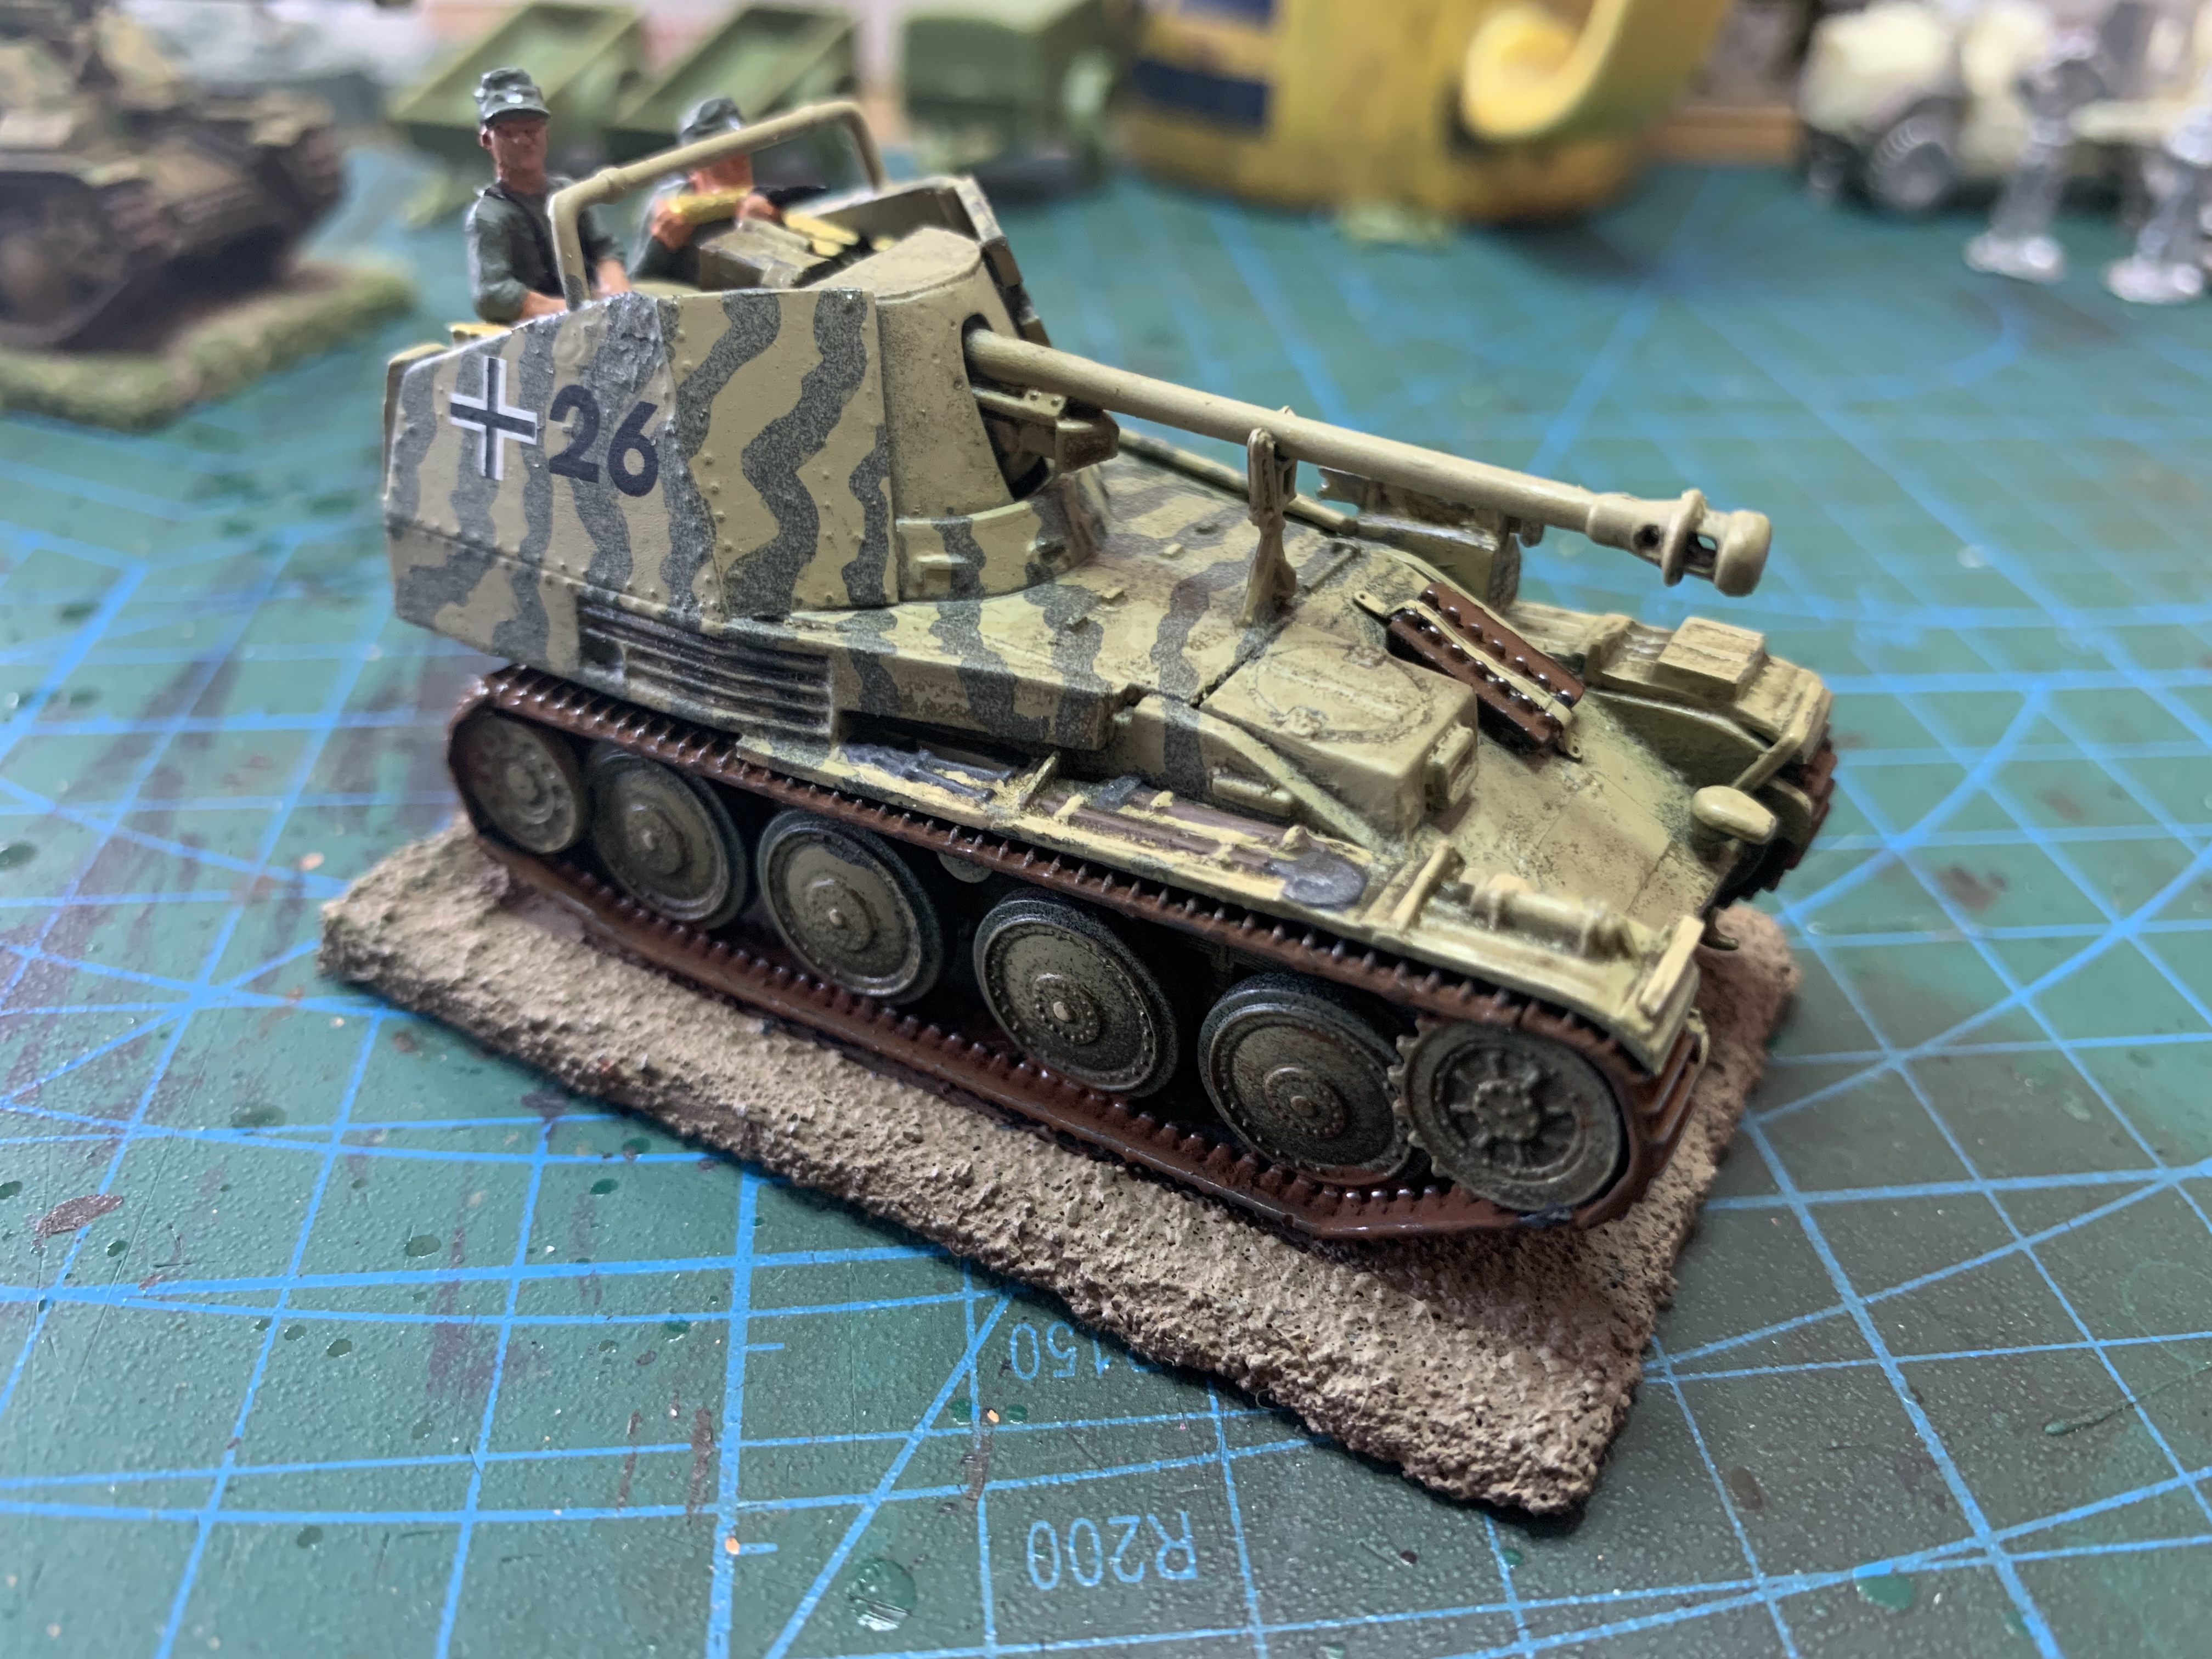
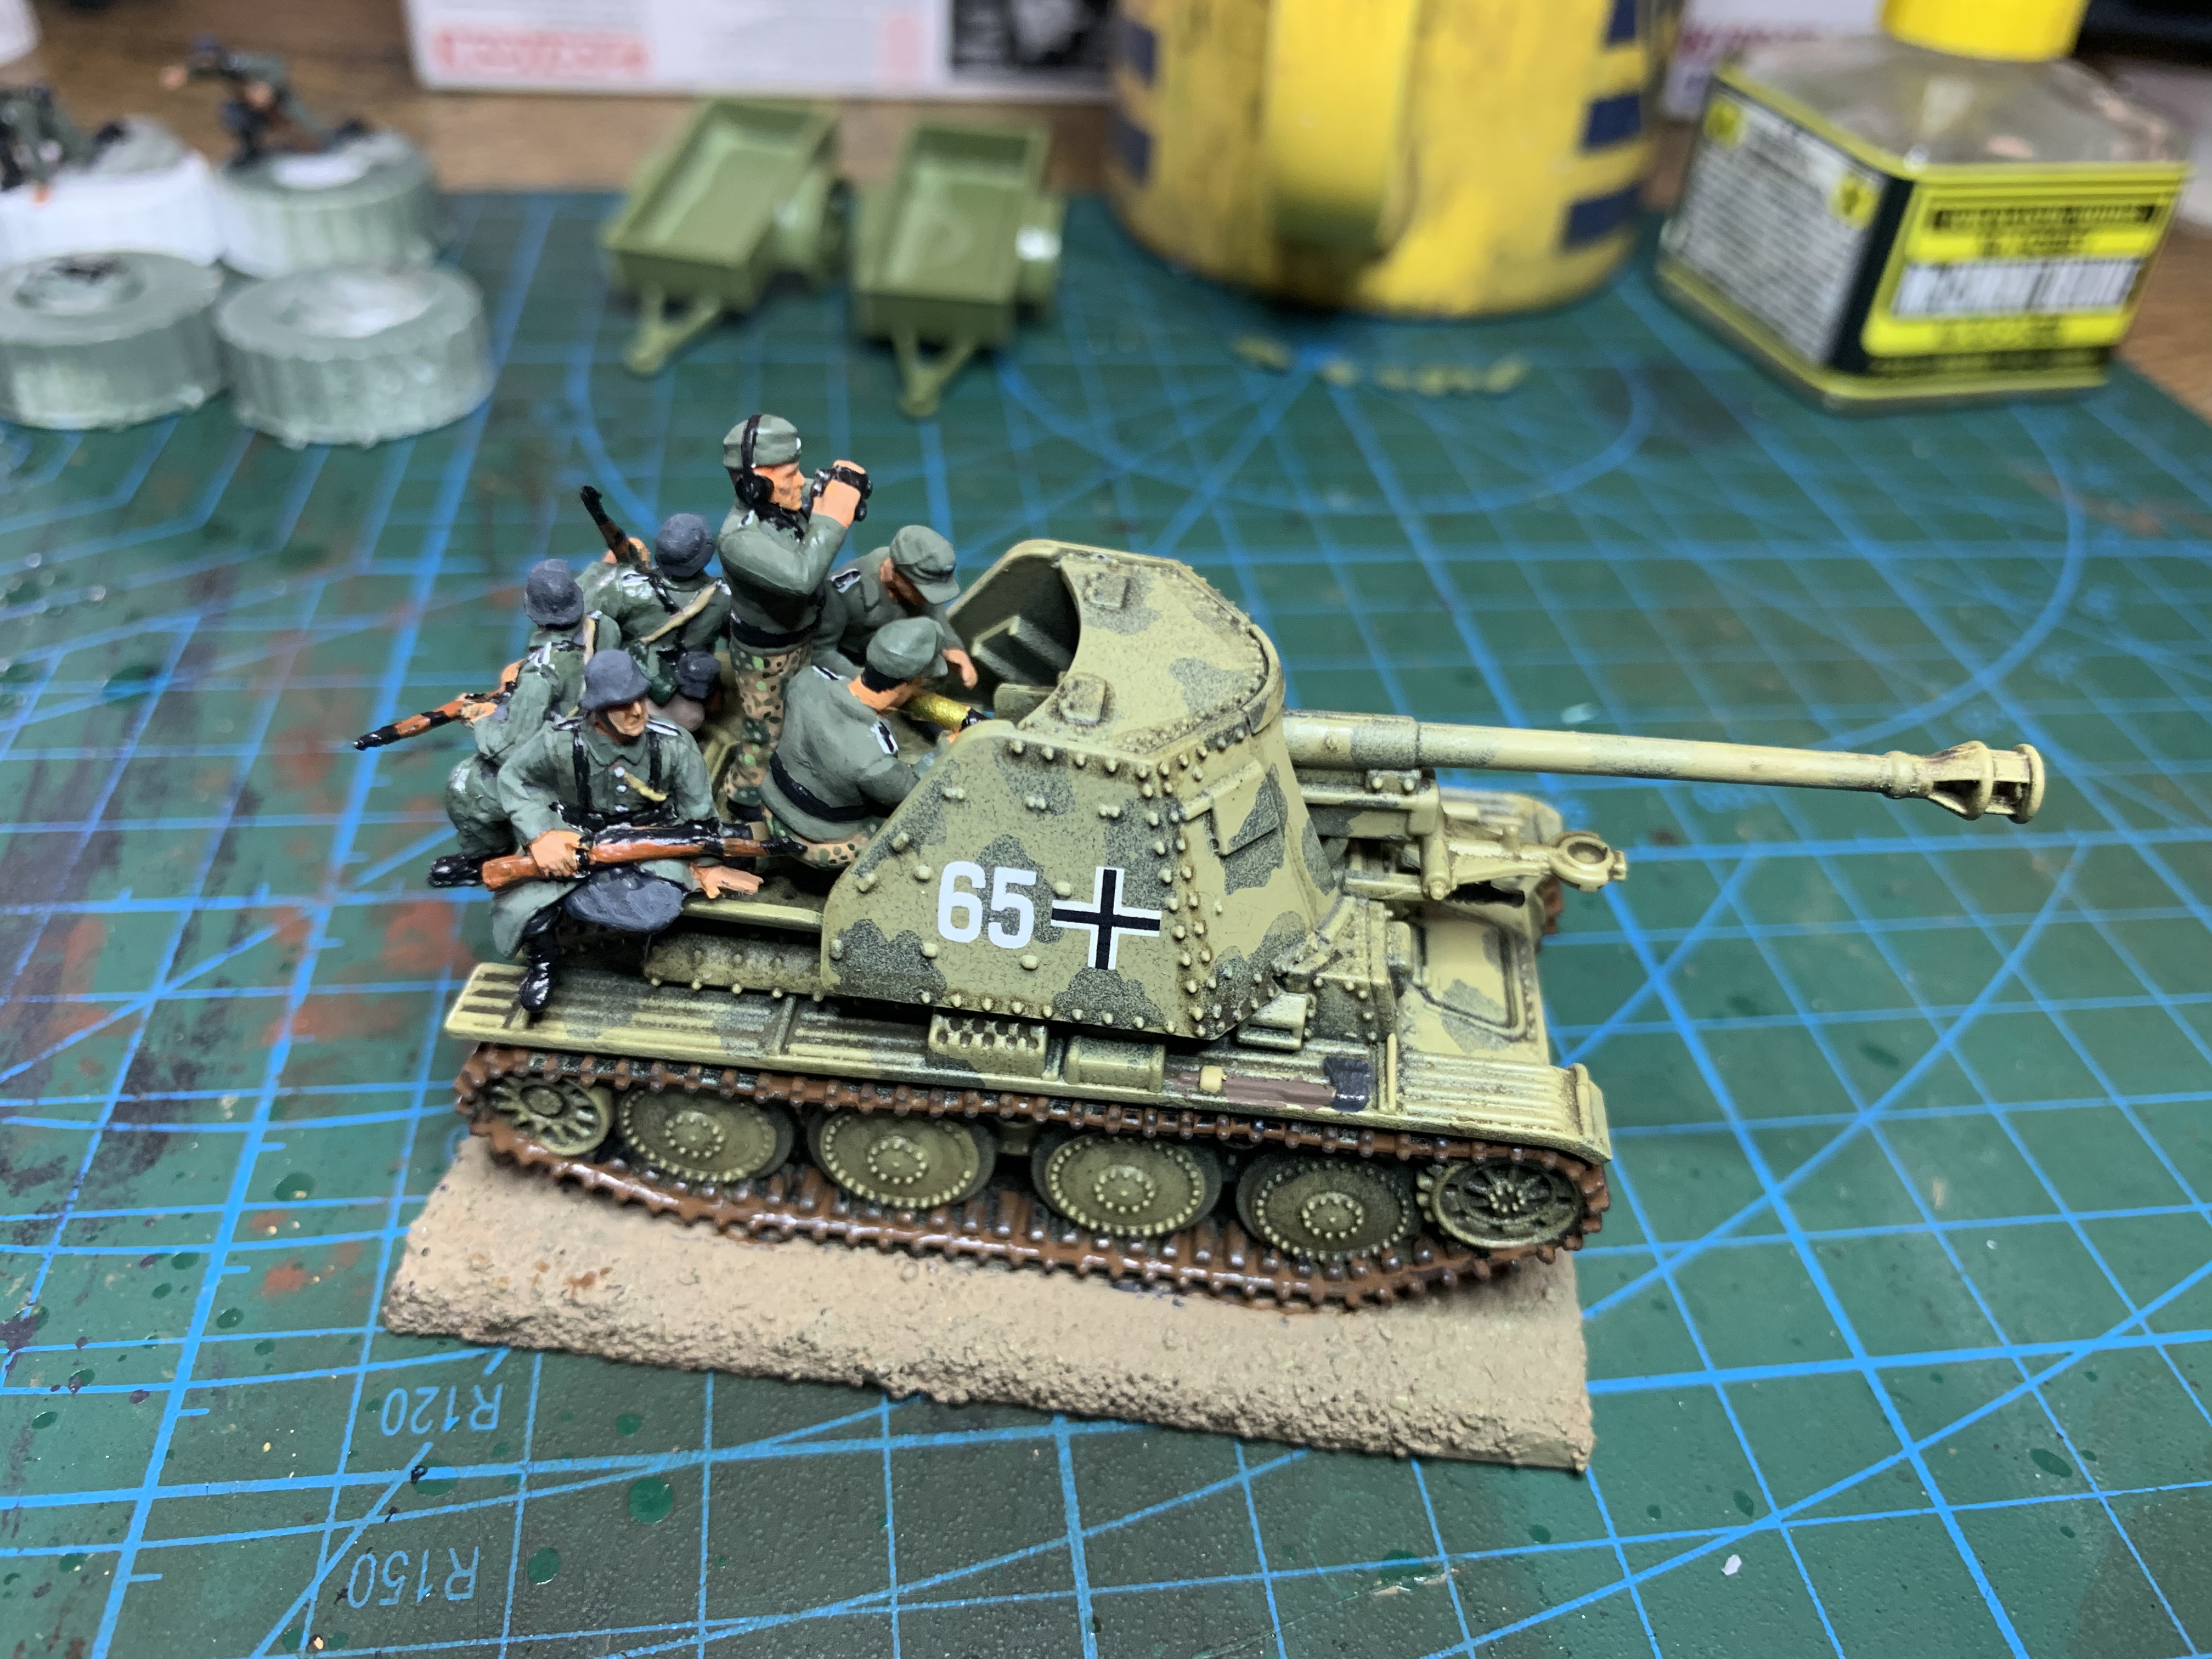
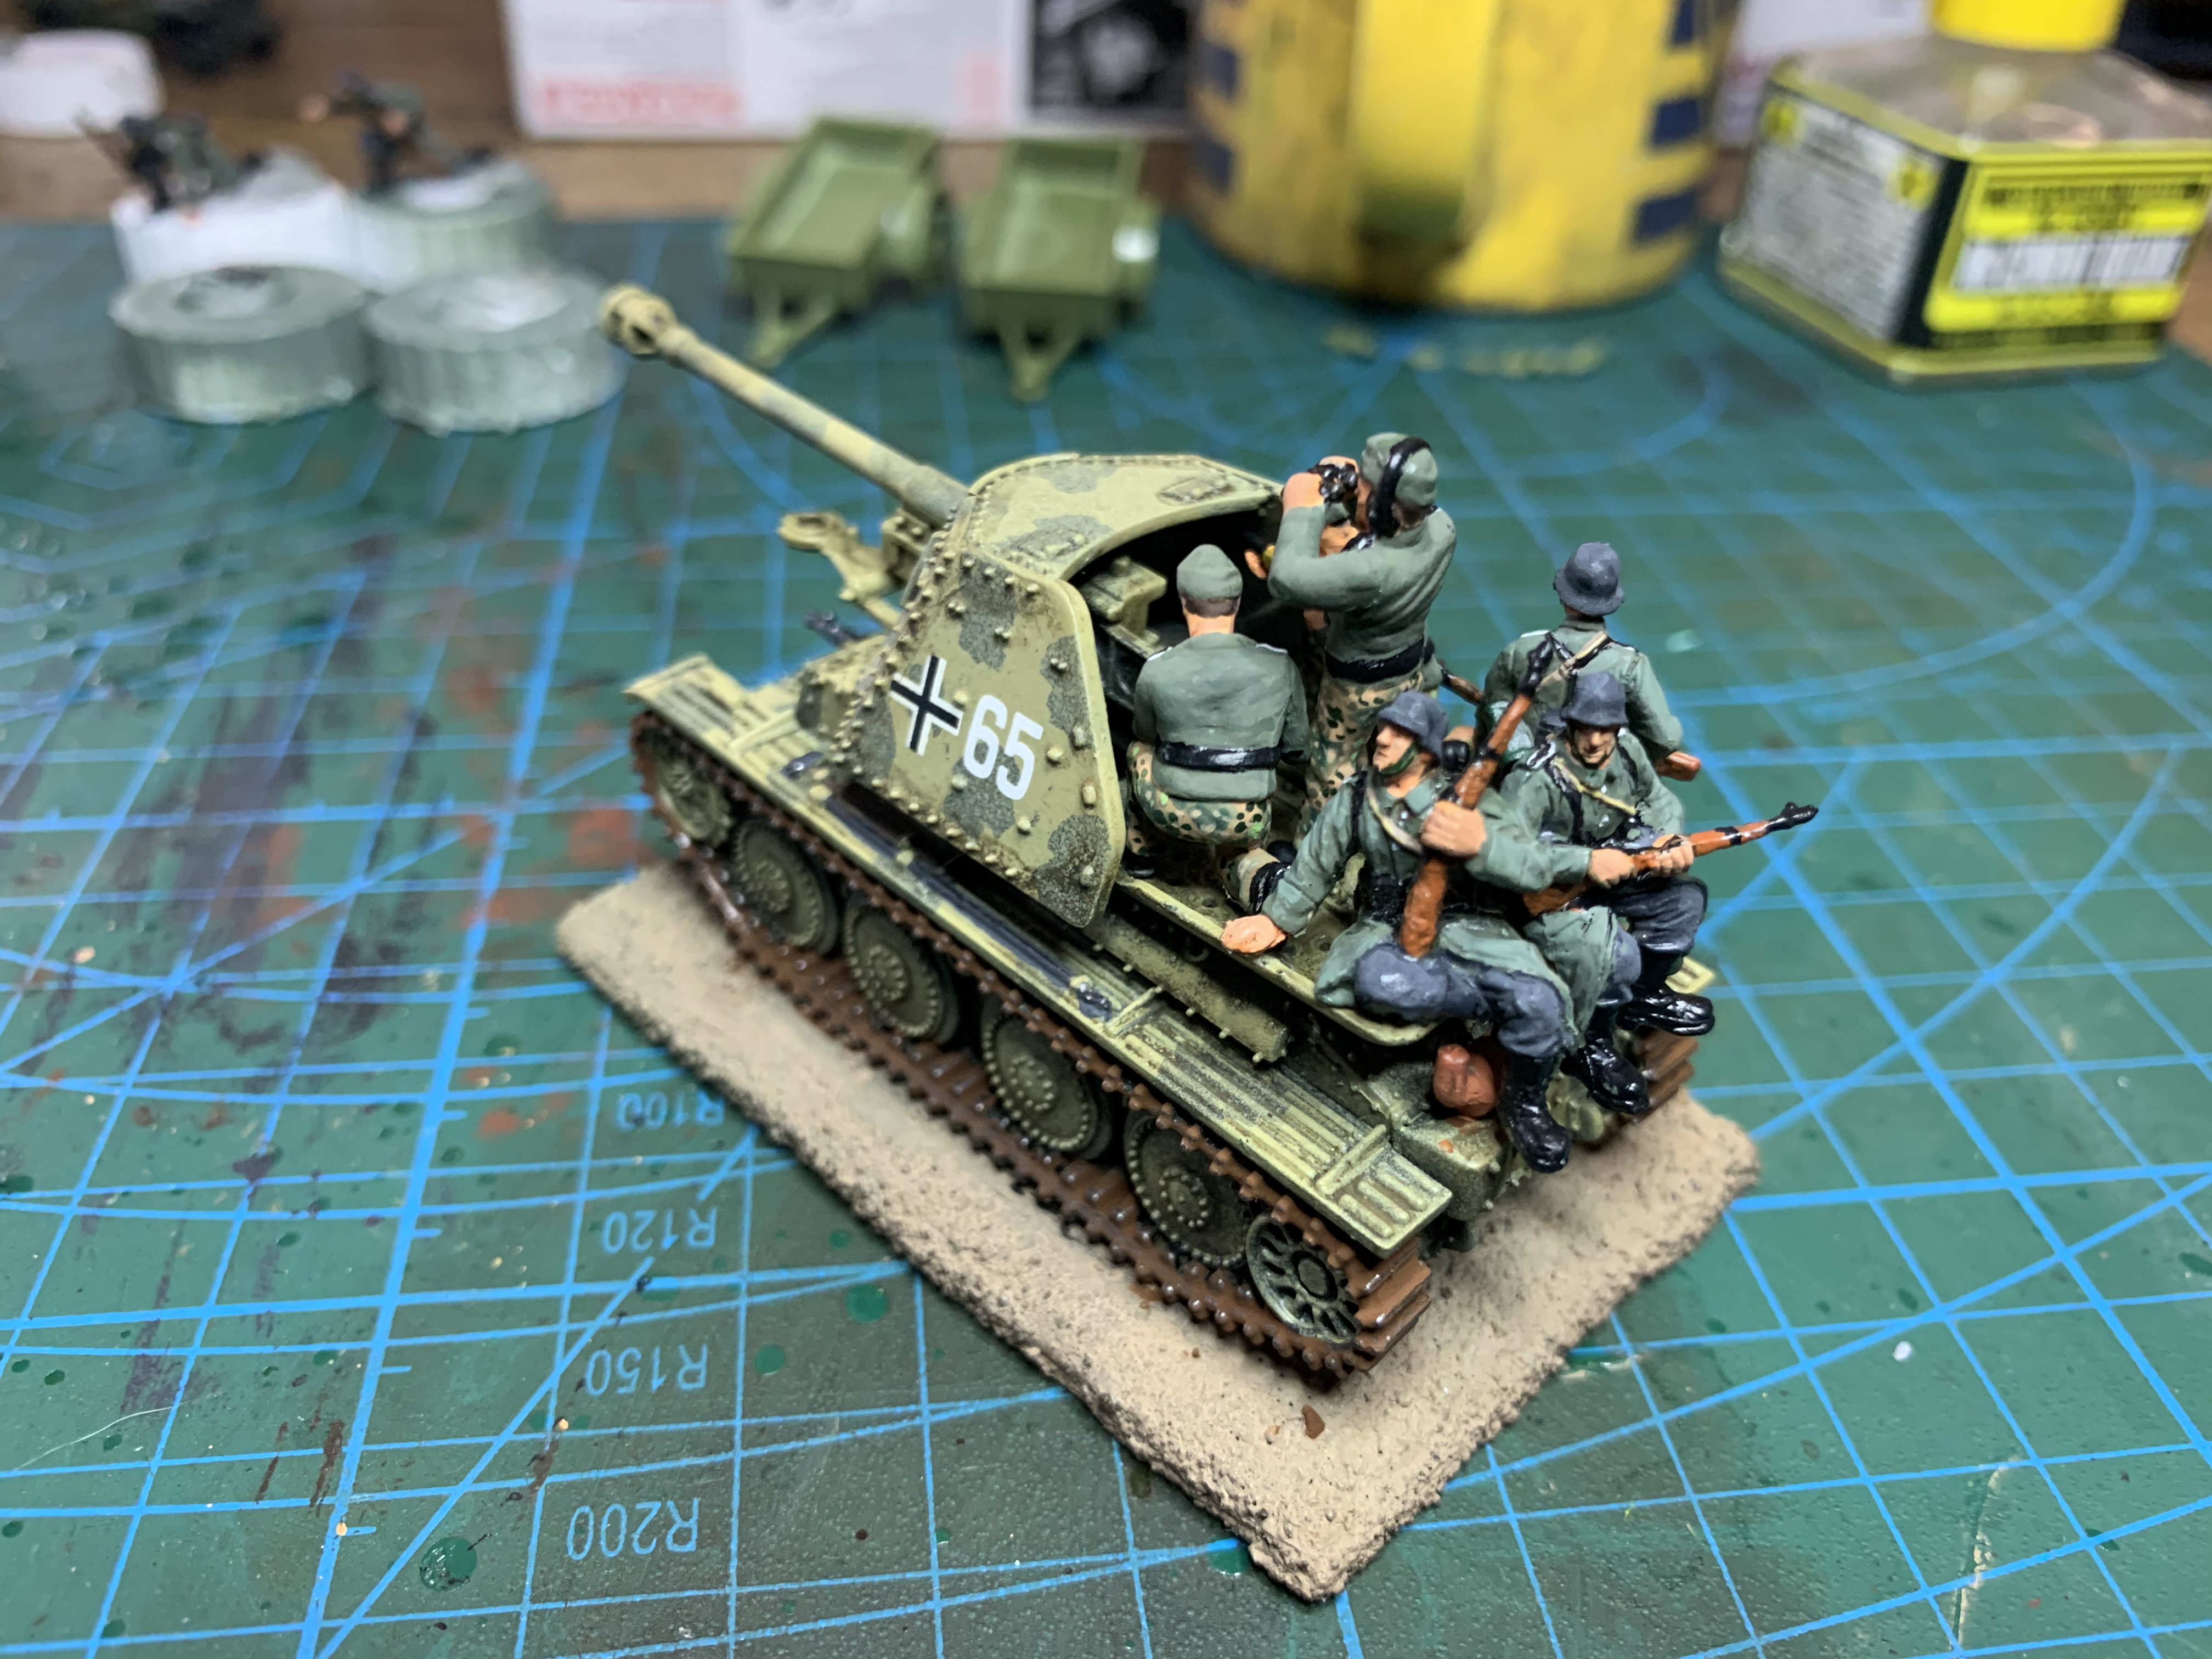
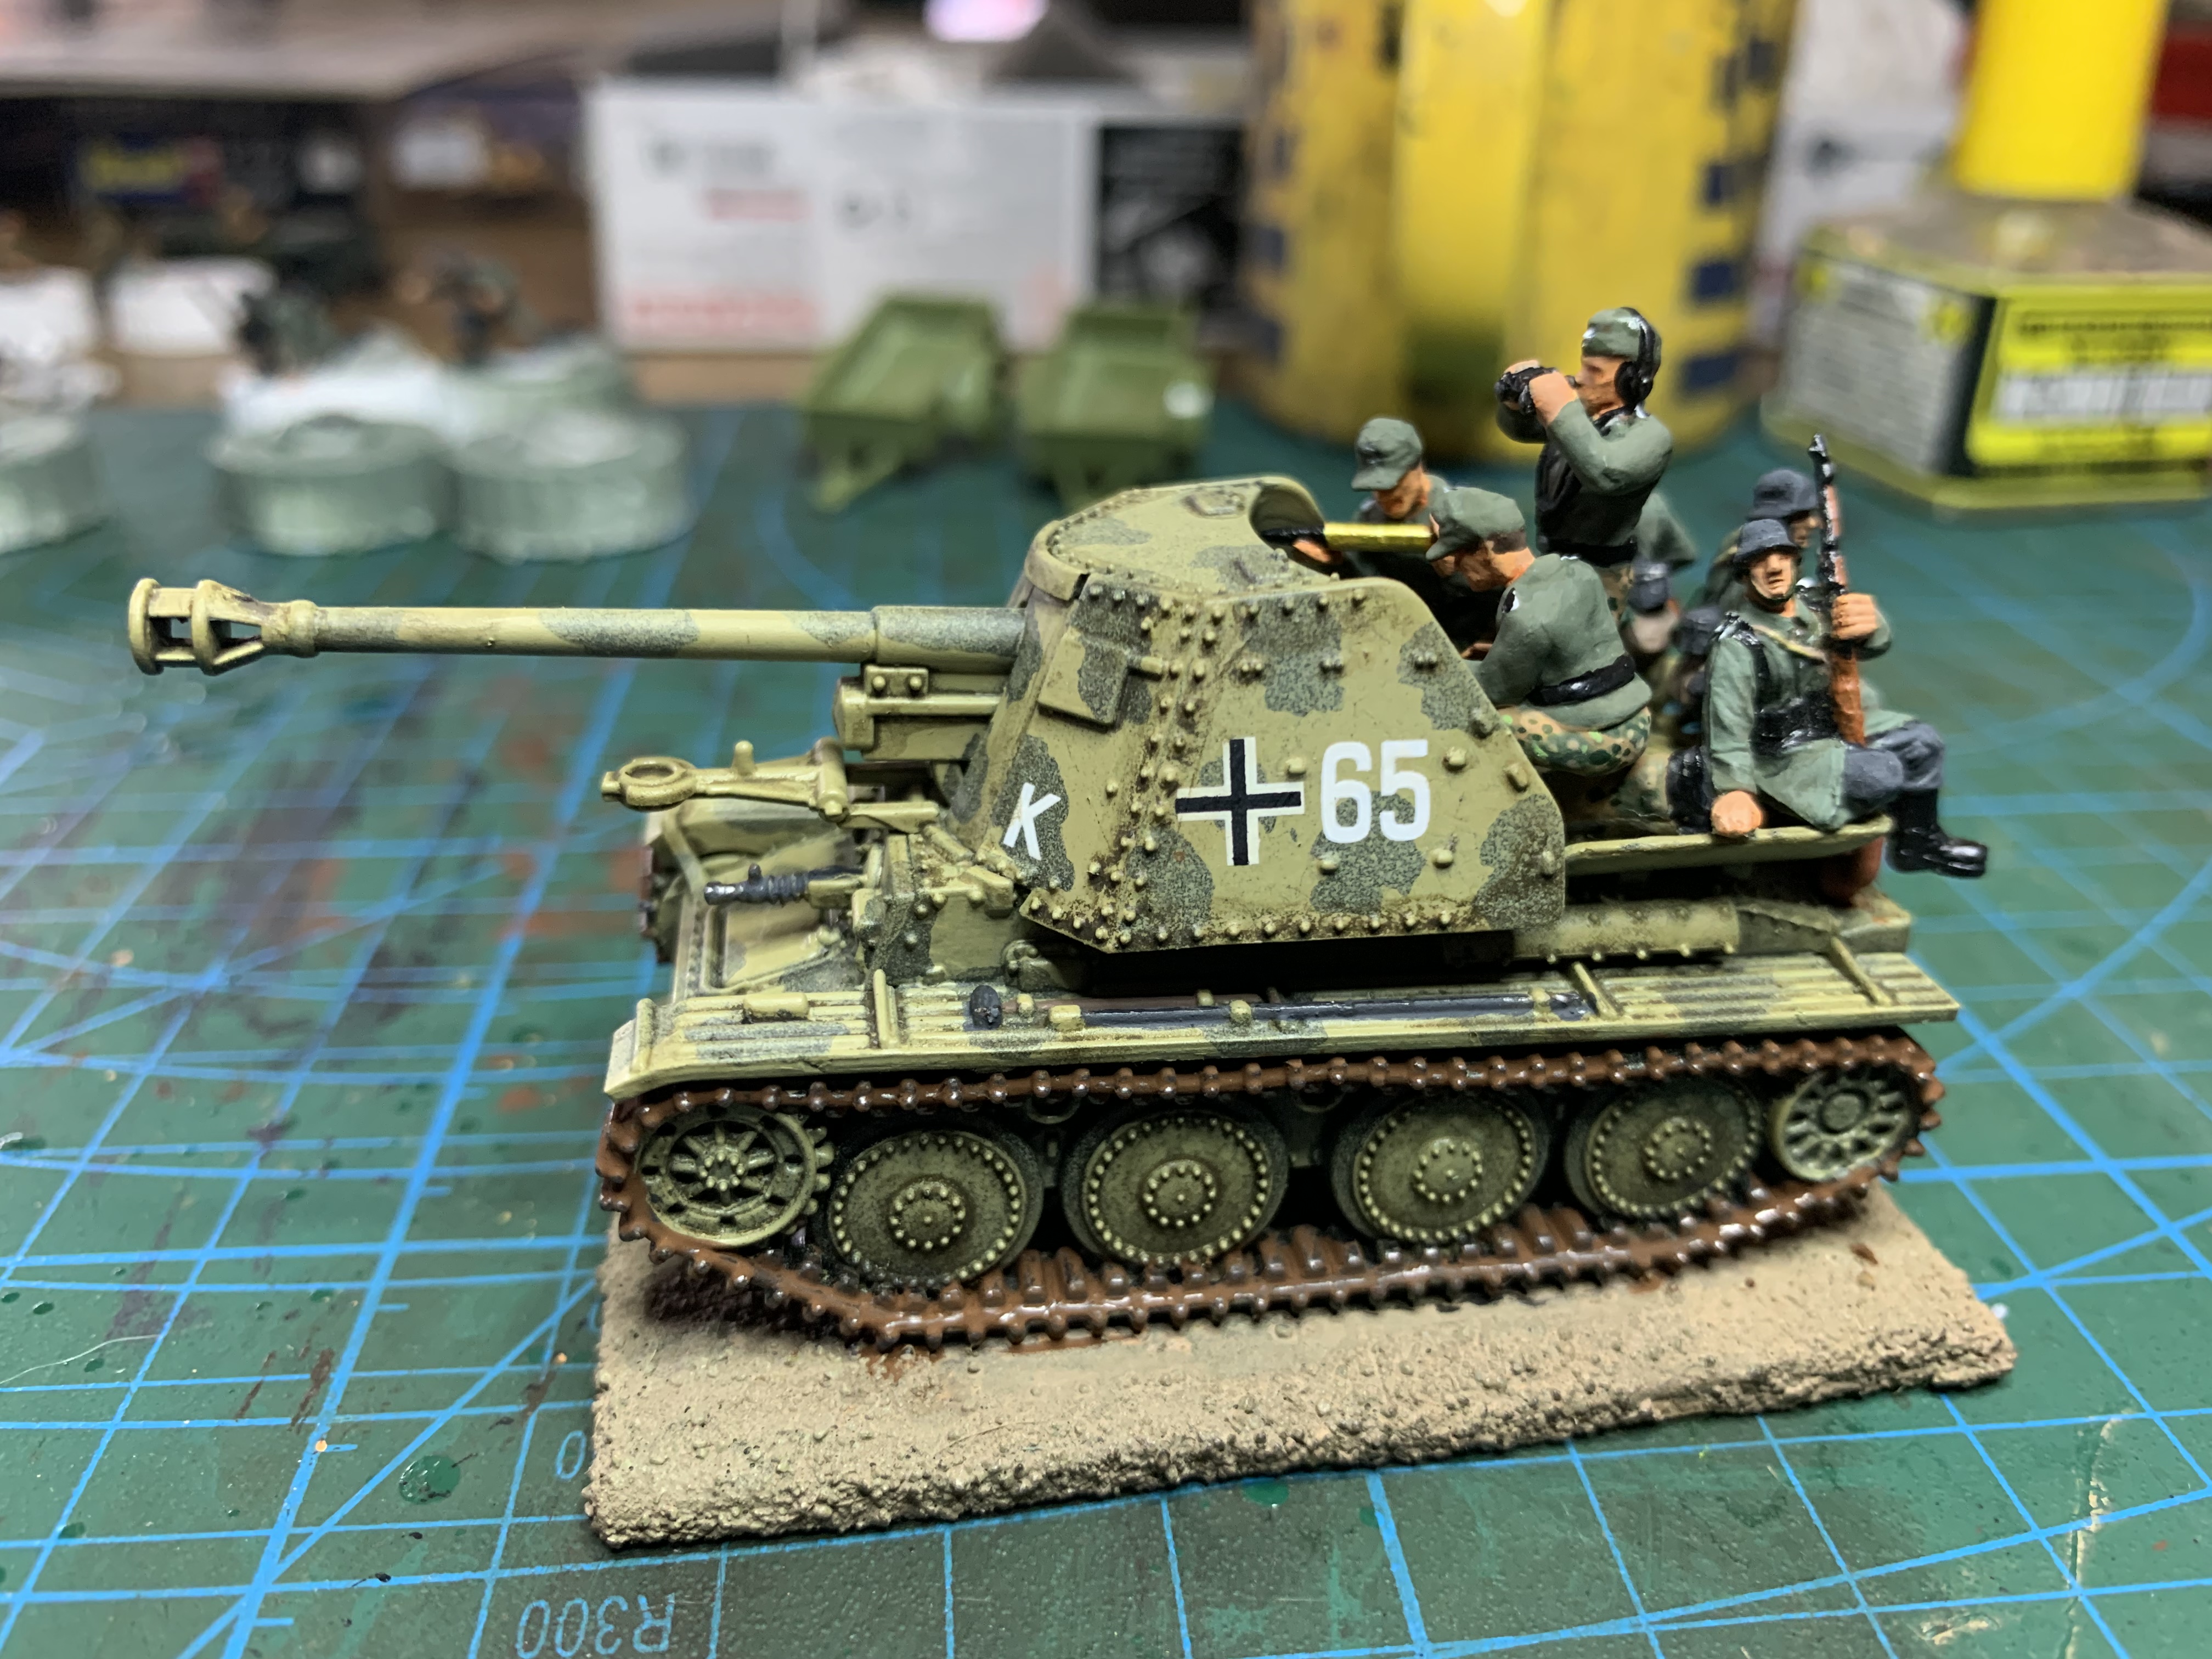
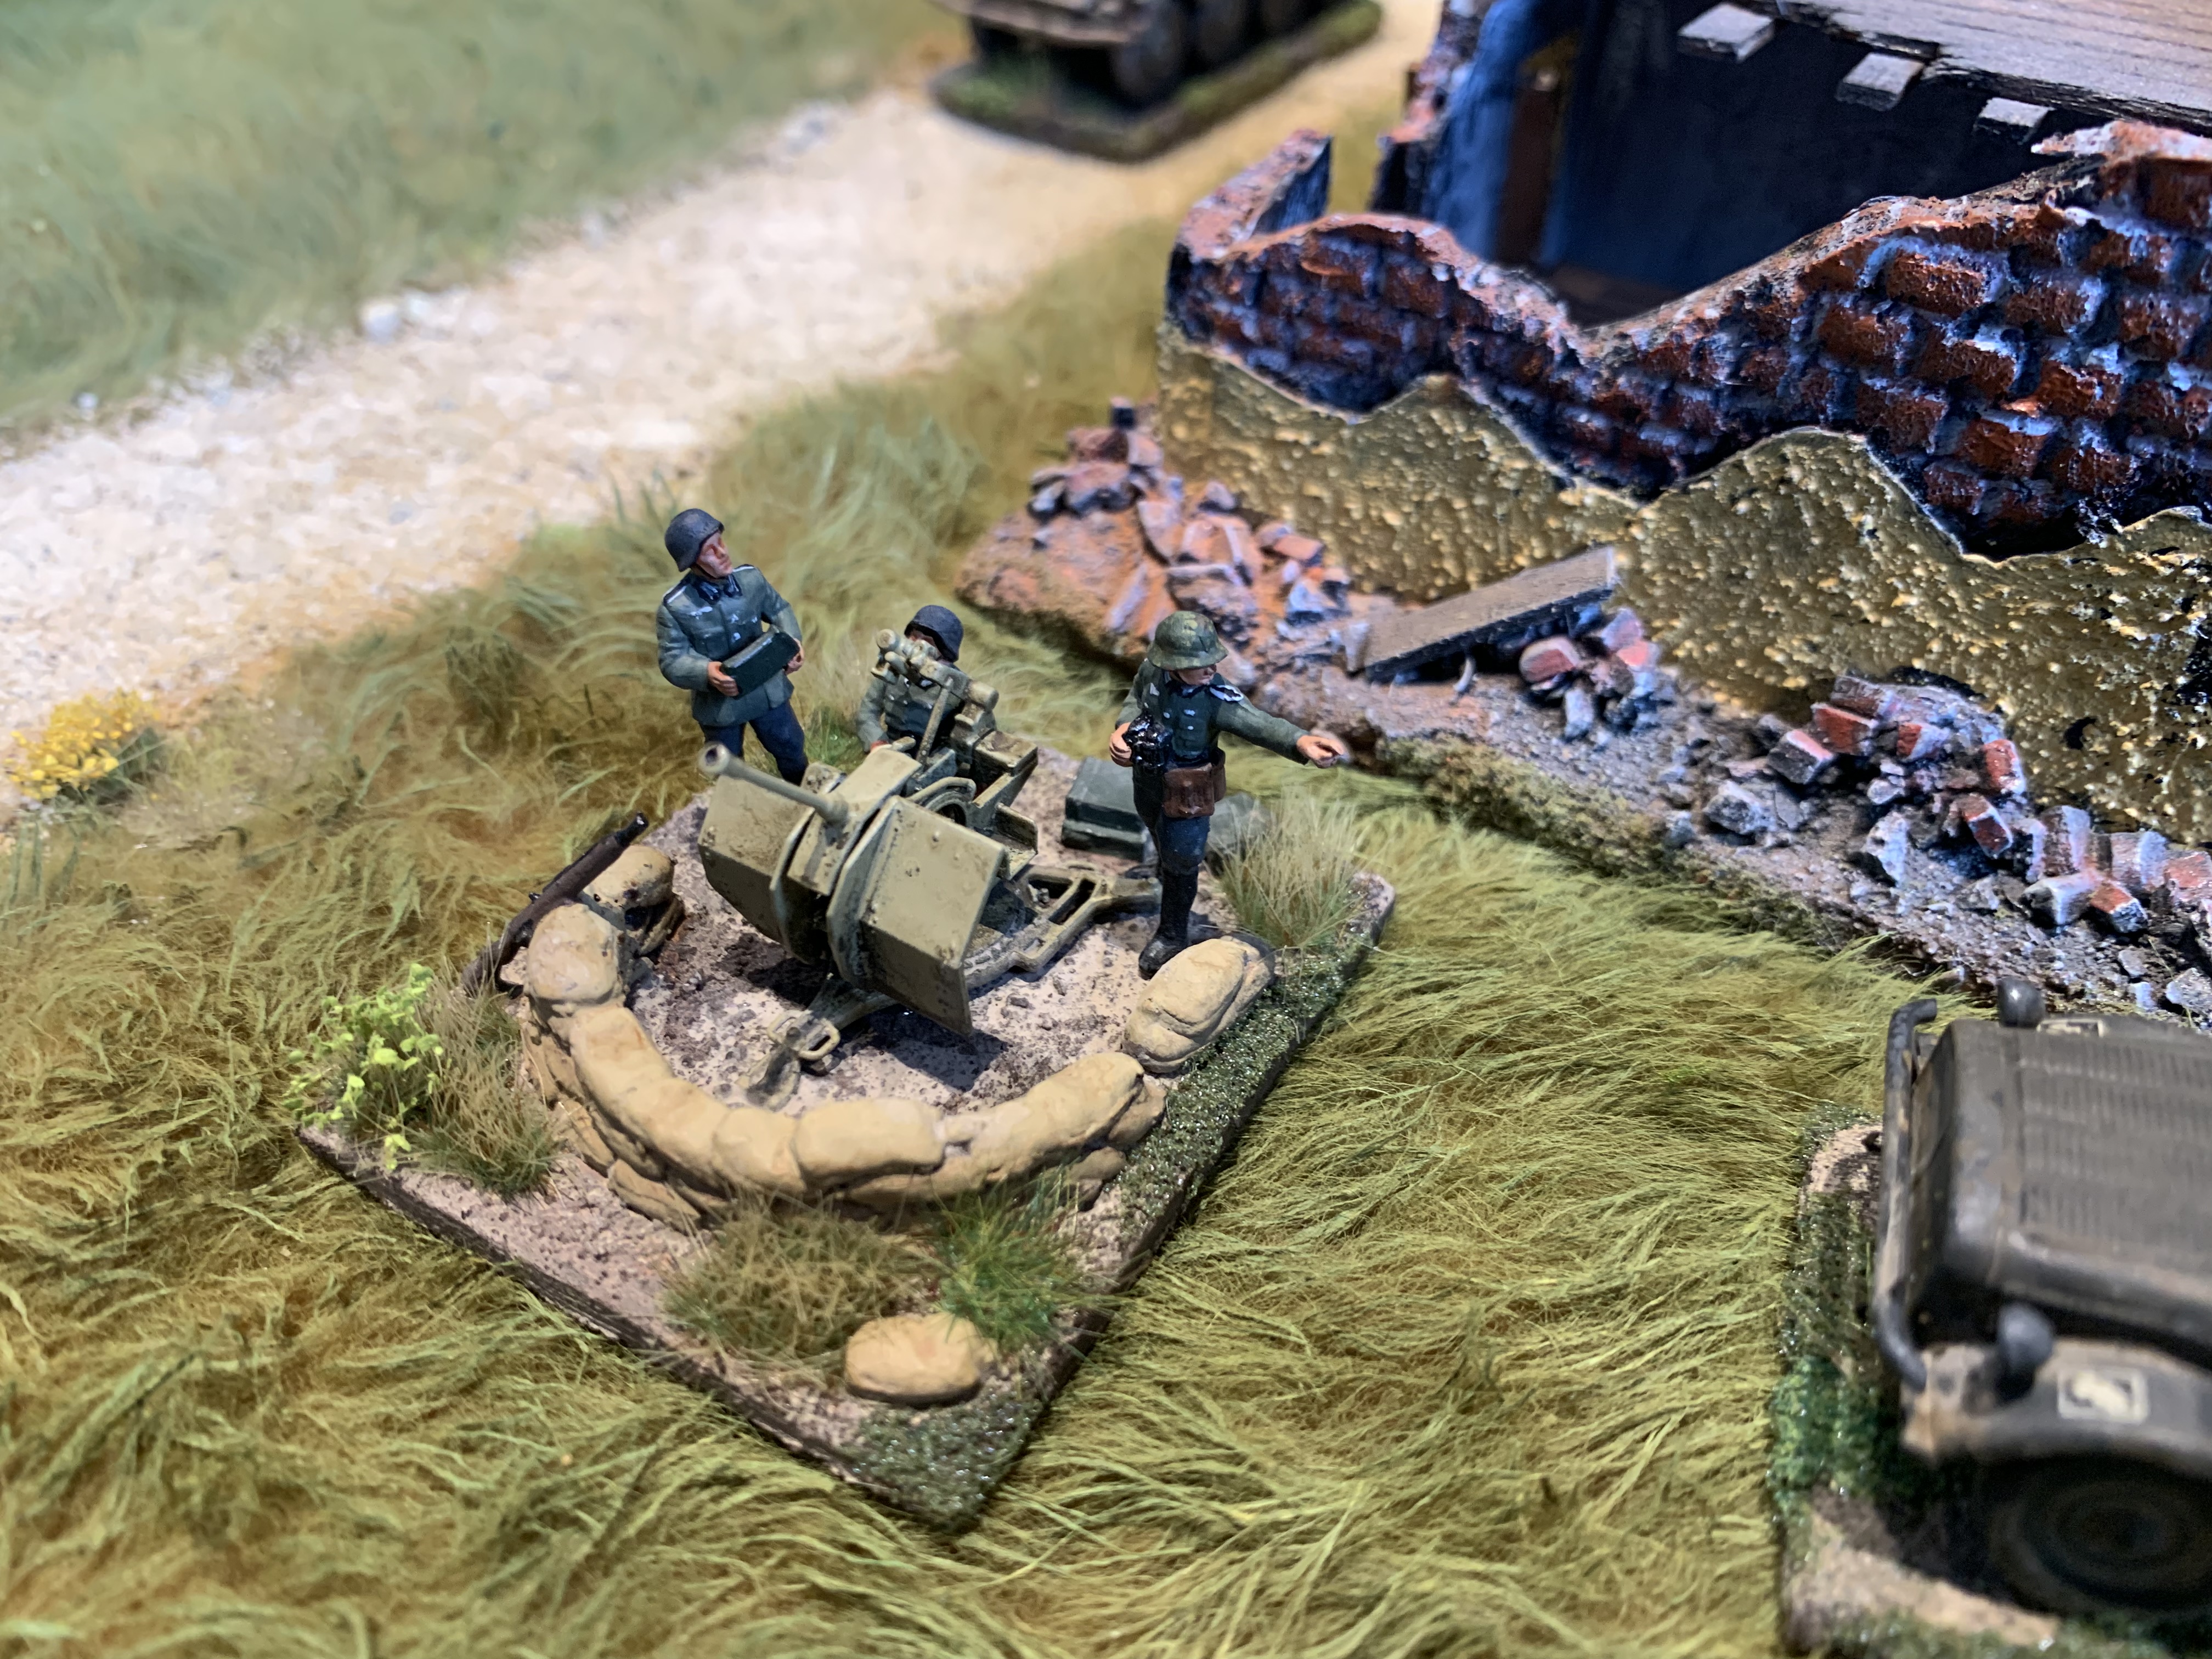
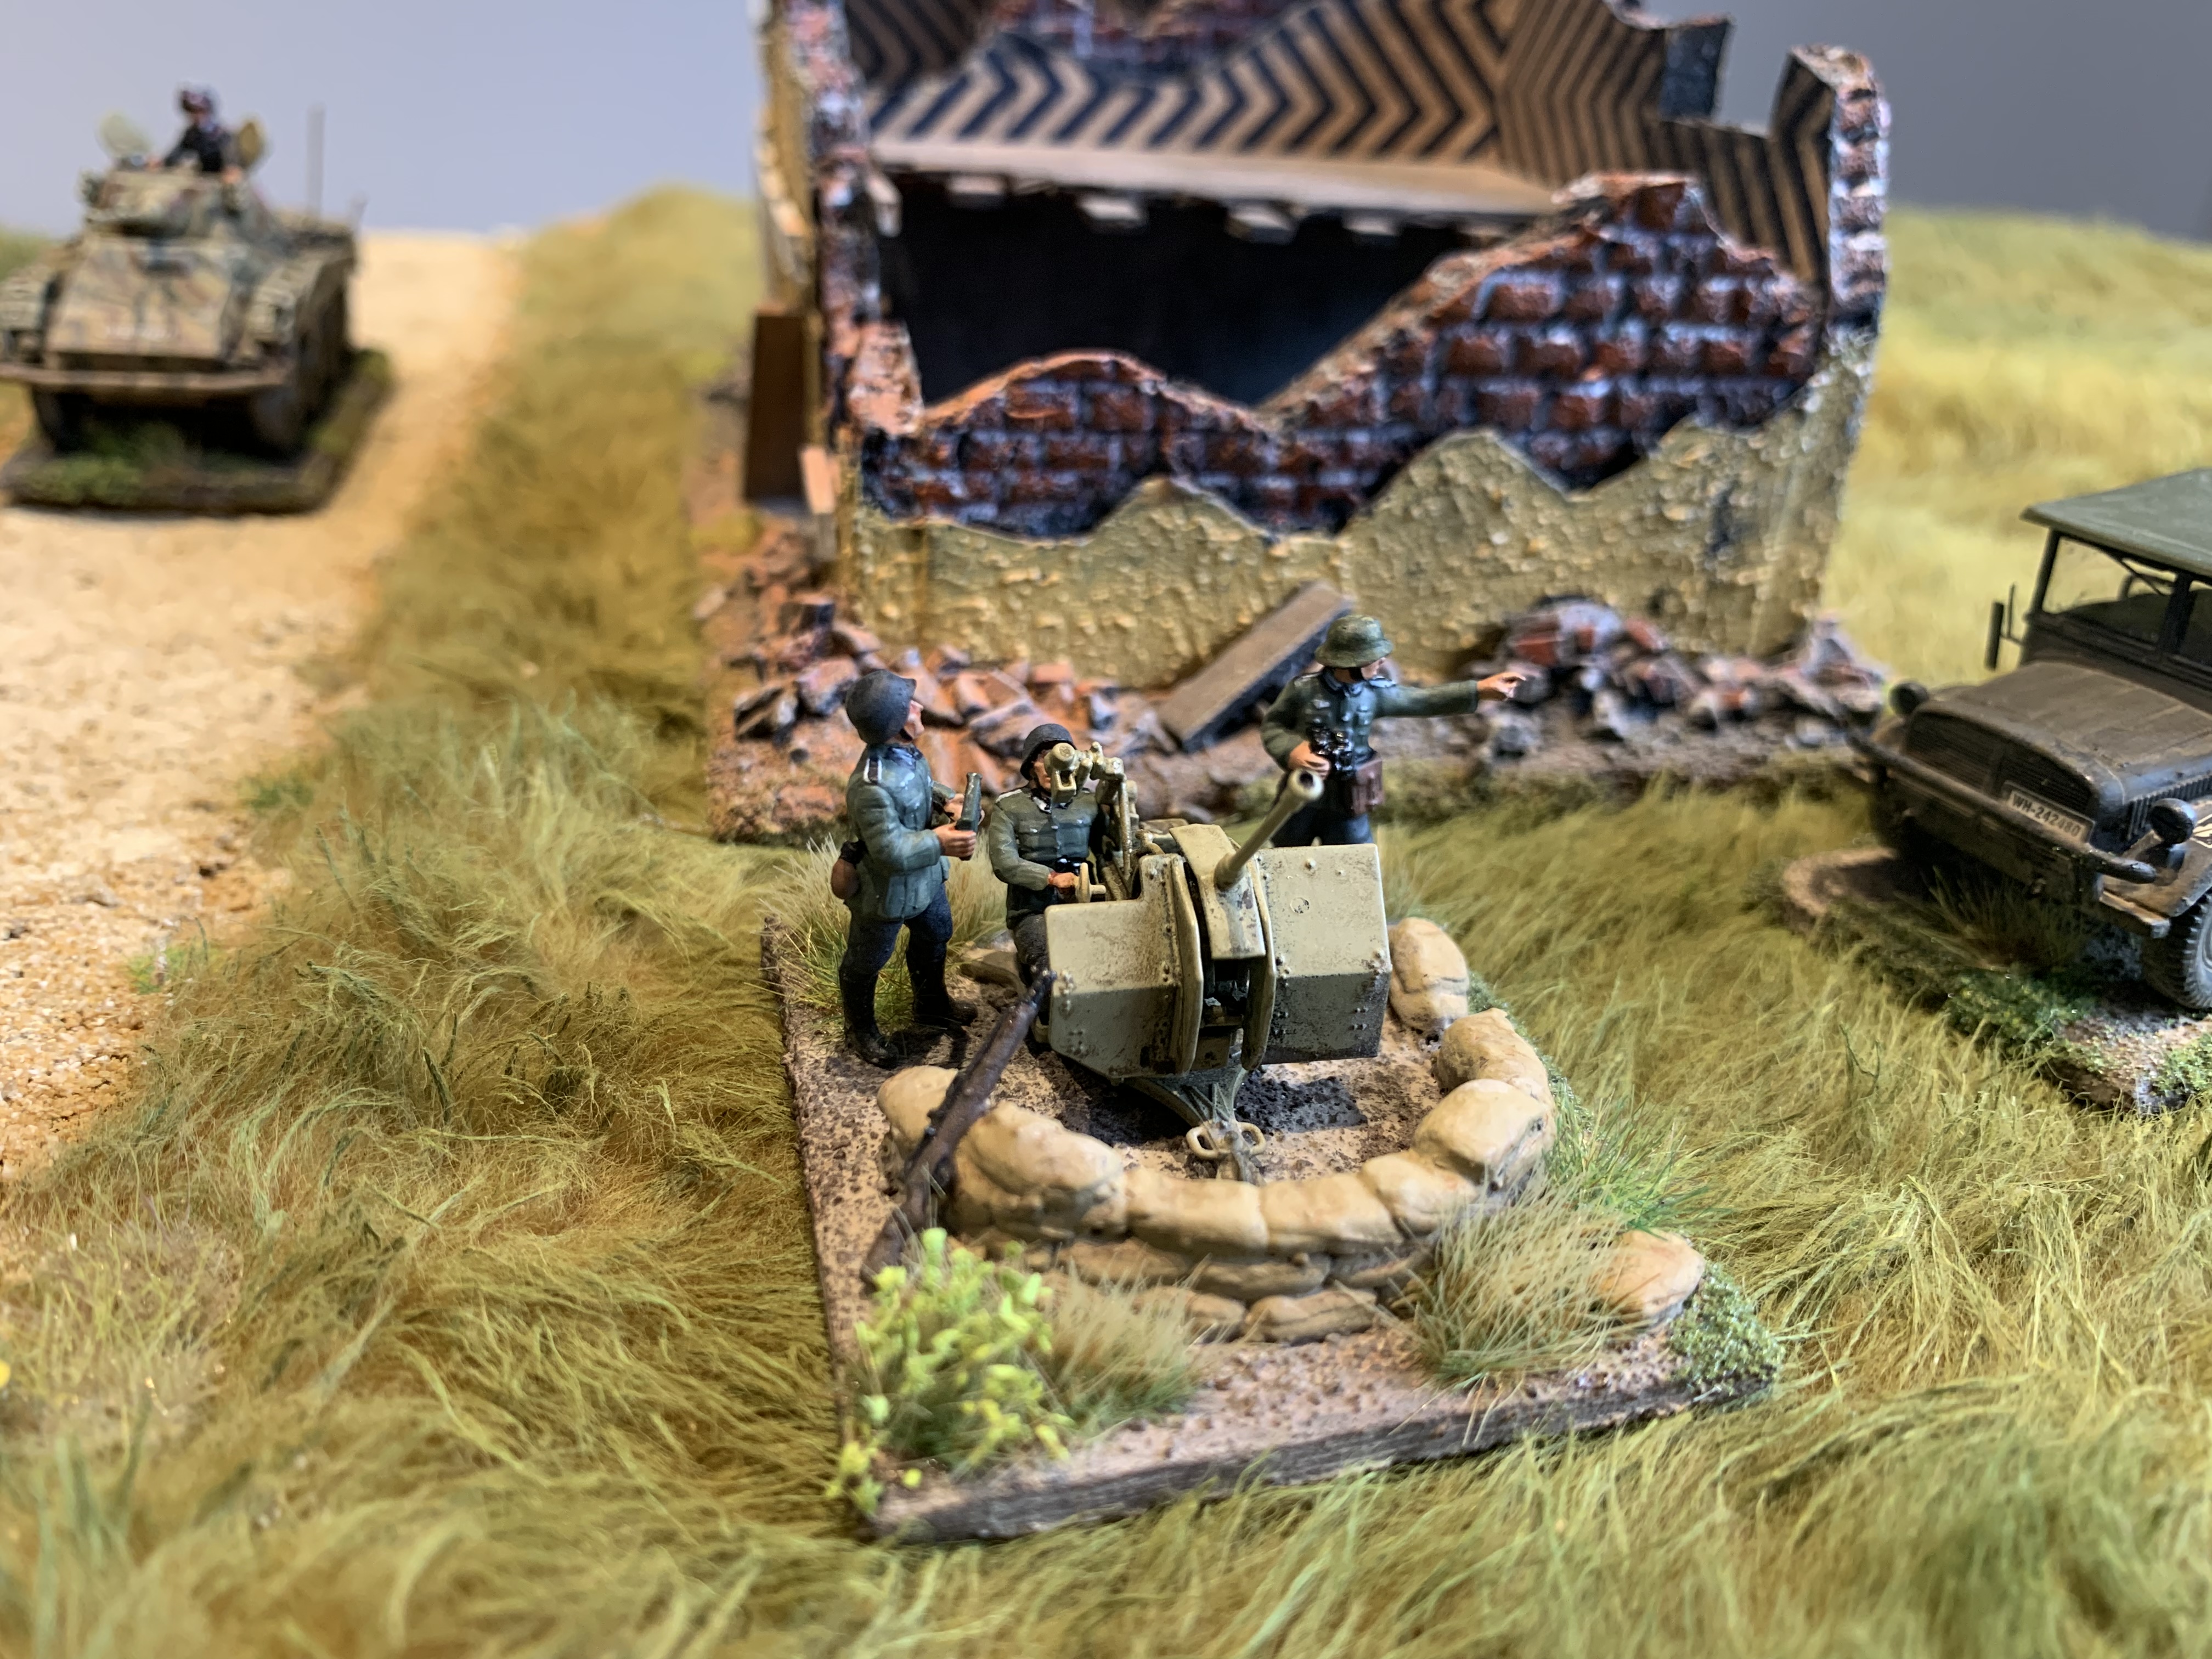
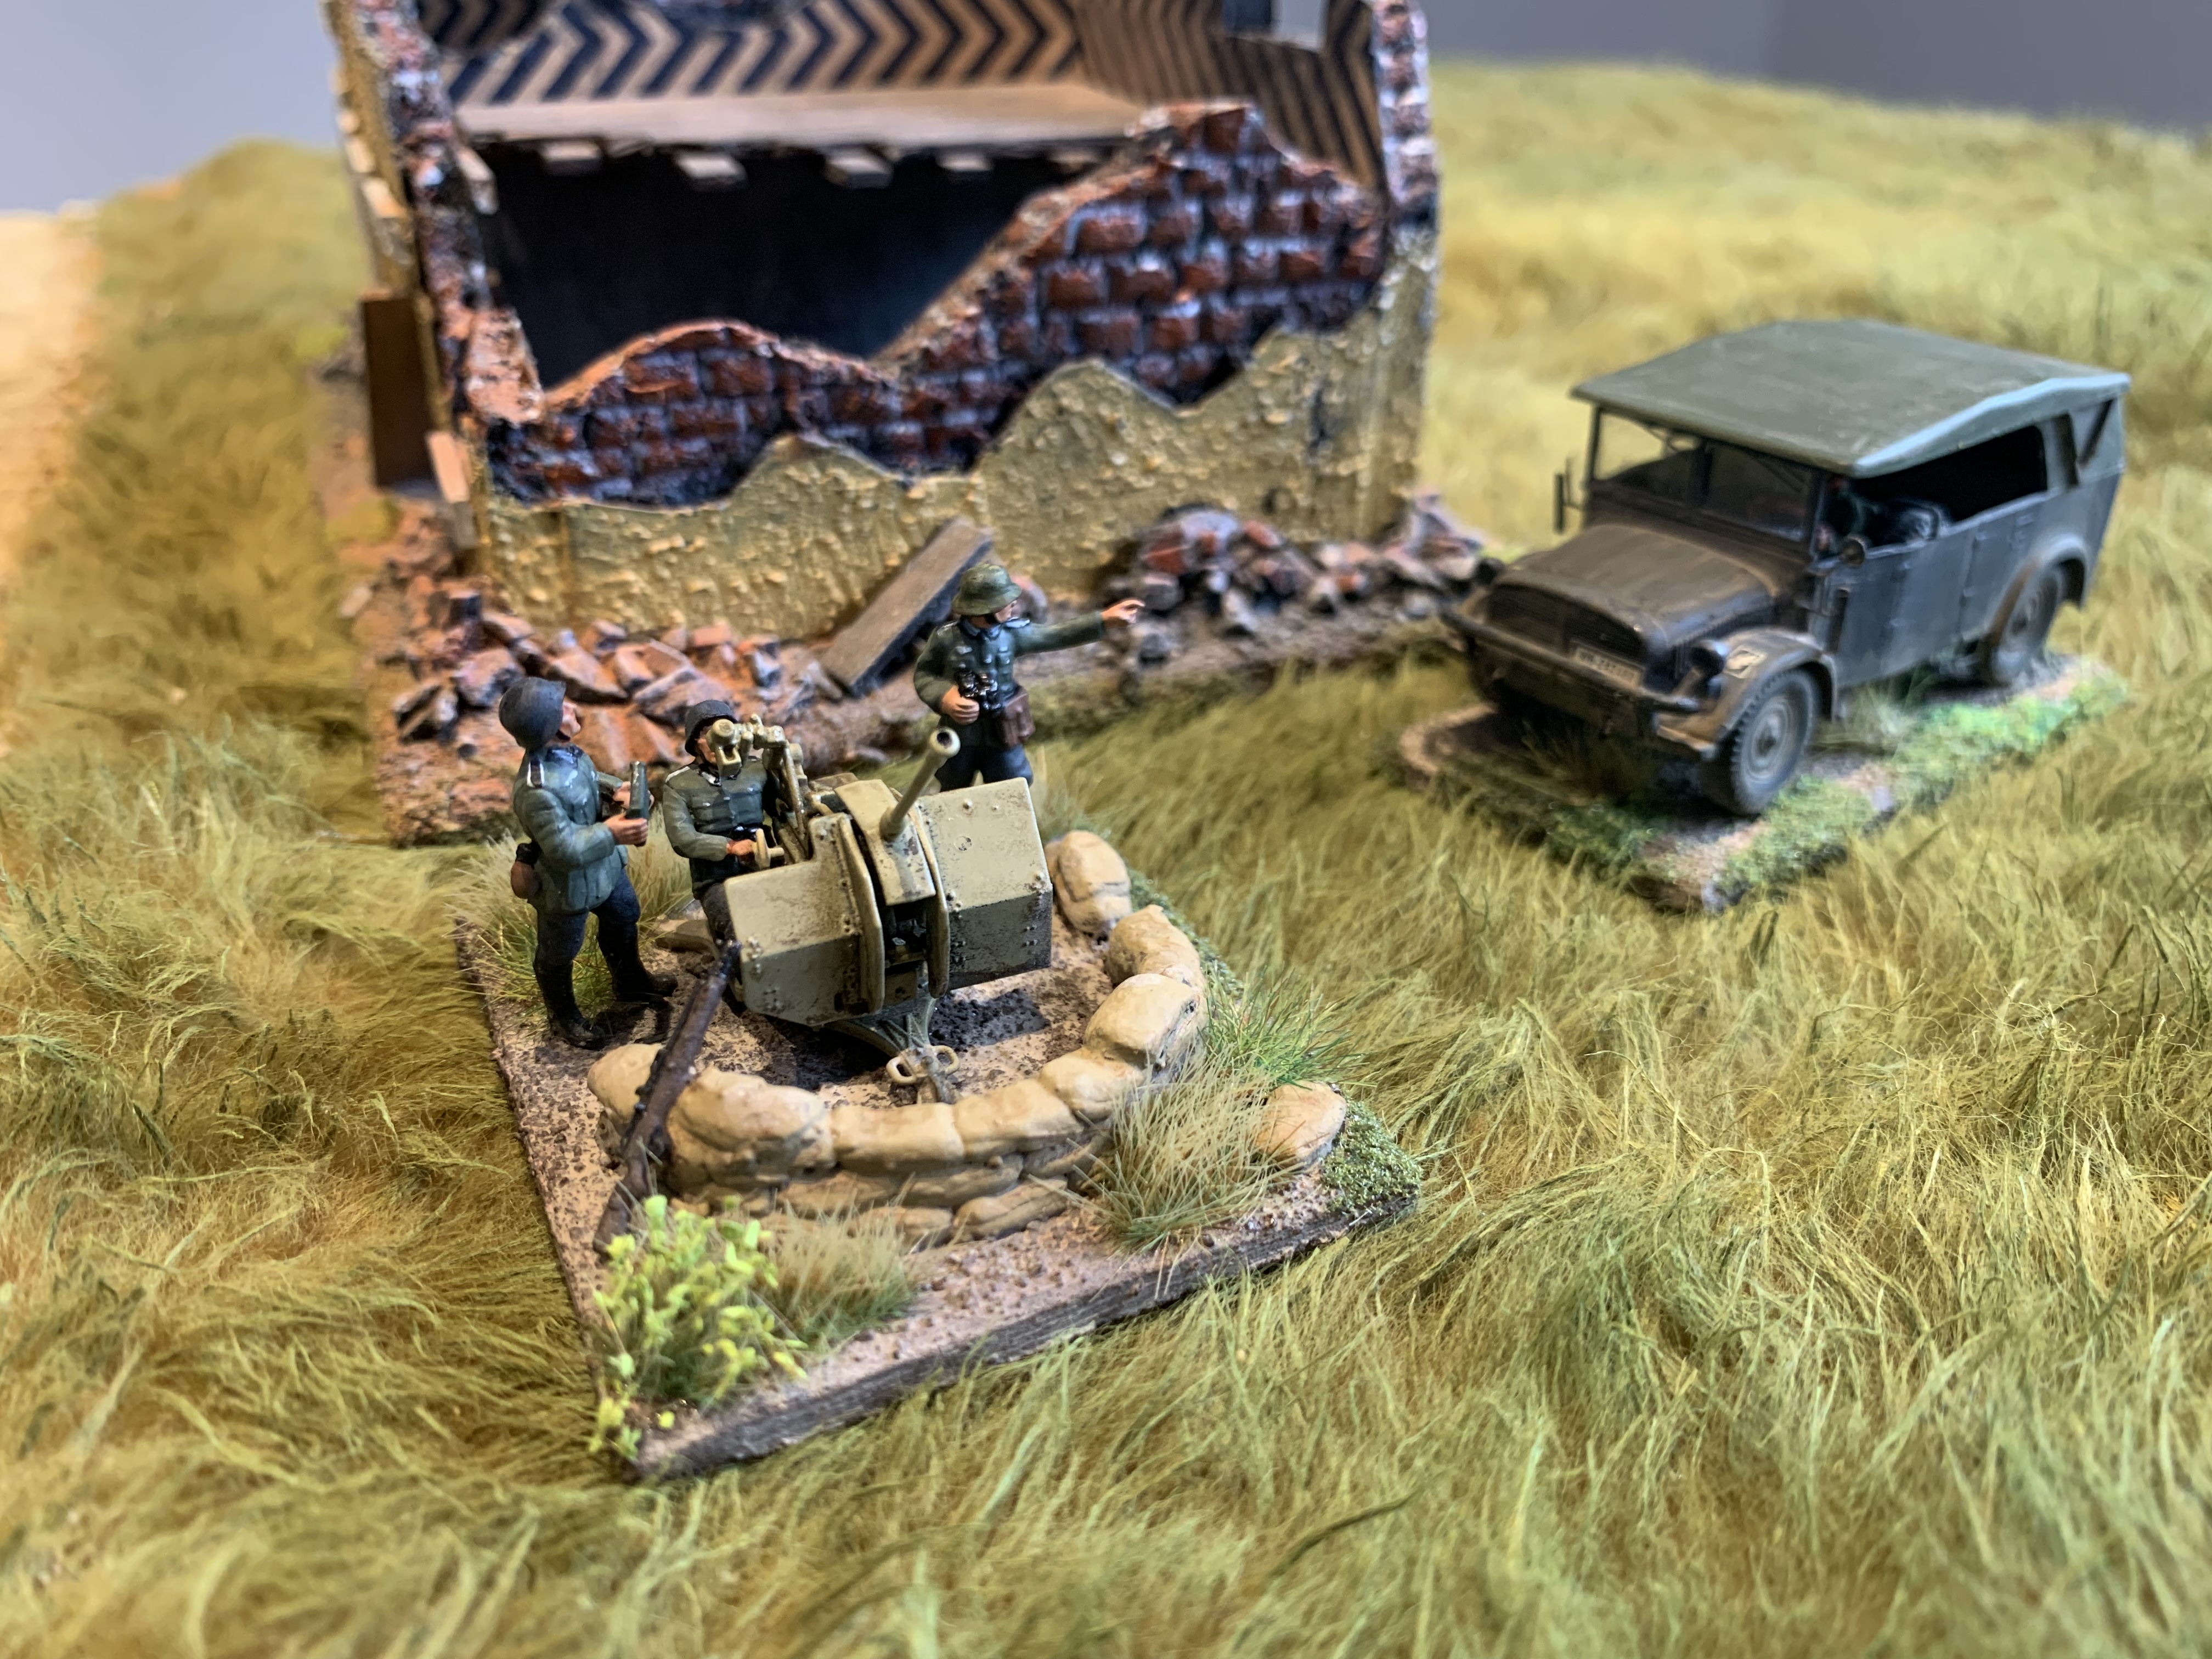
Once Mr Steyr was painted and based, and my German troops in their camo smocks had been thrown in the back I felt much happier. Oh the driver is an AB figures man as usual. The addition of the driver and the passengers make all the difference to what is a poor kit and not one i suggest bothering with.

Caesar Miniatures 1/72 Scale German Tank riders in camo smocks

I have been continuing to try and perfect my camouflage painting skills, to begin with on these seated soldiers to ride on tanks, or in my case to fill the back of trucks. This box of plastic men from Caesar are really nice and come in a box of 32 in 8 different poses. They are one brand that really match up with better metal manufacturers (AB and CP Models) but if you are just filling trucks with men it keeps the expenses down, being a whole a lot cheaper per figure. I have collected some excellent reference material on German camo schemes and find these a great help in trying to get my effects right. At this scale its definitely only an effect i am after. This scheme is a spring flavoured oak leaf or plane tree pattern. If you get the colours correct it really seems to look after itself. I use a flat earth light brown type base and then a bright green and very dark green on top. Random patterns in patches and then filling the dark patches with light and doing lots of small dots over each colour. Anyway I keep practicing and it seems to be getting better. Next post will be these guys in the back of a Steyr heavy car which was a total dog of a kit and nearly got thrown out for scrap……

Another Puma Armoured Car from Italeri in 1/72 scale

Happy New Year everyone!!! What can i say!?? I like armoured cars and I keep building them. This is a another Italeri Puma for my German forces and this is third and final one i will be making. It’s a super easy kit and takes minutes to build. i spent more time on the dark green camo and the paint job. The decals are really nice in this kit and it comes with a couple of options. I think I found this kit on eBay for a bargain which is why I bought another Puma….. that’s my excuse anyway!!! Not much else to tell you on this one. My only complaint would be the lack of opening hatches which means you cannot add a commander figure unless you are brave enough to surgically remove hatches. For this reason I still like the Hasegawa Puma kit a little better. Oh I did add an aerial to this guy plus a an aerial holding place too.

Attack Kits Marder III in 1/72 Scale

This is the third Marder kit I have made after the Unimodel and Plastic Soldier Company ones. This one was a work in progress for a while so I am stretching my memory a bit on the building process. All i can really remember was that I really did not enjoy this kit at all. It comes in a weird kind of plastic that is almost has a resin feel to it. I found it very hard to glue with normal polystyrene cement. Also the instructions are vague and in many places the fixing points for parts were either not clear or non existent. It made for a frustrating time of trial and error. Oh and probably some swearing. I would avoid this kit and rather buy simple but excellent kits from Plastic Soldier Company or more complex but also great ones from Unimodel. So this one was lying around unpainted for a while as I overcame the bitter memories.

Painting was fun though with a dark yellow base and some dark green camouflage stripes. The decals were added from my spares, not sure if it came with any decent ones. Plenty of photos to follow including one with all three Marders together. Oh and there is not much room for crew but I did manage to squeeze in a plastic crew man clutching a shell and also an AB man relaxing!

The Plastic Soldier Company Marder in 1/72 Scale

This little tank is dedicated to my friend John at Just Needs Varnish in the North Of England who very kindly sent me a Marder sprue from The Plastic Soldier Company a while ago and it has been sitting in my WIP pile for a number of months waiting for some love. So finally I made an effort before Christmas. Plastic Soldier Company kits are minimal parts, with good chunky details and very easy to put together. So I find them excellent additions for smaller models in 1/72 scale as there are no really fiddly bits. This Marder comes with one piece running gear and tracks which always speeds things up, no numerous wheels or tiny links to bother me. So an easy build and very hard to get wrong. I gave him a matt black primer, then a dark yellow basecoat. I painted dark green camouflage splashes and then resprayed from my tamiya spray can more dark yellow to blend the camo patches in. Tracks were painted black, then grey and then weathered using track rust powder and an 2B pencil for the metal bits. Decals I found in my spares pile and just added some random ones, I was keen to use the white 65, just because. I painted three Plastic Soldier Company crew men (you get a few crew with the kit – one who is unusable as he has comedic long arms) with fancy camo pattern pants and then added three infantry with greatcoats hitching a ride. These figures are plastic from Caesar Miniatures and are great for adding tank riders to a model. All I have left to do is some dirt and dusty powder and then some flock and tufts on the base. Hey Presto another groovy little tank buster for my German forces. Thanks John!!

Zvezda British Soldiers in 1/72 scale

I think these guys are from two smaller packets of Zvezda British Infantry but I dont quite remember. I have had them hanging around for ages and since they were the last plastic figures I had based I thought they should be painted. They are more 1940 early Brits but who cares maybe they just kept their old equipment heading into Normandy. I cant say I really like painting plastic figures as the detail is always a bit muddy compared to metal ones. Anyway i was happy i managed to finish them in between building three Dragon Tigers which have been keeping me busy!!!

AEC Armoured Car from Early War Miniatures

One armoured car that I really wanted to add to my collection is the AEC armoured car. This vehicle is more like a four wheeled tank. I could not find a plastic model kit anywhere from anyone in 1/72 scale so I had to break my rules on this occasion. I found an excellent version from Early War Miniatures in the UK, who do a big range of vehicles.

The armoured car comes in two main parts, being a metal turret and barrel, plus a special type of resin hull and wheels. Compared to other resin items I have bought this is easily the best quality. The detail is crisp and there are no bubbles or mis-shapen bits. It was a pleasant surprise I have some other resin things languishing on a scrap heap looking too tricky to fix. You also get a couple of machine guns to pop on the turret and also some mirrors to attach to the hull. So a bit of superglue later and hey presto i am ready to paint.

Black undercoat and an olive drab spray was all he needed. Decals are not supplied so I added from my bottomless source. I did attach him to an MDF base for extra strength, and then dirtied him up with some weathering powder. This made a nice change from my usual plastic kits and so speedy to the finish line. For more resin vehicles I will certainly shop here again.

IBG Models Bofors Gun Tractor in 1/72 Scale

I finished another very cool truck from the Polish company IBG Models. This time a towing vehicle for the British Bofors anti aircraft gun. I always enjoy building their kits and they do produce a wide variety of different models at very decent value. My only criticism is sometimes the parts have too many connection points and removal and clean up can be annoying. This one was also a bit tricky getting the cab put together as lining everything up is more a trial and error thing rather than having specific guide holes or slots. I added a driver as they do not supply one. You have to have someone in control! I used normal cement glue on the windows and windscreen which was not good enough and my windshield fell in after i had completed the kit. So i suggest using super glue instead…..

I wanted to do the mickey mouse camo scheme which is one of my favourites. I also added two relaxed looking passengers in the back, from AB figures as usual. This was a fun build and an excellent addition to my growing fleet of British vehicles.

Zvezda 20mm German Flak Gun in 1/72 Scale

This was a tiny quick build from Zvezda. I like their little kits as they are really handy for filling holes in your forces cheaply and quickly. Only a few bits but those bits are nicely detailed. This one only took me a few minutes to assemble. You need to leave the seated gunner off until everything is painted. I added an Esci spare officer i had pointing at something probably a badger appearing in the hedgerows. I put the whole thing on a small MDF base with some Value Gear sandbags. Here they are defending a ruined house with their tow and a Puma scuttling past in the background.

Revell Sd Kfz 7/1 in 1/72 Scale

I am slowly getting through my pile of kits and have had my eye on this one for a while. I recently made an old Esci AA gun on the back of an Opel Blitz, and this was another in my stash of Anti Aircraft vehicles. Revell make very nice model kits which are always excellent to build and this was no different.
This is an armoured halftrack with a quadruple 20mm gun on the back. You can model the gun in firing position with the sides of the halftrack lowered into a flatbed or leave them up in travel mode. I left my sides up as if the vehicle was on the move.

The kits is very nicely moulded and has good detail. The tracks are particularly nice and although the instructions say put them in warm water before attaching to the wheels, i didnt need to. They are flexible plastic and in one piece, which again makes a change from nasty rubber or vinyl, or fiddly link and length.
I did have to drill a few holes for some the external details and you do have to drill a few holes in the back of the halftrack too. The trailer at the back is a nice easy build and i added a few bits of stowage on the top. Be really careful with the gun barrels as they are very delicate, you can probably get metal replacements somewhere.
Its a fun kit to build and would look excellent in firing position with some crew firing it.